Project #4 Drawing with a grid

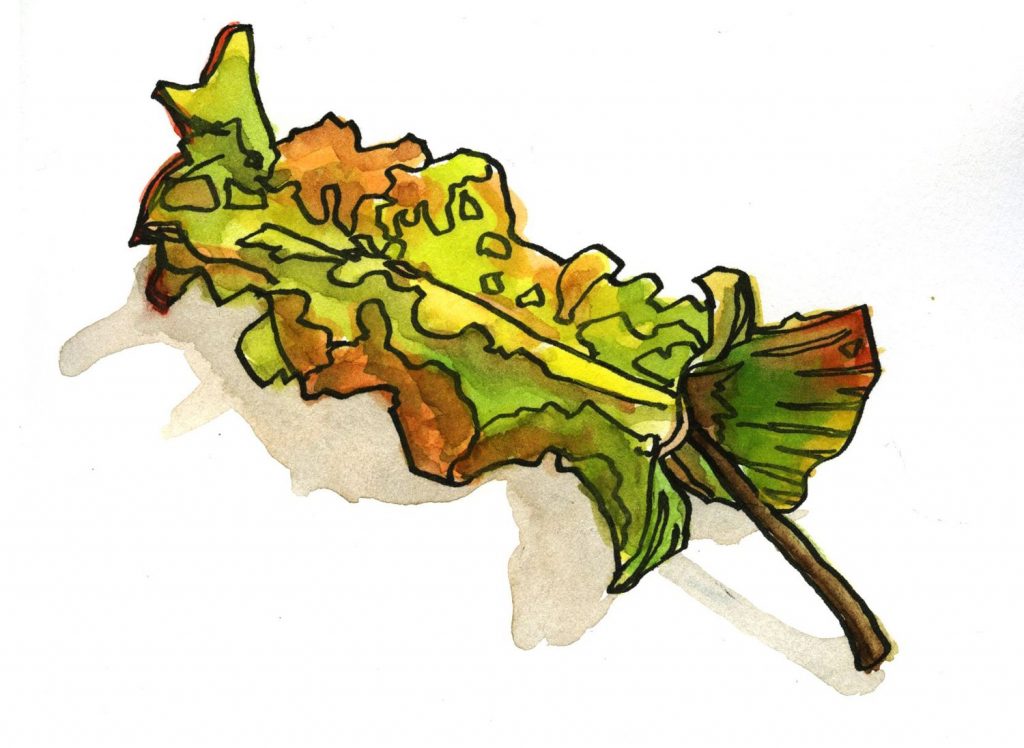
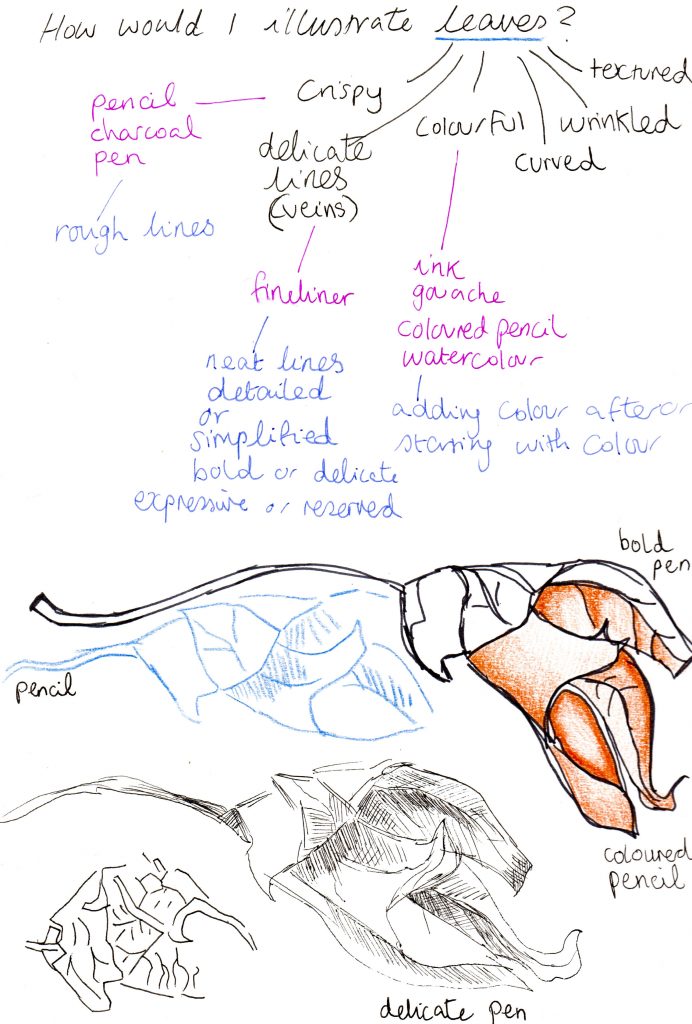
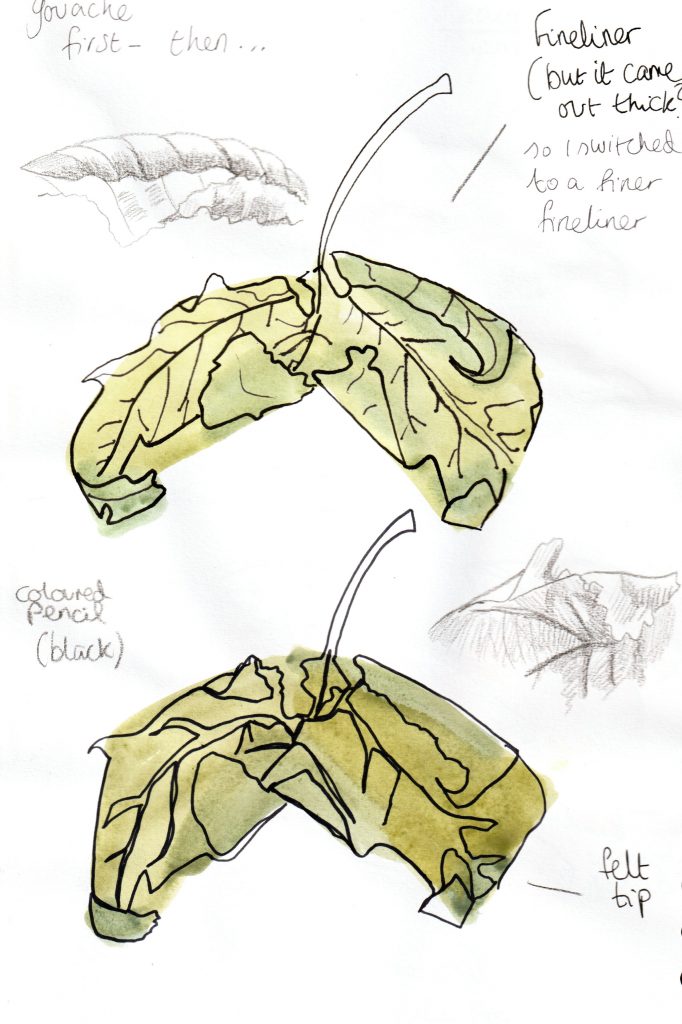
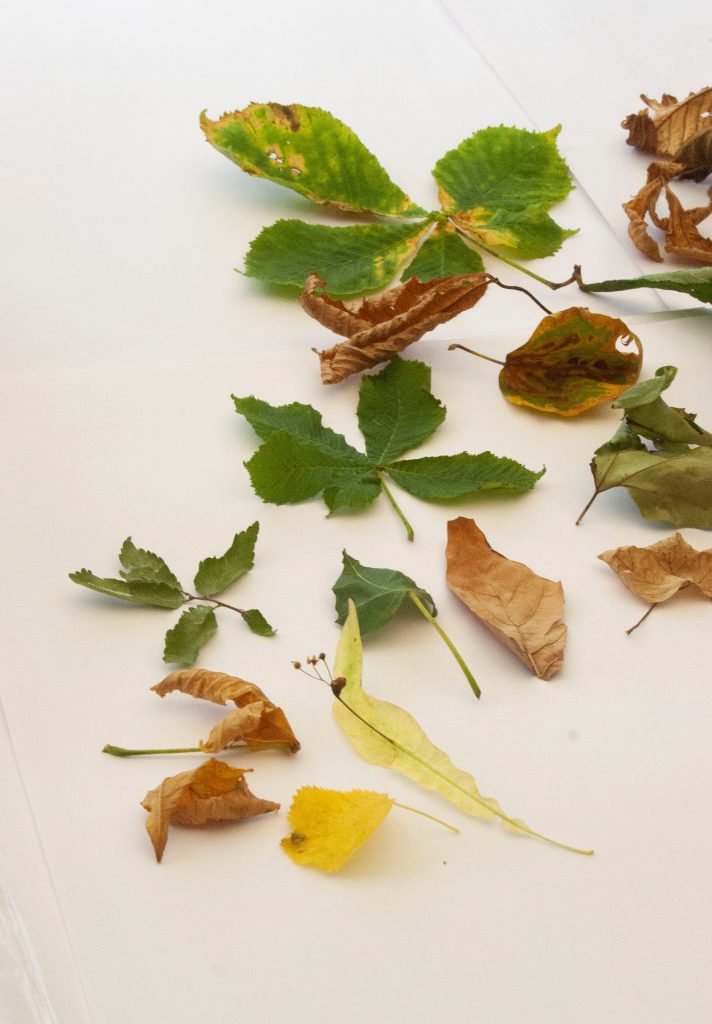
Project #3 Invited us to think about getting an idea onto paper: how we could visualise an object – in this case my leaf – and produce a visual record. Paper and pencil is one way, and it works for many cirumstances. For example, a straight-forward illustration for a story or educating people about leaf anatomy.

Project #4 required me to think in a different way. This time, I needed to translate my object onto a grid. This brings to mind the pixelated animations in early video games.

These animations were in no way impressive, back then and to the modern eye. But they worked because they simplified the objects and in most cases, this was enough for the imagination to make up the rest. The resemblance wasn’t always perfect.

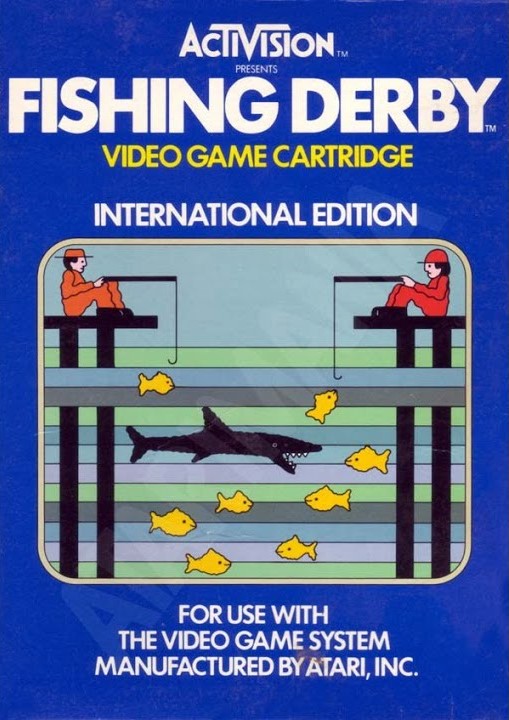
An example of these early graphics is the game Fishing Derby, released in 1980 for the Atari console. The cover illustration shows us the narrative of the game. Below, you can see the actual gameplay, where this story is translated into this primitive animation. Simplified, yes, but it works. I can understand what every shape is supposed to represent.

Screenshot from Outlaw. Another Atari game, this one realeased in 1976. These graphics are really successful in my opinion. The cowboy hats and guns represent cowboys, but incase you weren’t sure, the image of the cactus tells us the location and combines with our association of cowboys.

link here

While in a vintage toy rabbit hole, I came across the Lite Brite toy. I remember this toy in my distant memories, but never knew the name of it. The toy allows you to use lightbulbs to create pictures.

Secondary Research

I wondered how I could simplify a shape and still make it readable. I began to explore how designers apply similar methods to type.

I looked at type that has been constructed using a grid and appears with this pixel style.

Rosetta

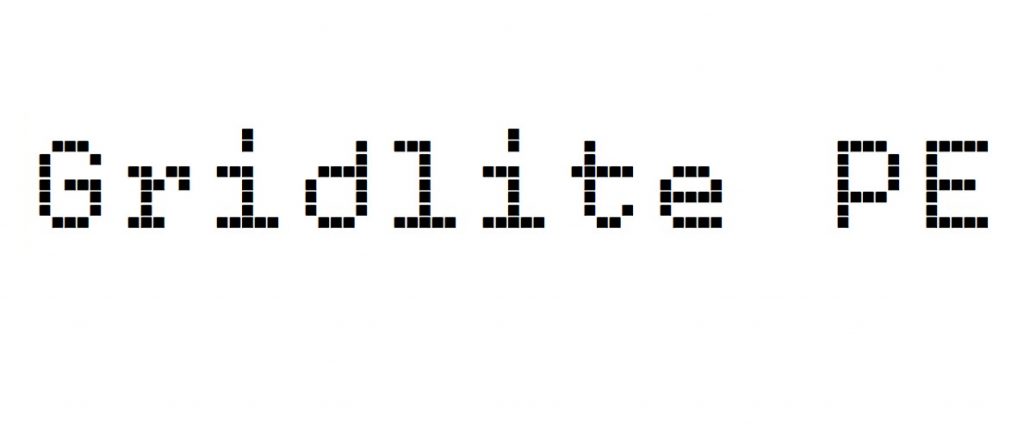
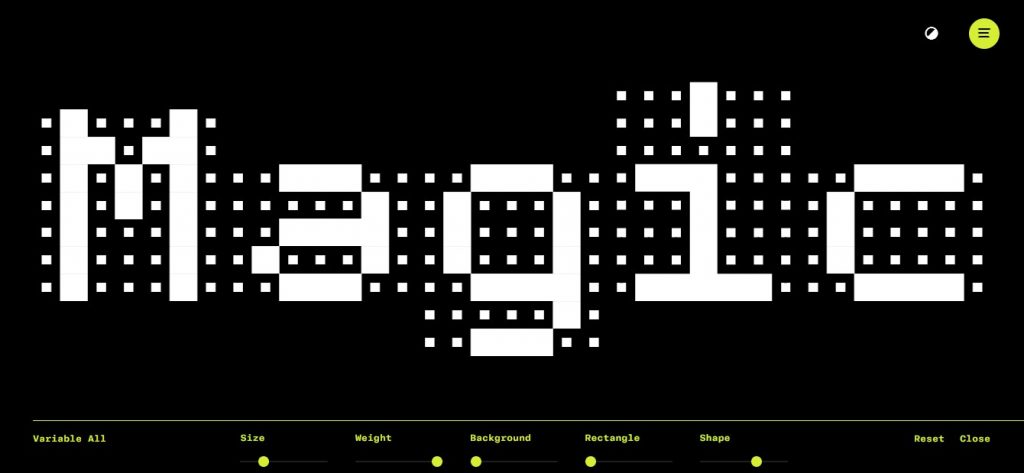
The design studio Rosetta have come up with Gridlite PE. This is a typeface that utilises a grid structure.

‘Gridlite, an experiment with a modular negative space, is a simplified and monospaced variable font ready to be animated, typed, scaled up, scaled down, rounded, or otherwise deformed. It sports variable axes to control the size of the elements, their shape, and the background.’

I can envision this type being adapted to a physical mosaic, using tiles for example to spell the words. The grid structure means it can be easily drawn up and converted into other uses. I like the clarity and neatness of this type (below).

Rosetta – Gridlite PE (rosettatype.com)

The type reminds me of the computer game ‘Snake’ (below). Maybe because of this association, I see the type as moving.

‘Snake’
This image has an empty alt attribute; its file name is magic-1024x473.jpg
‘Magic’ variable of Gridlite PE by Rosetta.
Nigel Cottier – Letterform Variations

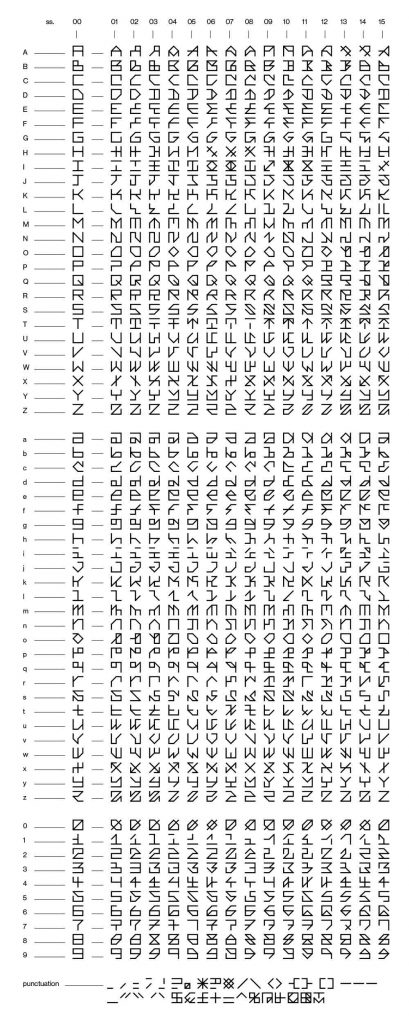
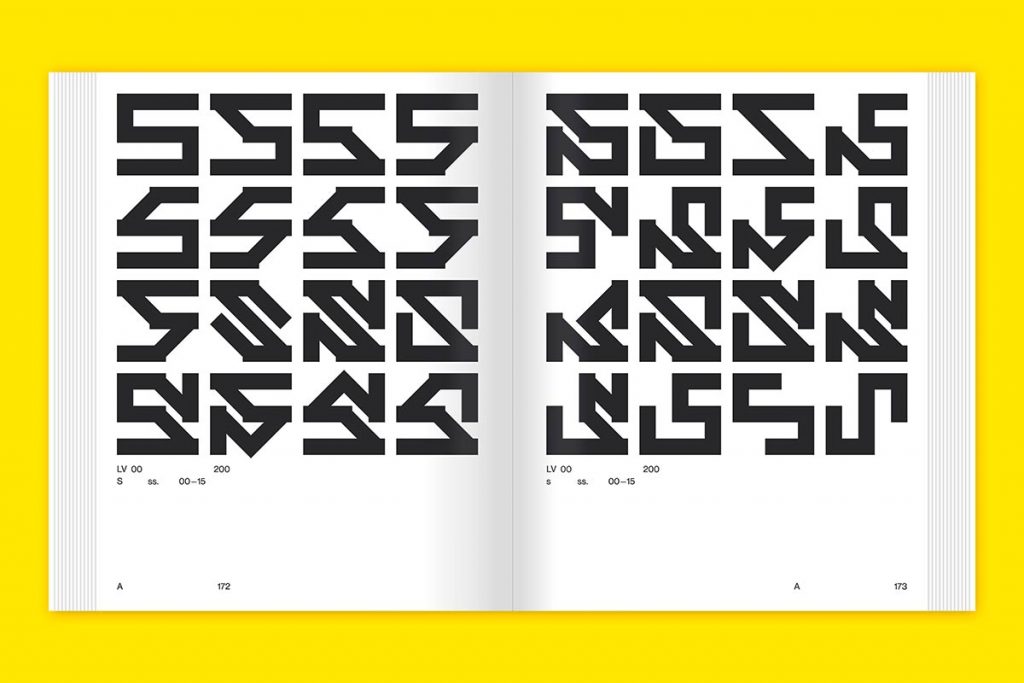
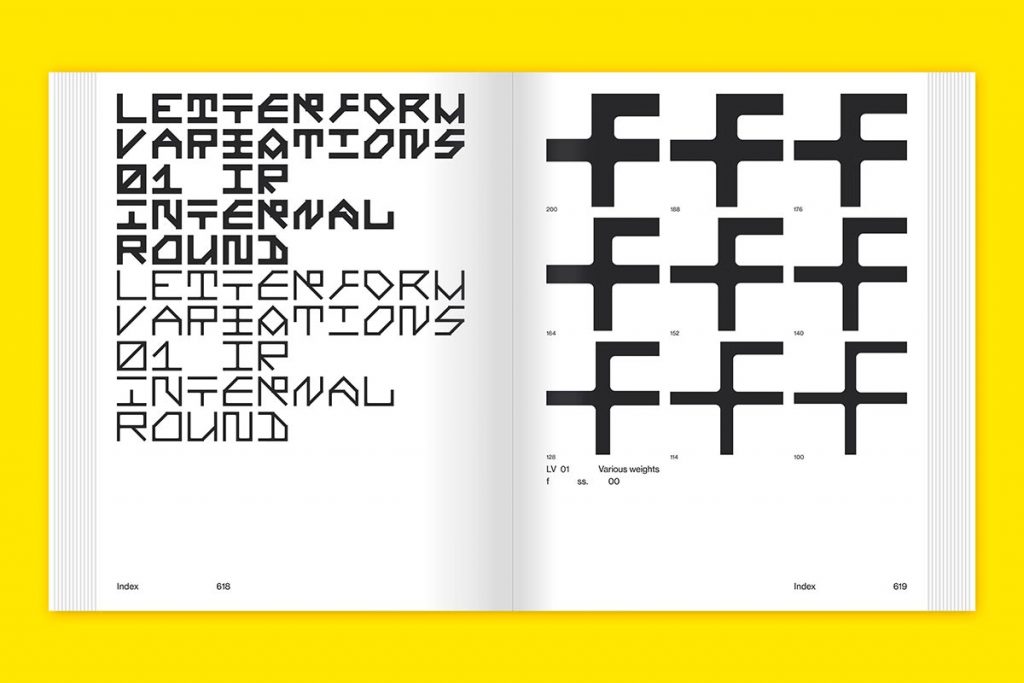
In the book Letterform Variations, Cottier explores different ways of forming letters of the alphabet. He uses the grid system and other shapes to form the letters. In table below, we can see the 16 variations of forming a given letter. By starting with the simplest form on the left column, he abstracts the shape further, pushing what can be recognisable as that given letter.

For the ‘H’, he plays with rotation as well. I would not have considered rotating the letter, since we write from left to right and top to bottom in a typical page of text.

For the ‘I’, he even leaves a gap in the letterform. The ‘I’ is still recognisable despite this gap.

I find the numerals easier to decipher at a glance. I’m not sure why this is.

This image has an empty alt attribute; its file name is LV01L-409x1024.jpg
https://letterformvariations.com/book/
This image has an empty alt attribute; its file name is Slanted-Publishers-NigelCottier-LetterformVariations04-1024x683.jpg
https://www.slanted.de/product/letterform-variations/
This image has an empty alt attribute; its file name is Slanted-Publishers-NigelCottier-LetterformVariations16-1024x683.jpg
https://www.slanted.de/product/letterform-variations/
Wim Crouwel

Crouwel was an experimental graphic designer, born in 1928. He was a leading figure in modern Dutch design.

Typography must be visually orderly for the purpose of good readability.

Wim Crouwel

He designed ‘new alphabet’ which was considered not useful for everyday use because of its low legibility. His typefaces were designed to be used for a computer display, since the grid use meant that these typefaces could be applied to a computer pixel by pixel.

New alphabet typeface by Wim Crouwel
This image has an empty alt attribute; its file name is 1968-vormgevers-679x1024.jpg
Vormgevers Designculture • Wim Crouwel

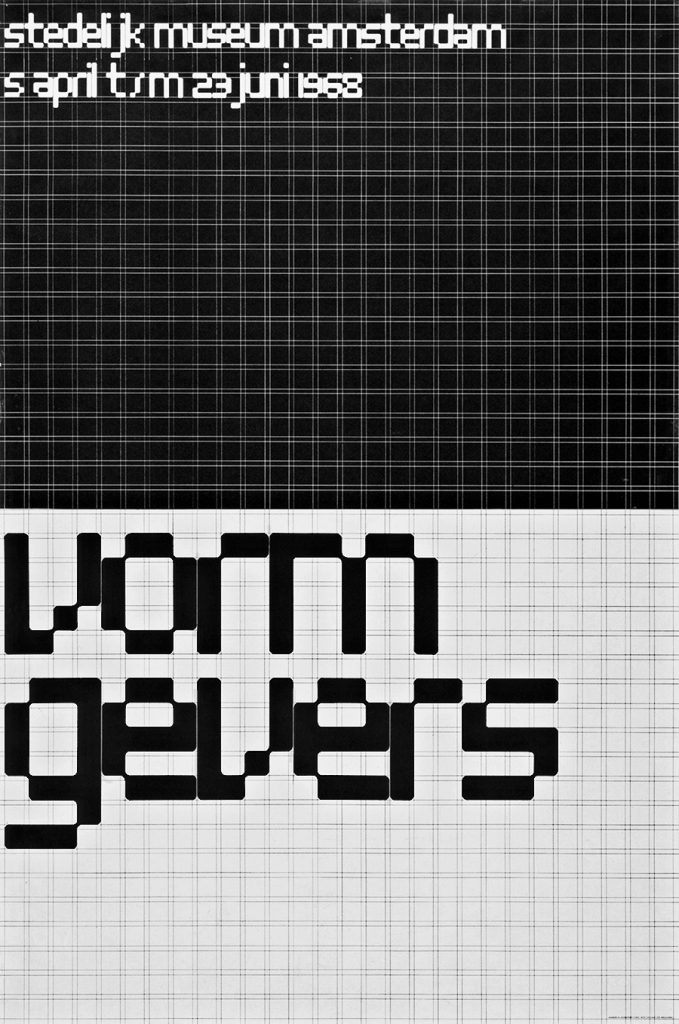
The above poster for an exhibition in 1968, makes use of the grid to compose each letter. I like the cut-out corners and the way they are rounded. The result is playful and futuristic.

Other simplified/ modular typefaces

I looked at more typefaces that could be described as modular fonts. This means the letters have been broken down into smaller parts.

A modular typeface is an alphabet constructed out of a limited number of shapes or modules. Modular describes any letter assembled from a limited palette of distinct elements, repeated, flipped and flopped but not scaled. Typically these elements are geometric and simple in shape—square pixels on a digital display or modernist circles, squares, and lines.

Typography 01

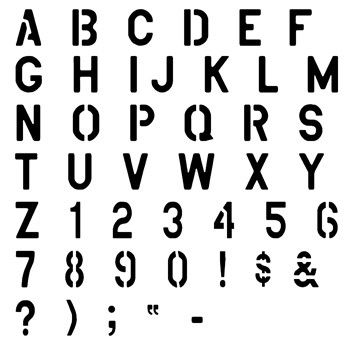
I was also reminded of the plastic alphabet stencils used in school. The letters are broken apart from necessity. Only the letters with a central cut-out area are constructed from 2 parts.

This image has an empty alt attribute; its file name is mercury-blob.jpg
This image has an empty alt attribute; its file name is mercury-blob-normal-lower.jpg
TT Mercury Blob Normal Lower font

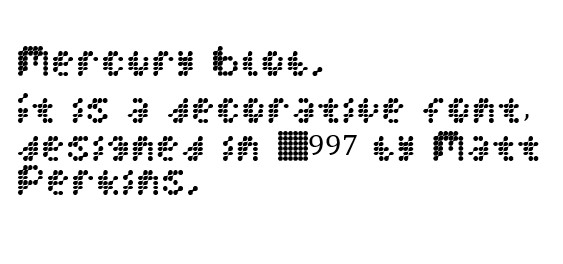
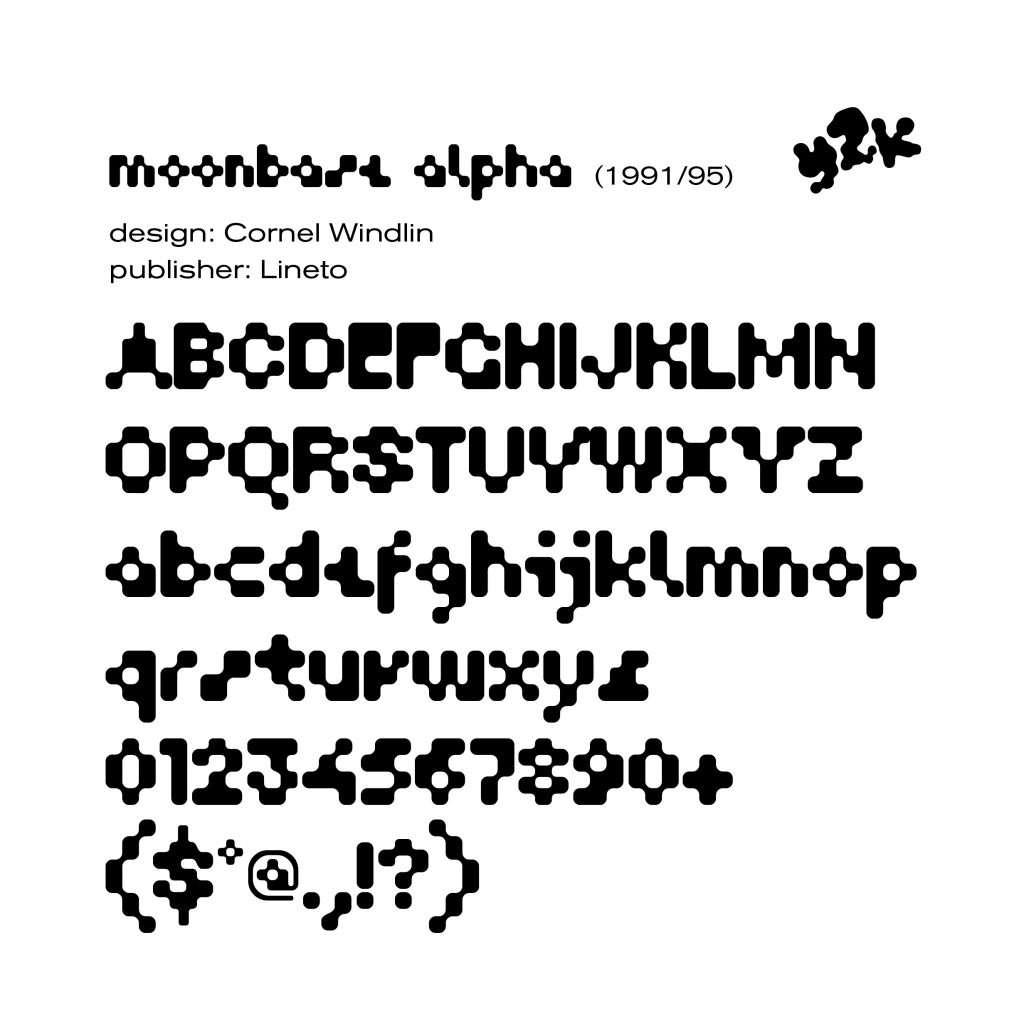
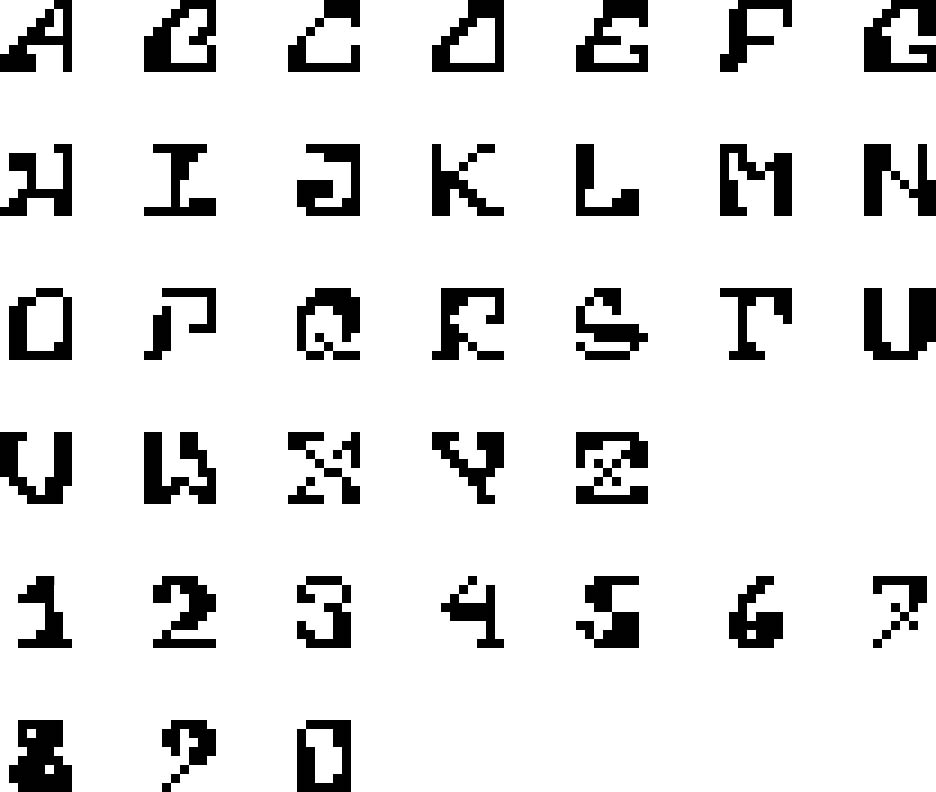
I find the above and below fonts (Mercury blob and Moonbase alpha) easier to read from further away! This is probobly because the pixels merge optically, giving them a more solid appearance at a distance.

This image has an empty alt attribute; its file name is D1YquqhV4AYFz_T-1024x1024.jpg
Moonbase Aplha typeface by Cornel Windin
Modular type designed by Deviantart user Final-Ressurection

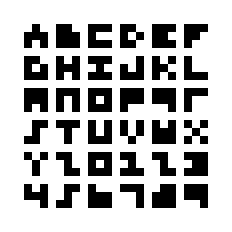
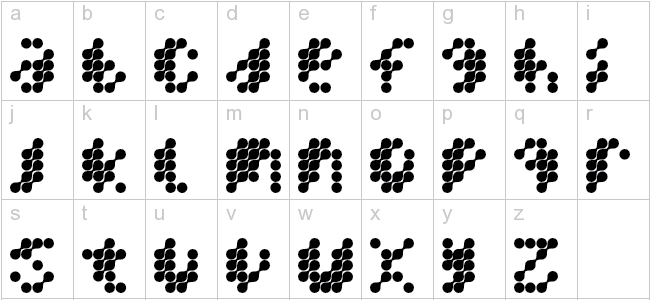
Modular typography- addictedtotype

This design uses a 3 x 3 grid to construct the alphabet. I find some of the letters more legible than others. For example, I only recognise the ‘M’, in the context of the rest of the alphabet. If I had seen this shape alone, I’m not sure I would have read it as an ‘M’, or even as a letter.
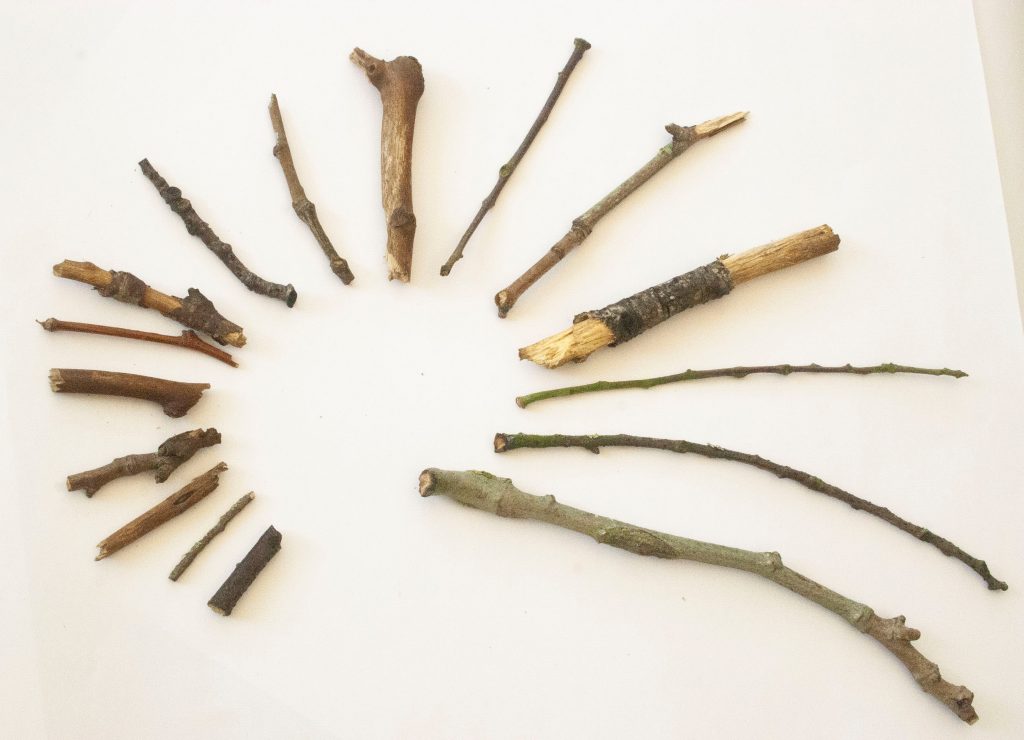
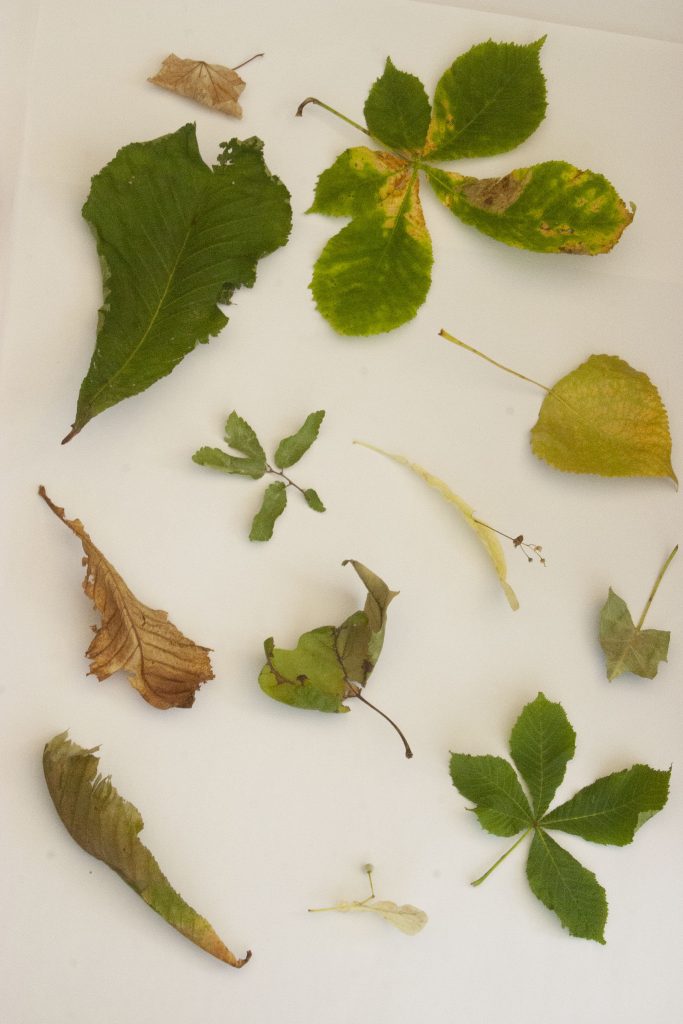
Primary Research

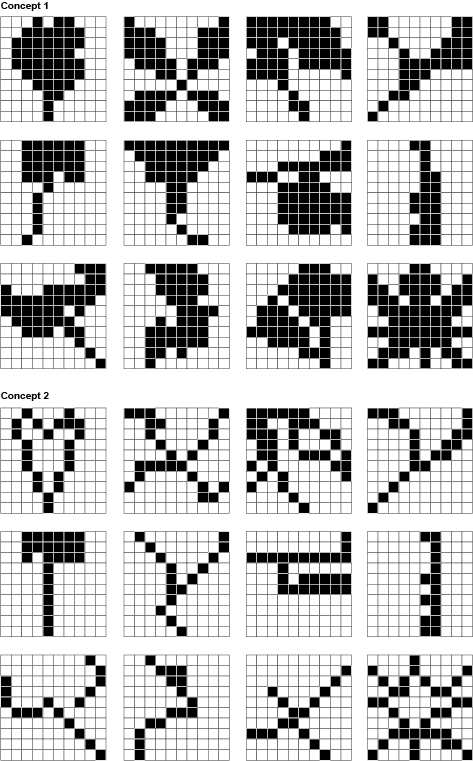
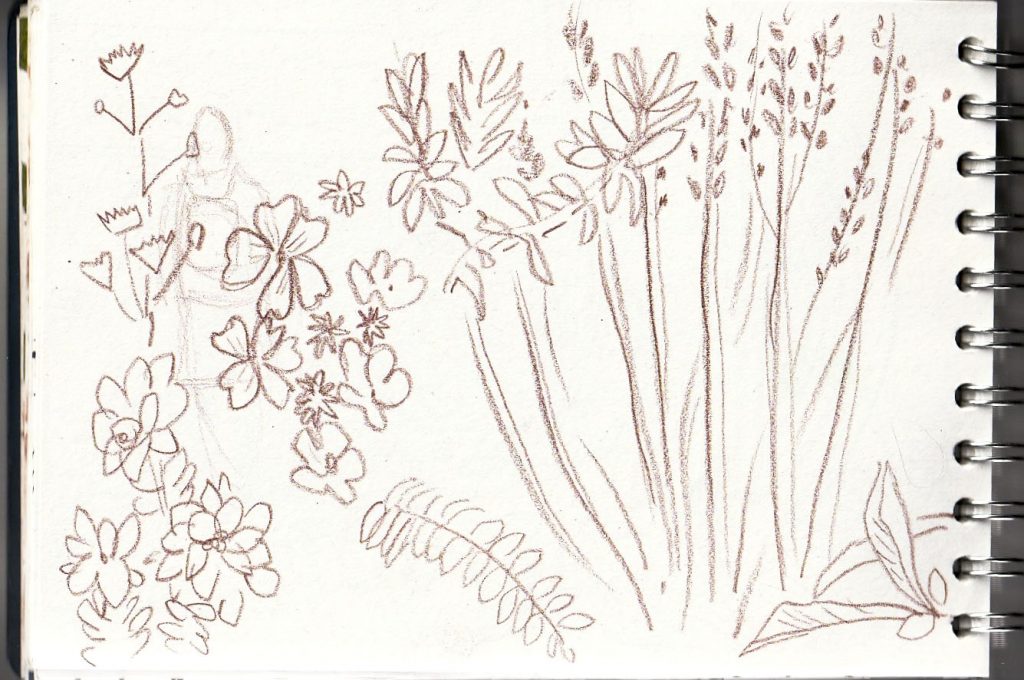
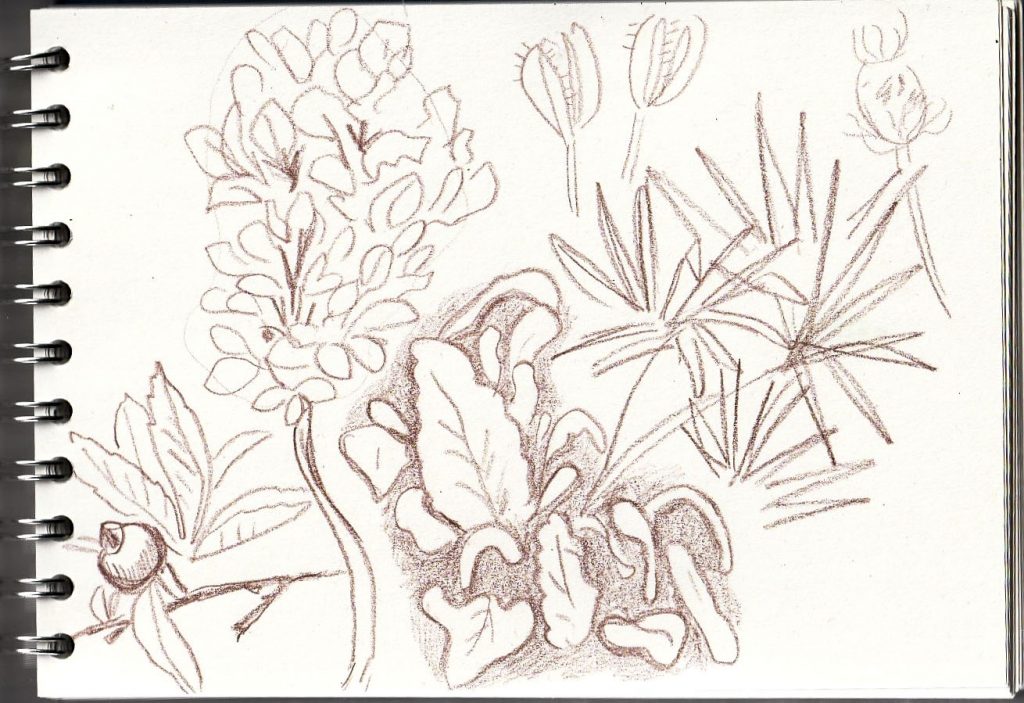
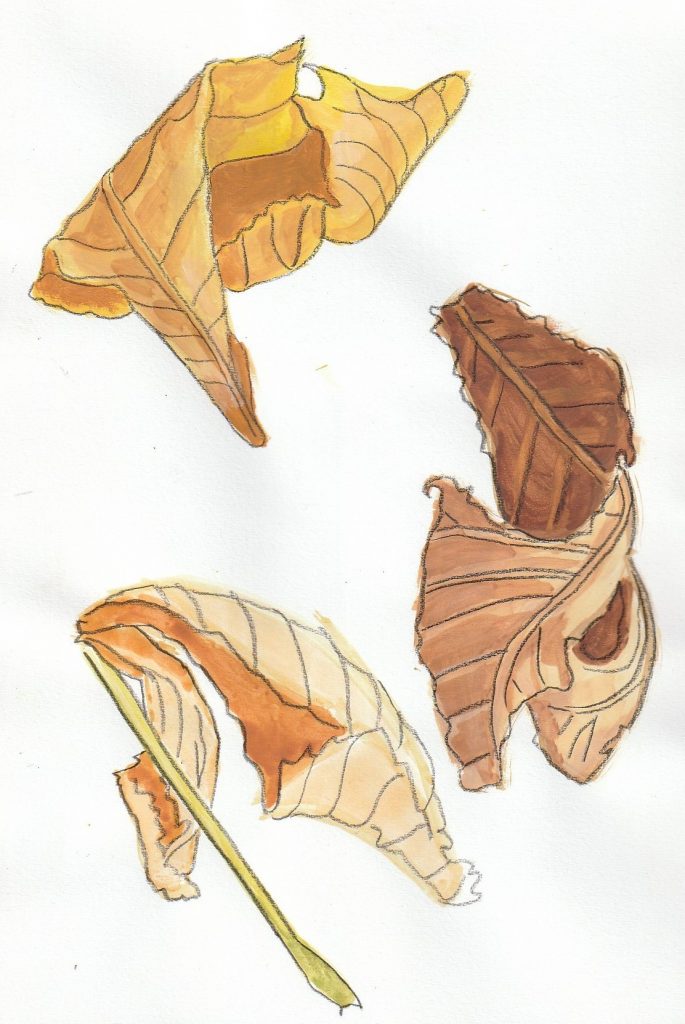
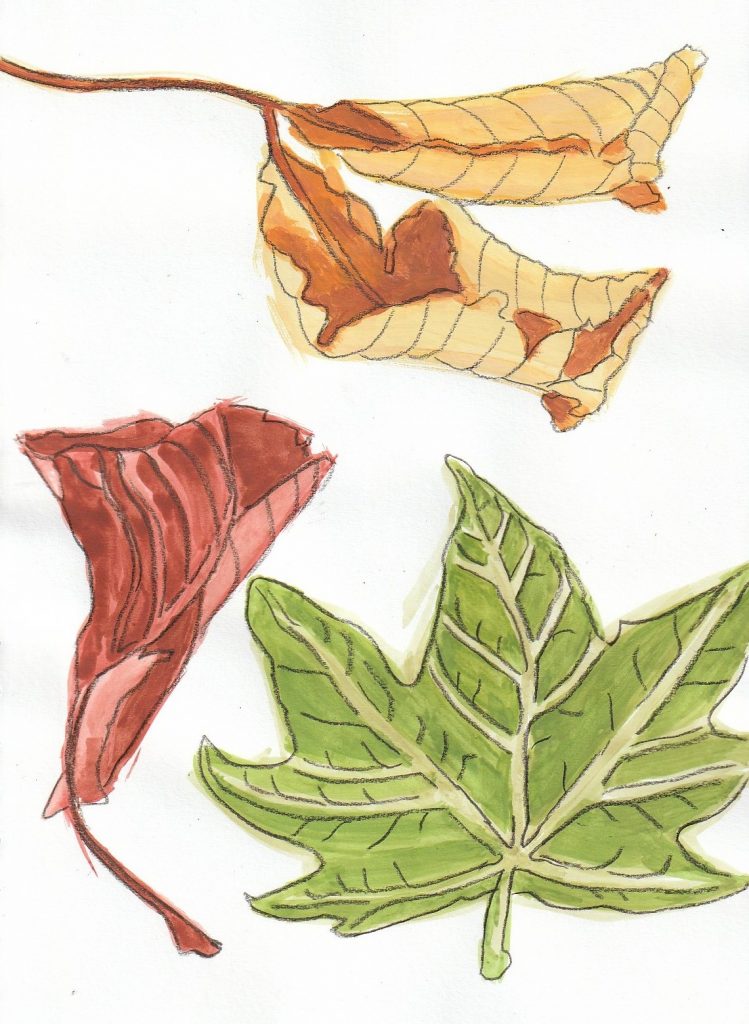
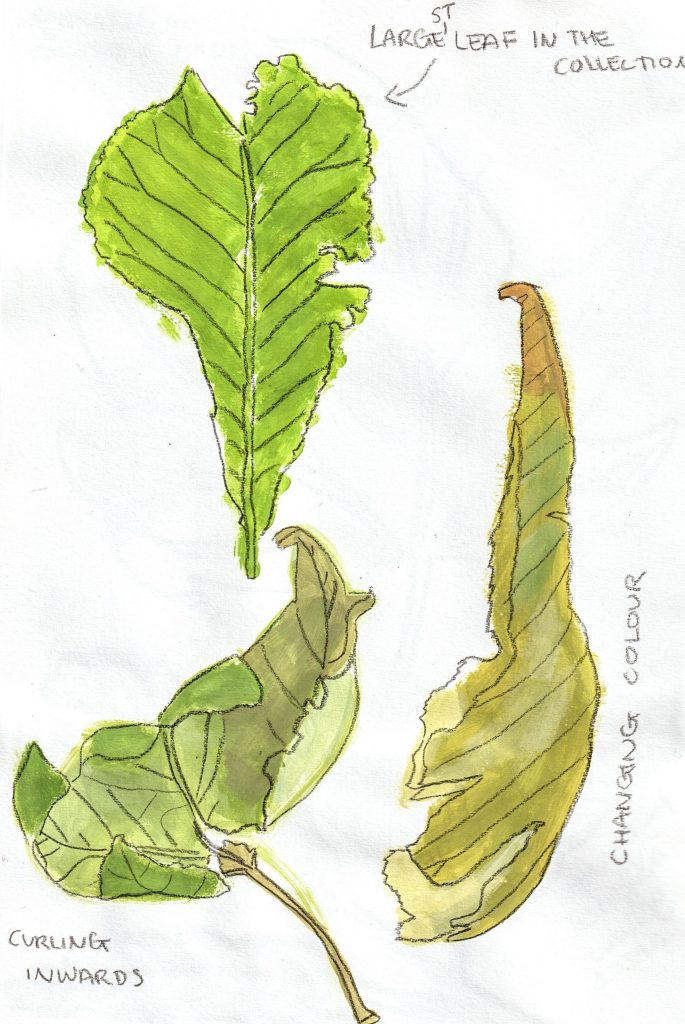
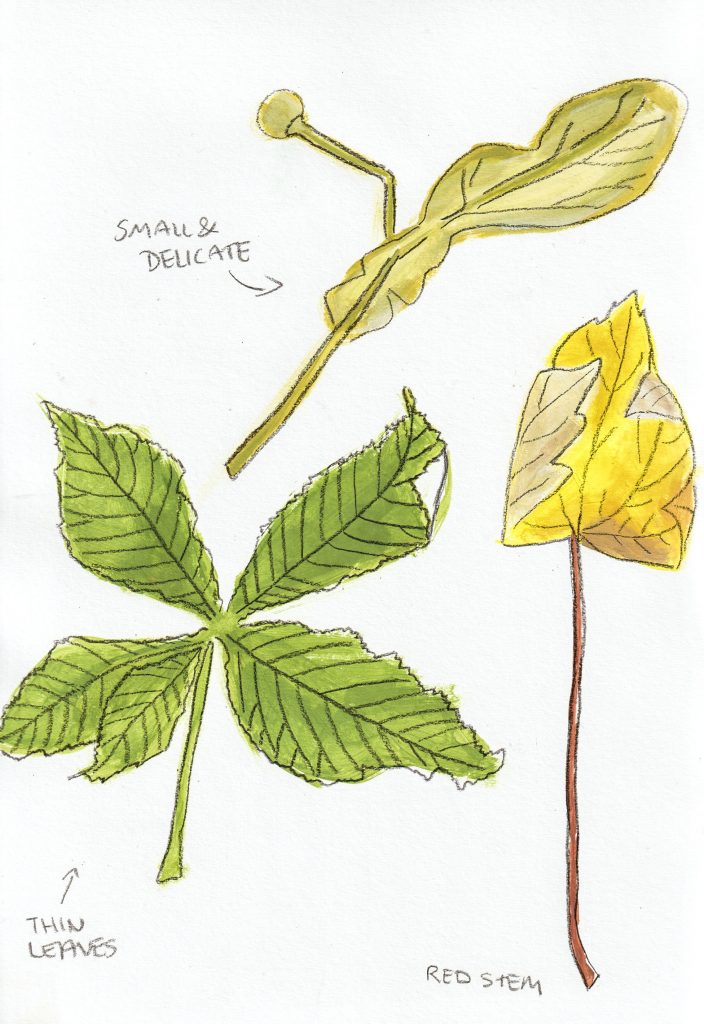
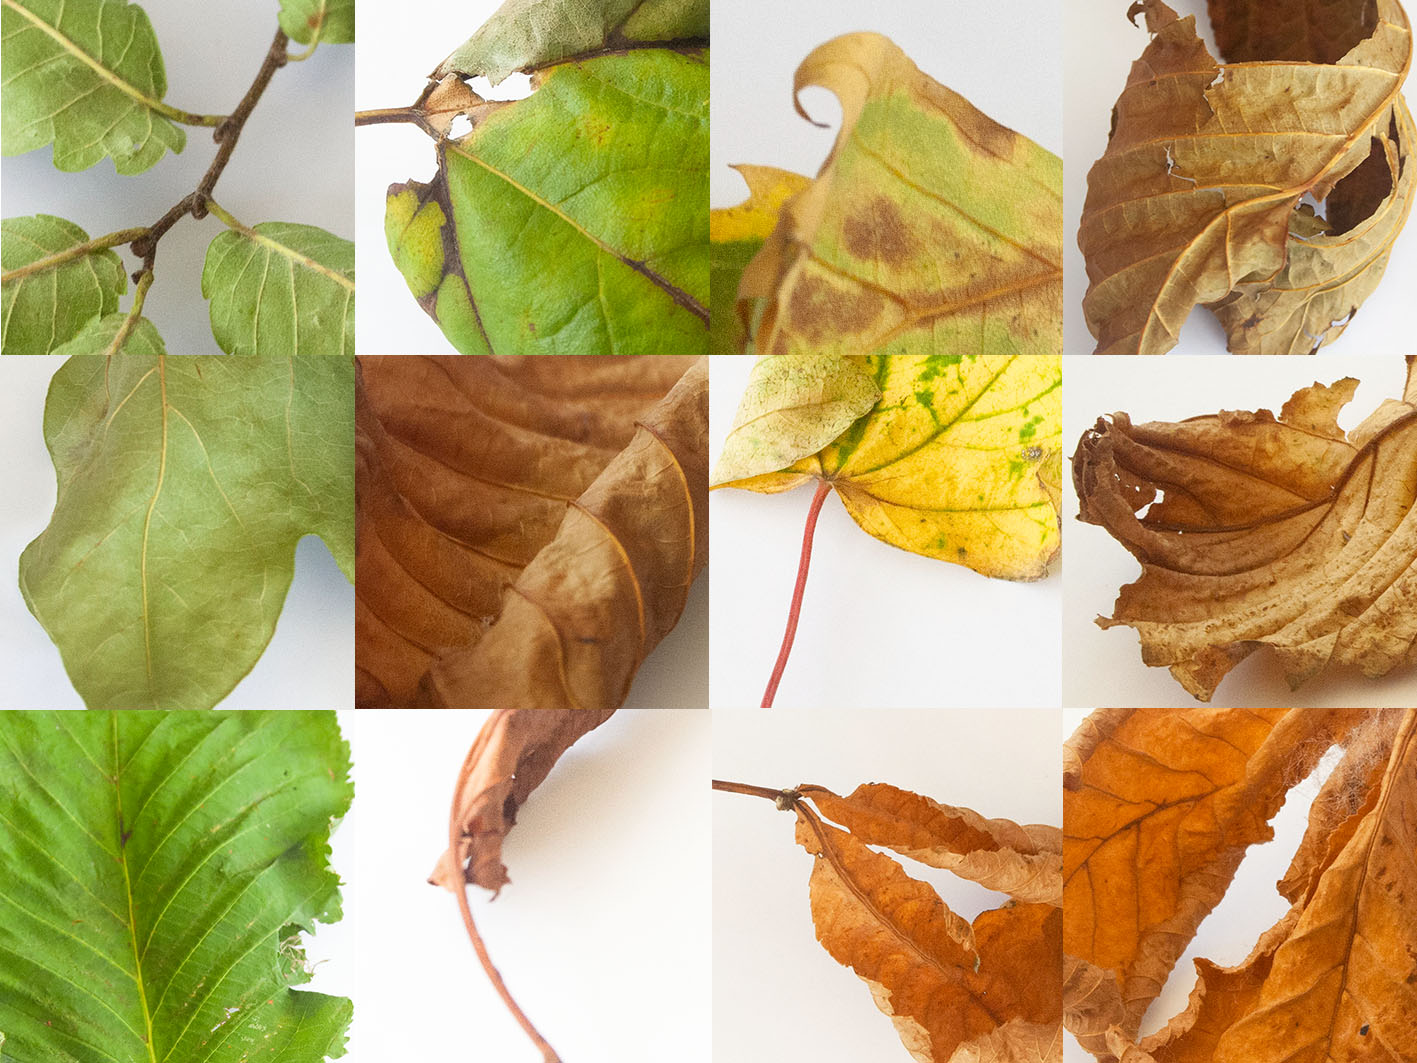
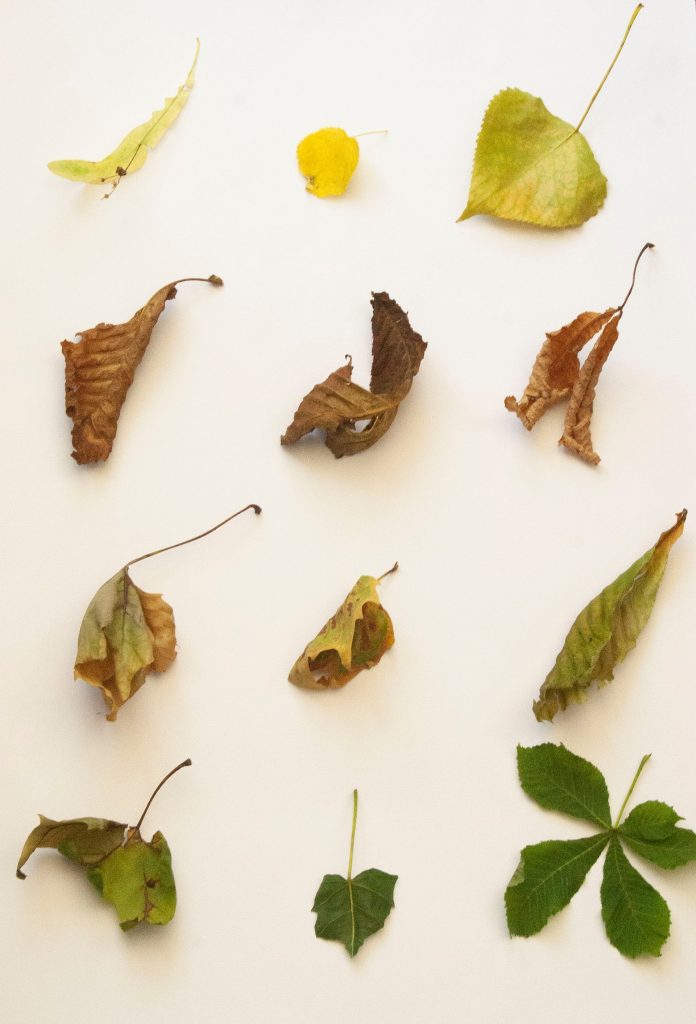
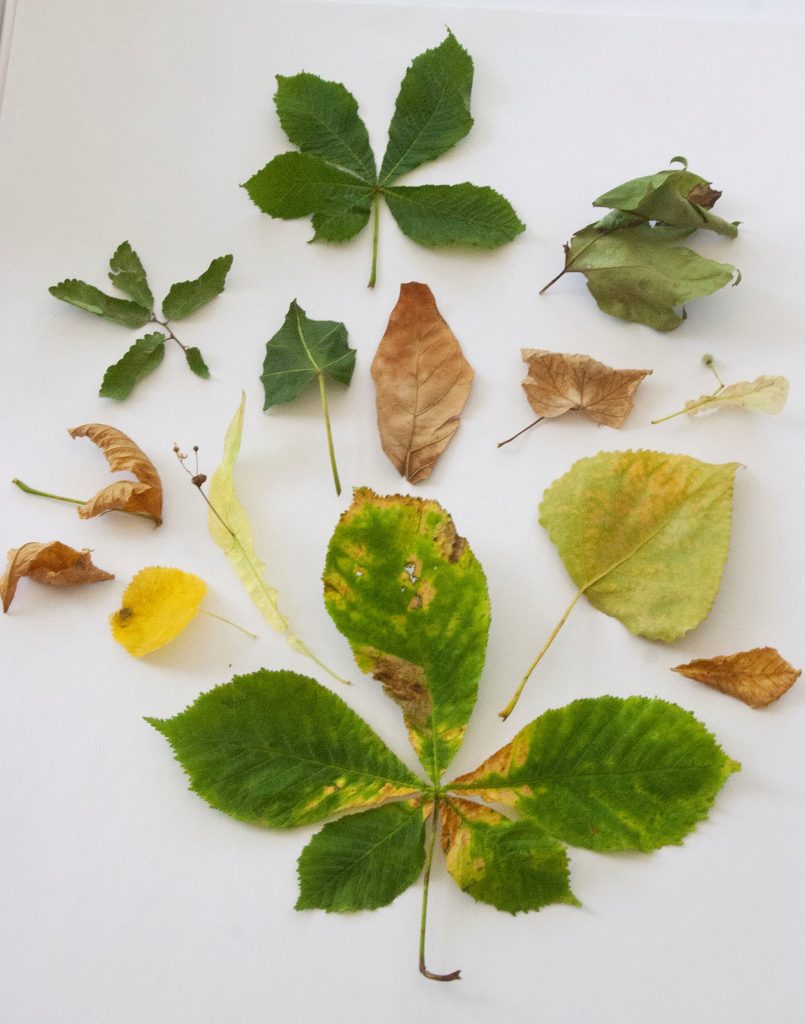
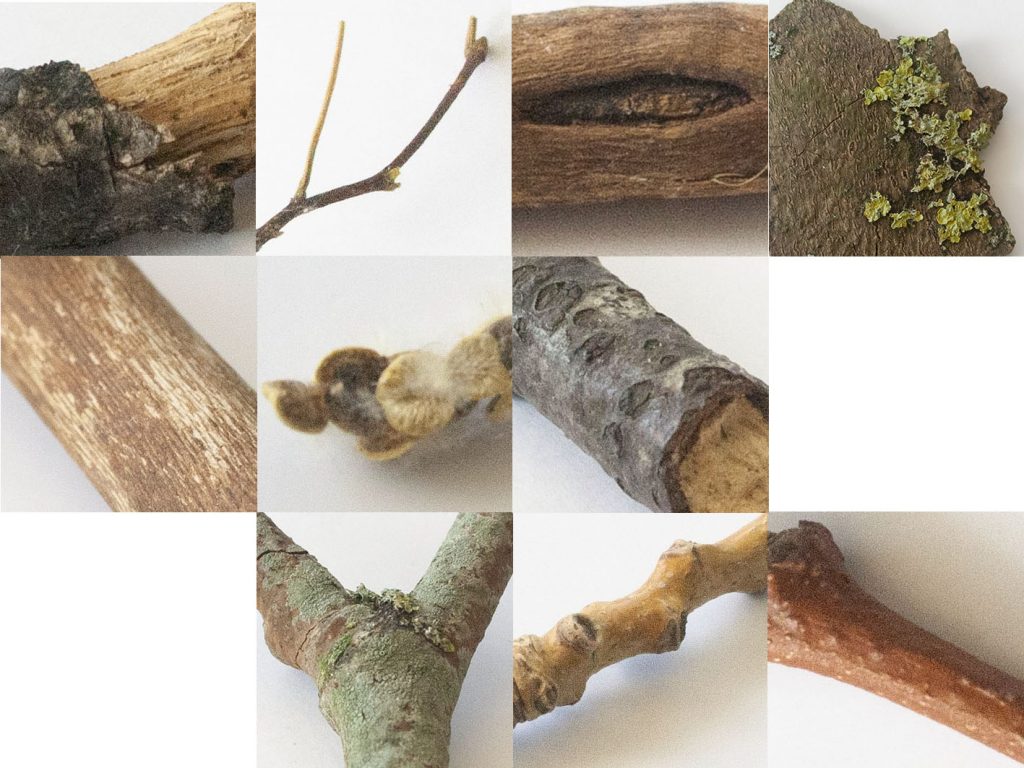
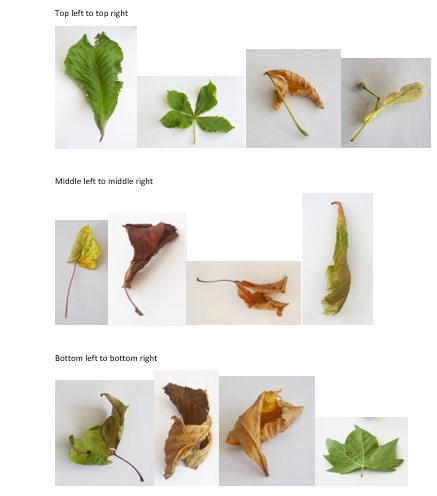
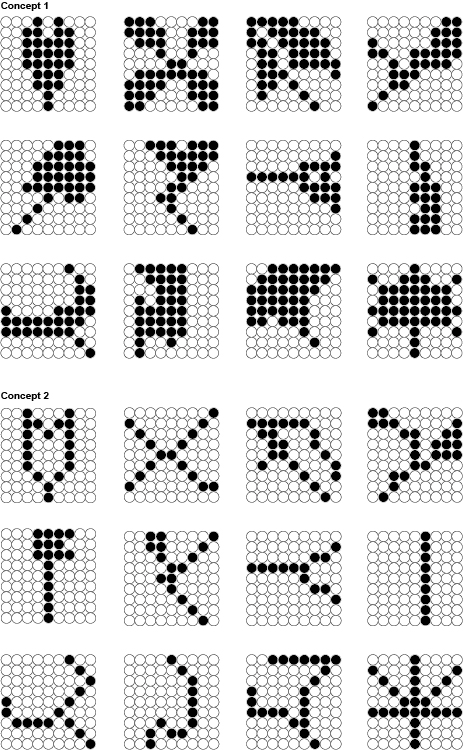
The task was now to translate my objects (the 12 leaves) into grid drawings. I worked mainly from the photographs of the objects. The main reason for this it that the leaves began to wilt very quickly after I brought them home, changing their shape.

I’ve placed the photos into the formation of the grid, to enable me to compare the objects to their pixelated counterparts.

This image has an empty alt attribute; its file name is for-the-blog-3.jpg

I worked on 2 concepts per each of the grid types. One grid being made up of round parts and the other being square parts. I used the concept 1 (below) to come up with a more filled-out version of the shape. The 2nd concept was then the simpler version, using less dots to construct the shape.

This image has an empty alt attribute; its file name is B_Project-4-9x9-circles-grid.jpg

The square grid was easier, since placing one black square next to another created a seamless line. I again applied the same rule to this grid type, with the 2nd concept being the most simplified. For concept 2 I aimed to use the least dots possible to construct the shape.

This image has an empty alt attribute; its file name is Project-4-10x10-square-grid.jpg

Project #3 Looking & Recording

This part of the summer project asks us to use our sketchbooks to look and record our found objects. This is a process I am familiar with. I regularly use my sketchbook when at home or out and about to record the world around me. This month I joined the Oxford Urban Sketchers group and took part in drawing sessions at Osney Lock and Folly Bridge. (The Urban Sketchers are a drawing organisation who gather in cities all over the world).

I used black coloured pencil and watercolours to record the many colours and textures of the river, boats and other details. I used black pencil because I feel comfortable with it and I like the bold markings as well as the soft texture it produces.

When drawing at Folly Bridge, I used 3 different approaches to what I saw. My process is usually intuitive and I don’t have a plan when I set out to sketch. For example, for the first drawing of the day, I used a black fine tipped marker. This was for 2 reasons.

  1. The sun was so bright that it made it difficult to see the scene and the drawing. Using pen allowed me to see clearly what I was drawing, as I also needed to wear sunglasses due to the brightness.
  2. The pattern of the bricks inspired me to go bold. Along with the geometric lines, I knew a pen would help to bring out the patterns.

I then moved onto this scene of boats moored on the bank. They looked happy and tranquil. I chose watercolour to pick out the variety of colours: the blue of the boats, the green of the bushes and river and the brown of the wooden decking.

After laying down the colours, I went back over the drawing with a blue coloured pencil. This allowed me to define the shapes and highlight the blue of the boats.
For my final drawing of the day, I captured a fellow sketcher at the river. I used a fine liner pen and blue pencil to sketch the scene. I found the man looked very peaceful and also I had moved to a shadier spot this time. The coolness of this position inspired me to use blue and the calmness of the scene inspired me to be gentle with my materials.

As you can see, I always let the subject inspire what materials and methods I use for the picture. This is usually the mood combined with the texture I want to capture. For a watery scene, I will usually reach for watercolour paints.

Applying drawing to the theme of nature:

At the Botanical Gardens in Oxford, I tried some observational sketching. I chose a brown pencil to reflect the earthly theme and create soft markings to reflect the soft texture of the plants. This is page 1 and 2 from a double page spread in one of my sketchbooks. I focused on capturing the variety of plant species in the rock garden. I was amazed by the many colours, textures and shapes of these plants that share the same habitat.
line drawing of lilies in my sketchbook

When approaching the drawings for the summer project, I looked at artwork mostly by illustrators, to learn from their process of looking and recording.

Secondary Research

Helen Hancocks

When at the Illustrator fayre at King’s Cross in London this summer, I had to pick up this zine by the illustrstor Helen Hancocks.

The zine has no narrative or text, simply drawings of cakes and sugary food items! The simplicity of the zine designs makes it bold and rememberable. The lack of colour makes the images easy to view and the booklet cheaper to produce. The only colour is on the front cover (see images).

Her line is bold and confident, which is the appeal. The pen flows across the page and the result is imperfect but full of character. The illustrations are sometimes 2-dimensional (see the eclair drawings below).

Let Us Eat Cake, (Zine title page)
(Zine front cover)
(Zine spread) Hancocks includes areas of block colour to create some depth and solidity.
(Zine spread) Here, she leaves negative areas where the viewer can imagine colours.
Ryn Frank

Looking at this particular set of drawings by Ryn Frank, I get a sense of the artist’s personality. She has been quite loose and playful with her line. For example, the cup at the top, centre, doesn’t have perfect proportions, if this drawing was used as a design drawing for a real cup, that cup when made would not stand on the table. But this inaccuracy doesn’t make the illustration ‘bad’. This is something I learned at UAL. Adding a personal touch to an illustration will make the viewer enjoy it more and make your work also stand out amongst others.

Here she has used the same thickness of line, filling areas in with patterns or block colour to add interest. The patterns she has used are varied from stripes to circles, whichever is appropriate to the object. She also uses negative space to give the eye a place to rest and break up the business of the patterns. Her drawings have a 2D element to them, but this doesn’t hinder us understanding what the drawing is of.

Charlotte Trounce
Insects drawn from collections at the Natural History Museum and Pitt Rivers Museum

Illustrator Charlotte Trounce produced a series of over 100 illustrations to promote the national art pass, for the magazine it’s nice that. She used the same black brush pen for all the drawings. It gives her work an expressive line, and in some drawings she used just one line to record the object.

Trounce added some areas of colour, but not too many as she didn’t want to ‘overpower the line work’.

Again, I like the loose quality of her style. The imperfections make the work really likable for me. The boldness of this medium shows confidence and clarity.

Rebecca Green
Rebecca Green, Mushroom Collector
An example of ink illustration
Faye Moorhouse
Faye Moorhouse, Forty Faces

Gouache and ink illustrations. The faces sit in rows of even numbers. This ordered way they are laid out, balances with the fact that Moorhouse paints what she calls ‘wonky’ drawings of her subjects. The colour is laid out first, allowed to dry, then the faces are added on top. Adding the details afterwards, means the line remains clear to read.

Nina Chakrabarti
Nina Chakrabarti

The use of green with the black and white drawings is an effective choice. Limiting the colour keeps us interested as an audience. Green in particular is an appropriate choice for the subject of nature. In this case, it helps us to guess the subject before we have read the line of text ‘Pattern is everywhere in nature’.

In her botanical illustration (below), she has used a thicker line, which I find unusual for the purpose, since botanical illustrations typically use a fine line to depict the tiny details of a plant. The labels are clear and therefore helpful. She has been selective with her application of colour, only adding what is necessary.

Botanical Illustrations for Albion

The illustration below for a London grocers is more how I would imagine botanical illustration. The time and the careful way Chakrabarti has drawn every detail of these mushrooms, is apparent. This illustration is more accurate that the previous work I have looked at in this post.

Any colour added would obscure the fine linework in this piece.

Food Illustrations for Melrose and Morgan
Koosje Koene

Koene uses mainly watercolour paint with a brush pen. Her sketches are vibrant, like this painting of lemons. The black shadows and bright yellow make the lemons look solid on the page. I like her use of mark-making to express the texture of the skin.

Koosje Koene

A continuous line drawing is used for this apple core sketch. This helps to sculpt out the shape of the fruit and the dips and curves. A broken line wouldn’t have had the same impact.

Primary Research

It was now time to turn to my sketchbook.

Taking photos of the leaves was a good way of recording the different colours, textures and shapes accuratley, but the process of taking photos didn’t allow me to absorb the subject visually. Photos are useful to keep as reference, but taking the photos takes a number of seconds. Drawing, on the other hand, requires the illustrator to explore the subject for a longer amount of time.

Gouache and coloured pencil (below, top). Brown pencil creates a softer mark against the watercolour layer. This medium allows a variety of texture to be expressed.

Gouache and pen (below, bottom). Painting a blob of colour onto the page, allowing it dry then drawing an outline drawing on top with a black fineliner pen.

(above) I was inspired by Charlotte Trounce’s brush pen markings. I don’t own a brush pen, so I used the next best thing, a pot of black India ink and a regular paintbrush.

12 leaves

Step 1- painting colour onto the sketchbook page with gouache

Step 2- Adding line to the leaves. I added outlines and details with a black pencil.

Project #2 Arrange & Rearrange

When visiting the museum of natural history (see previous post) I took notice of the different arrangements of objects. The way the objects were arranged made them easier to view and navigate around the museum.

I saw the impact different arrangements had on the objects when researching artists who work with collections.

Now it was my turn to investigate for myself…

Primary Research

Task 1: Arrange & Rearrange

Having my objects collected, I then had the job of photographing them in several arrangements.

Twigs

arrangement: random, chaotic, jumbled
arrangement: divided by shape type. 1) straight 2) forked 3) curved.
arrangement: tall to short
arrangement: circular & in size order

Leaves

arrangement: random
arrangement: by colour and evenly spaced into a grid formation.
arrangement: artistically, centered around the largest leaf at the bottom, centre. Stems pointing towards this central leaf. Greenest leaves around the outside.

Feathers

arrangement: random
arrangement: divided by neat (bottom) and messy-shaped leaves (top) Divided by a central gap.
arrangement: light to dark, horizontally placed.
arrangement: grouped into smaller piles. categorised by colour (light, mid and dark).

Task 2: Re-direct the attentional focus

I then took separate photos of the individual objects from a group. I needed to select an interesting aspect of the object to focus on. For example, with the twigs (below), I picked out the following elements:

  • dark and light contrast, split at centre
  • fork in the twig and it is long and thin
  • an oval ‘mouth’
  • lichen growth
  • scratched markings on the surface
  • fluffy catkins
  • round markings
  • fork in the twig, colour is slightly green
  • kinks/ knuckles create an interesting twisty shape
  • smooth surface, rusty red colour

I then needed to create a grid with these photos. In the example below, I made sure to connect the lines from one photo to the next, so that the images would meld together visually.

Leaves

I was more drawn to the leaves when selecting a topic to explore further. I then produced 2 grids using some of the same leaf images, and switching others.

Placing the stems in a direction that guides the eye around the grid. I used negative space to break up the composition and kept this space to the bottom right area.
Placing the greener elements to the right and left, with the rusty colours in the centre.

I found this task more challenging than I was expecting. Because all the leaves are quite different, I wasn’t sure how to place them harmoniously.

How I made the grid in adobe photoshop:

  1. place embedded
  2. resize the image, accept (tick)
  3. rectangular marquee tool
  4. select the square
  5. mask
  6. unlink the mask from the picture
  7. v for move tool
  8. w rows to move it around
  9. to resize, edit> transform> scale >accept (tick)