This week, I am re-visiting the ‘Number’ brief. Since I struggled with this task last week, I decided to give it another go and try to understand Adobe Illustrator a bit better, as well as how I could go about designing numbers.
Figure and ground
‘Look at the Rubin vase (example 1) where the figure– ground relationship relies upon a visual confusion so that the eye sees either faces or a vase.’
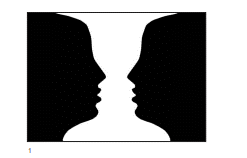
In this image, we can view the white area as negative space, therefore seeing the 2 faces. Or we can choose to read the image as a white vase, where the black area becomes the negative space. The figure is the object in a given space, and the ground is the background space around the object.
Numbers are everywhere in the world around us and they are instantly recognisable to us. Since they are so easily recognised, we can playfully customise them away from a basic number form, and they will still be readable- we have a lot of room to experiment. This is what we did in the Number workshop.
Number Designs
I looked at the way designers have approached numbers. These designs are suitable for use in posters, as the numbers have eye catching styles, shape and composition. They are functional, as they can convey information, and also are interesting designs.
From The graphic design idea book by Steven Heller & Gail Anderson:
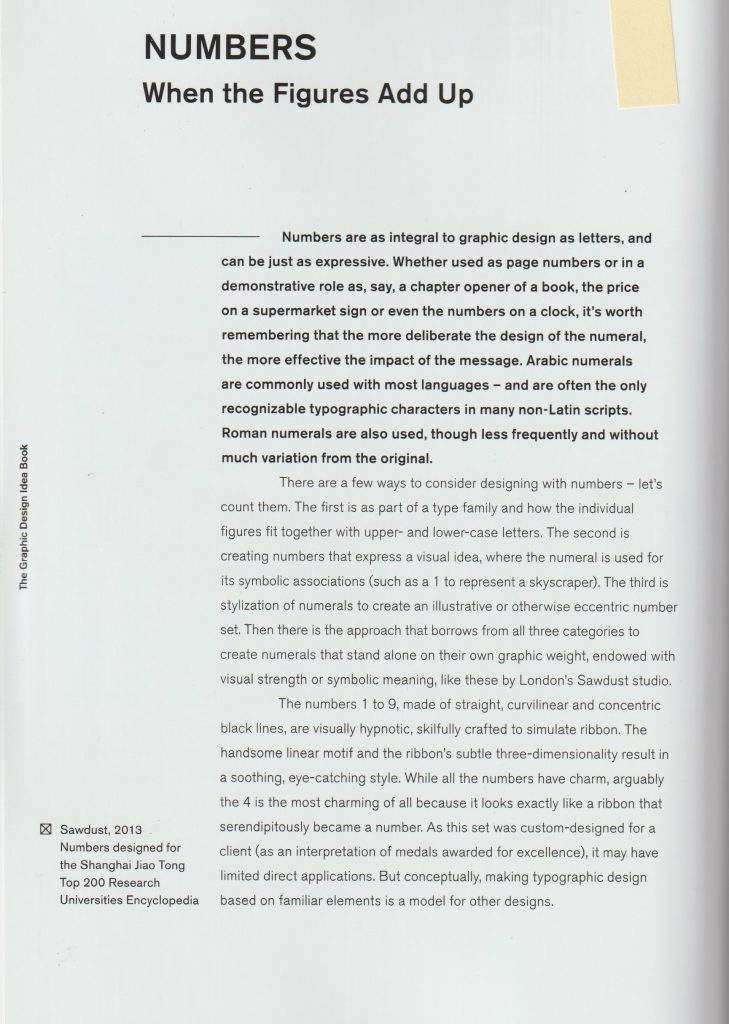
Non-Format
Non-Format are a pair of designers who are known for bespoke typography and interesting image making.
The designers were asked to create their version of the number 25. The colours they were given for this task were red and grey. I like the way they have played with the rotation, it reminds me of the staircase images by MC Escher. I like the 3D effect because the number looks tactile and I can envision it as an object in the room.
Image from: non-format.com/slanted-25
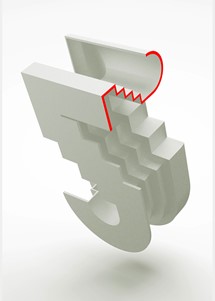
I also came across this design by Non-Format, which is styled quite differently to the 3D number. This figure is two-dimensional, but this does not make it flat looking. It looks as though they’ve designed this number using a grid. They have sometimes chosen to group the squares of the grid together and in other places, it’s easier to see the individual squares of the grid. The Zigzag lines that form the edge of the 2, add a sense of movement, it is as if we can see the shape vibrating. They have used smaller chequered patterns within a single grid square, they have used stripes, circles, triangles and dots. The figure itself is cohesive as one piece, because all the smaller elements within the 2, such as the different patterns and different colours, are presented in similar sizes to each other.
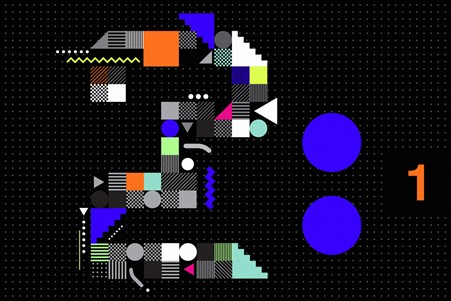
Leonardo Sonnoli
This looks to be a poster design, using the numbers three and two. I like the boldness and simplicity. The thin lines are important, as they balance out the boldness and add a sense of delicacy. The designs are quite elegant, and I would expect this to be a poster for an art event or for a sophisticated audience. I associate these numbers with the Art Deco style. The numbers themselves are black and white but the colour comes from the background. The number 2 is not joined up in a way we would expect, but instead it’s our eyes that join the top and bottom half to form one object because we are familiar with the figure of the two.
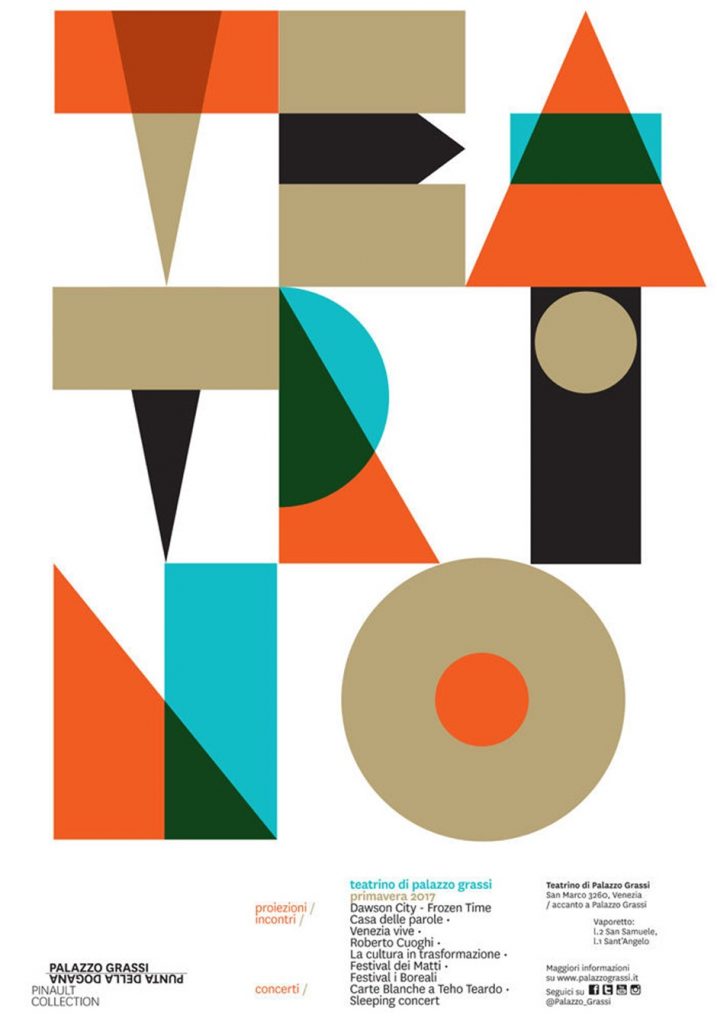
This poster does not contain numbers, but it interested me when I was thinking about number design. I like the overlapping of colours, particularly in the top third of the image where it looks as though the colours are mixing in layers before our eyes. Because these figures are chunky, and they are placed so closely together, my eyes naturally wanted to read the negative space as part of the design.
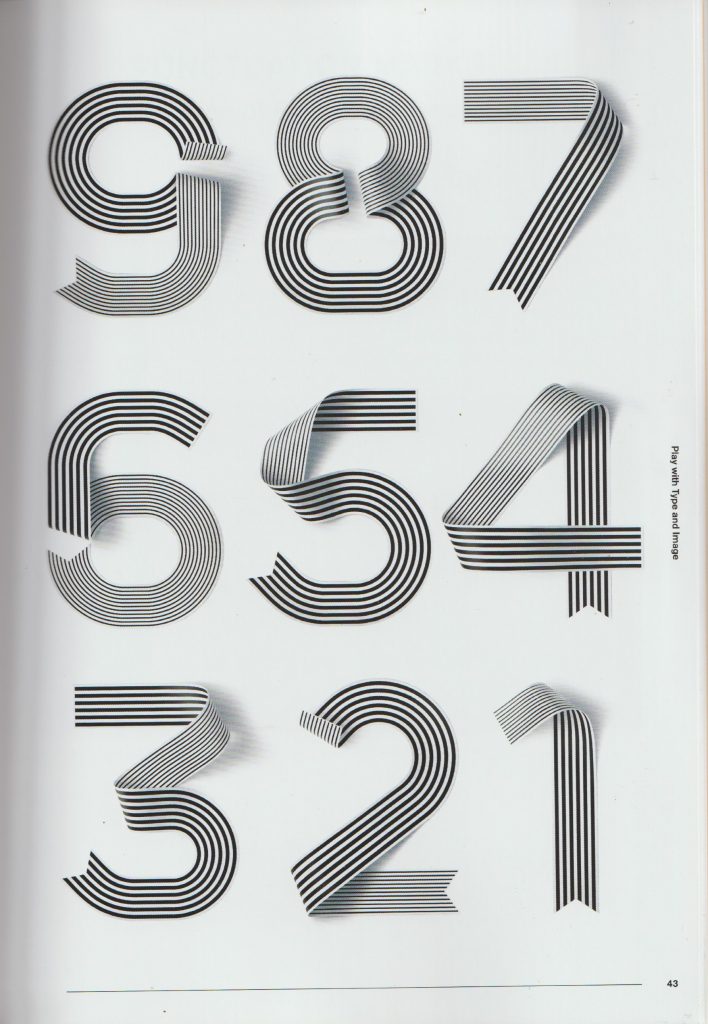
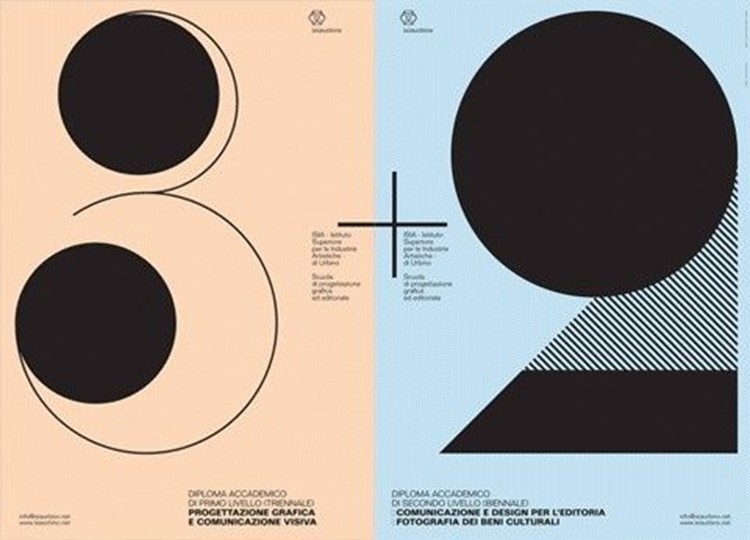
Dan Chamberlain
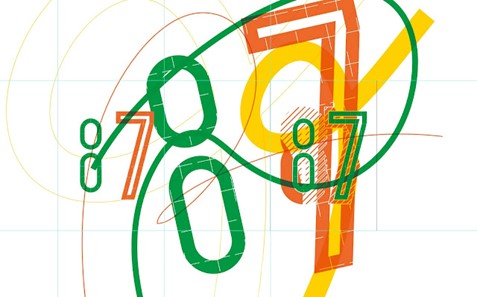
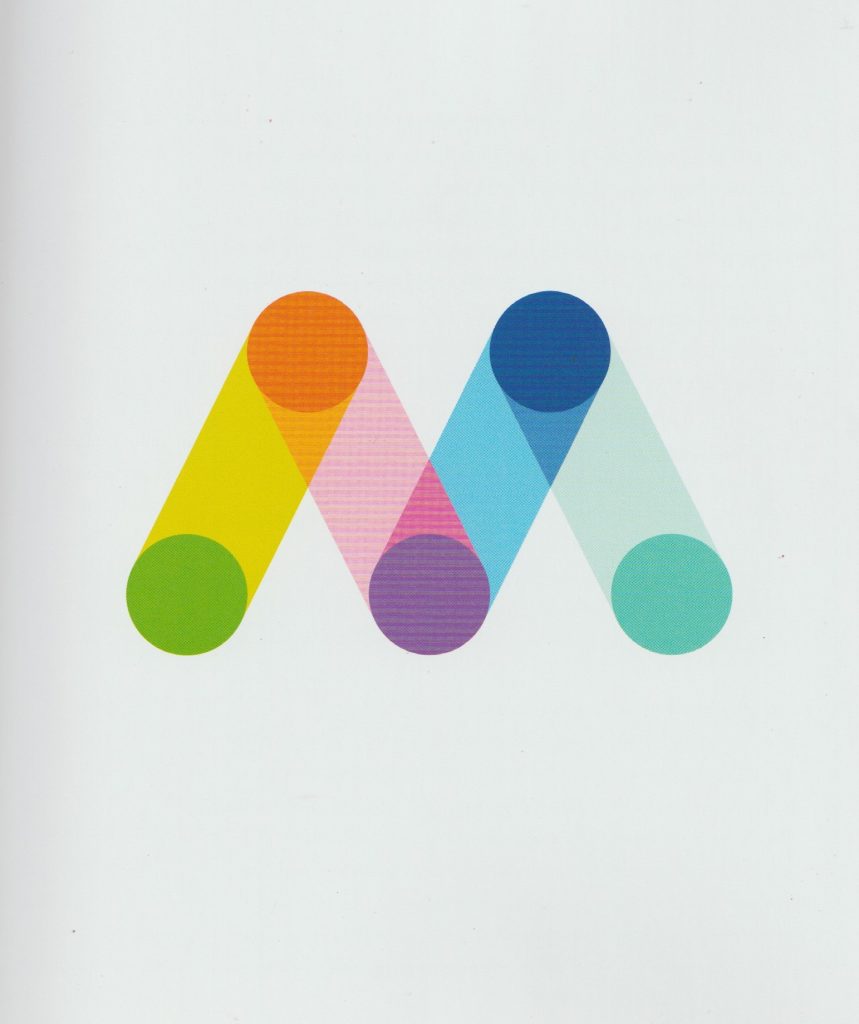
I was immediately drawn to the refreshing colour palette. This design looks fun and energetic. The two links that make up the eight do not need to be connected for us to read the pattern as an eight. This is helped by the fact that the figure of eight appears next to a seven. (Our mind makes the association that we are looking at numbers.) I like the outline of the 7 and I was inspired by the fact that I do not need to fill the figure with a colour.
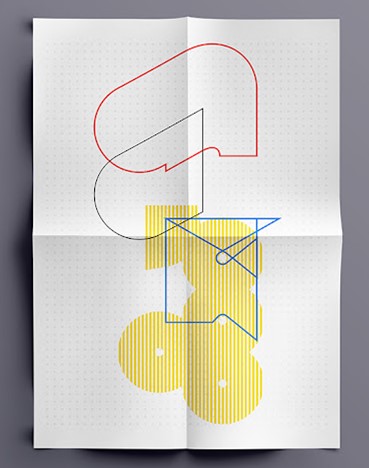
Here I liked the use of half tones with negative shapes. It is interesting to see where they intersect at the centre stop. Using yellow and blue was a good choice because it helps the outline to stand out.
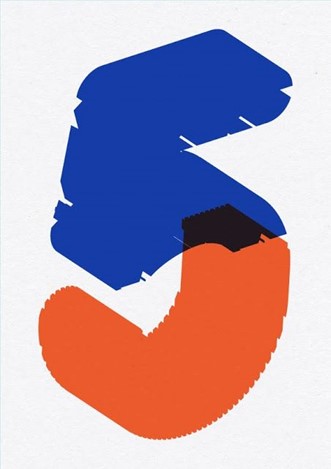
I was drawn to the boldness of this figure of 5. I like the way that certain areas are cutaway around the outside of the shape. It makes it look imperfect and accidental. This helps to include some negative space in what would otherwise be a bulky shape. The bottom half of the 5, to me resembles the bottom of the J. There may be some significance in this or not. Where the colours intersect at the centre, there is the murky dark colour. This shows that the blue and orange are transparent, and resembles the effects created by screen printing for example.
Because of this transparency, the 5 appears airy and light if it was to be physically lifted. It makes me think of jelly, this makes it a fun design to look at. I like the way the angles are not visible, but we can still see the shape is 3D because of the angle the designer has drawn it at. The use of orange and blue is very strong and works well because they are opposite to each other on the colour wheel.
From The graphic design idea book by Steven Heller & Gail Anderson:

Studio Myerscough
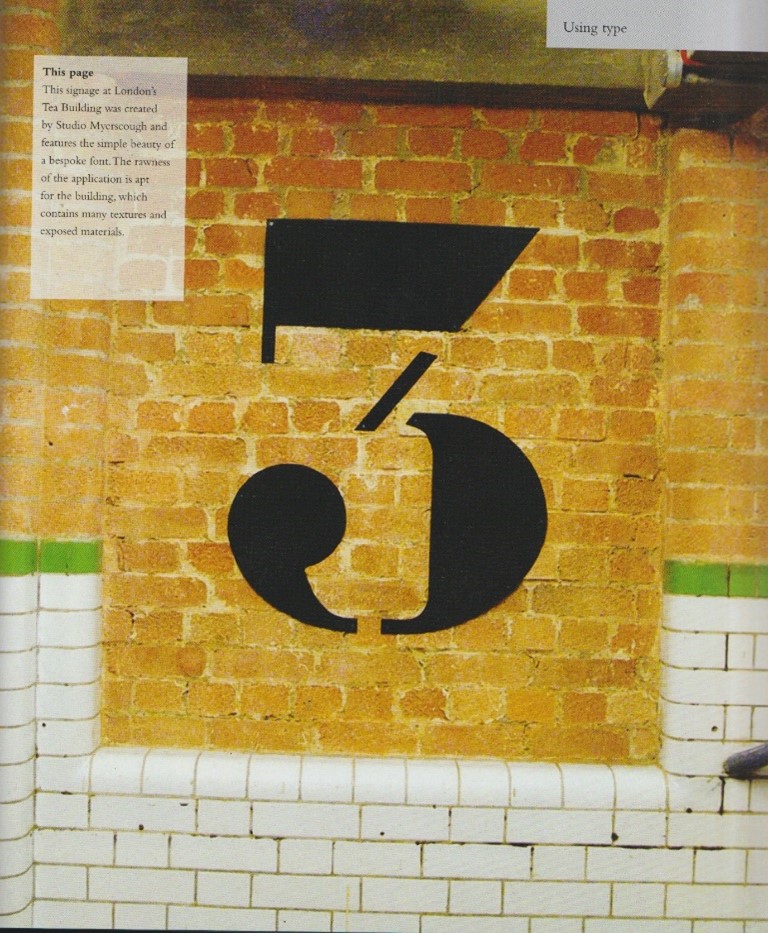
This number 3 has been applied to the side of a building, it may have been painted on. I like the disjointed quality of the figure. It helps to break up the chunky parts of the design. She has used curved and angled shapes and the results is bold yet stylish. I like how the end of the three looks like a quotation mark or, or a backwards comma. This might suggest a relationship to a literary theme.
Adolphe Mouron Cassandre
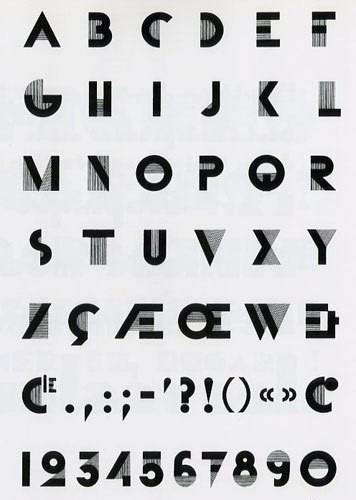
This is a typeface for numbers and letters from 1929 (the Art Deco period). I like the combination of block shapes and half tones to make up each figure. Each number is unique and yet clearly belongs to the same family of numbers. The half tone, or stripy areas sometimes stand in for positive space, sometimes stand in for negative space, and other times are connecting and representing both.
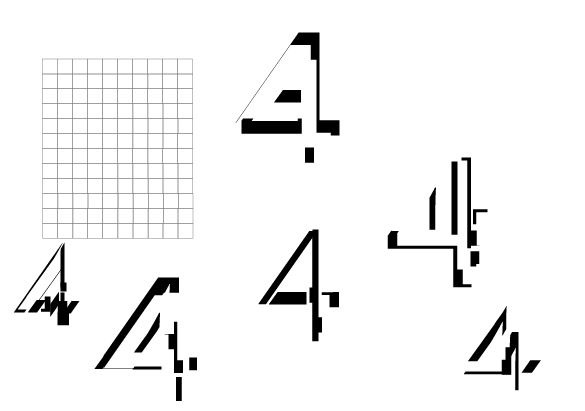
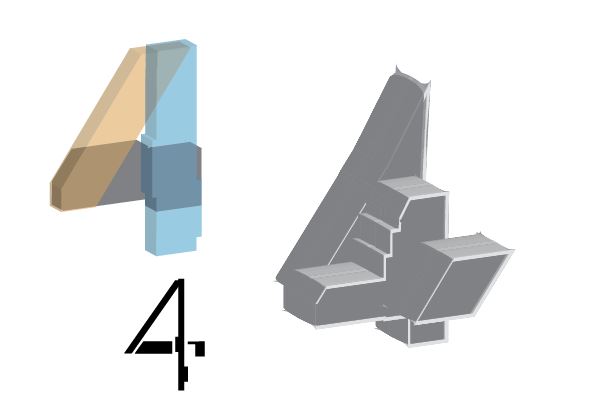
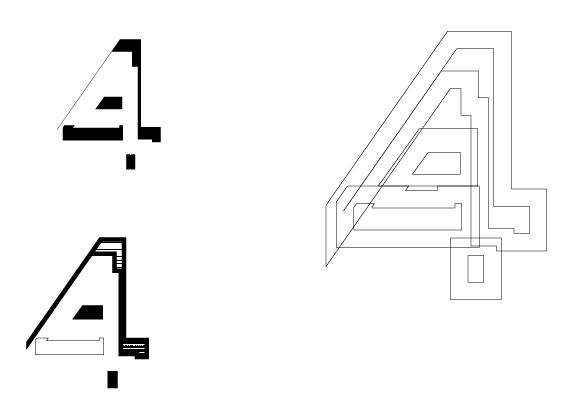
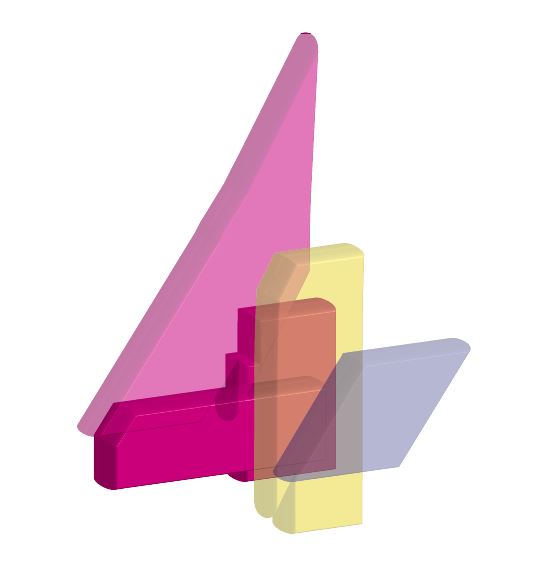
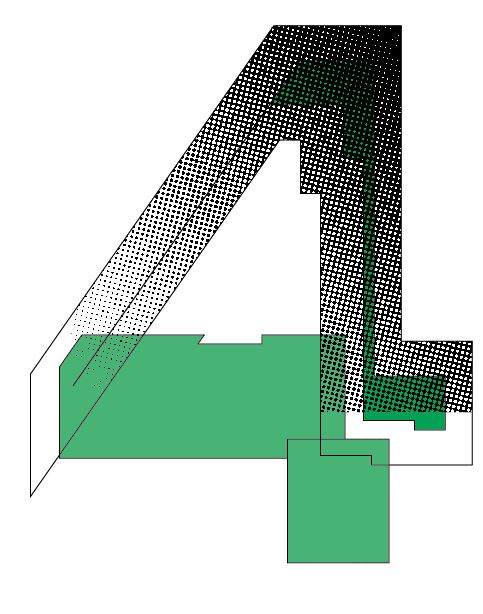
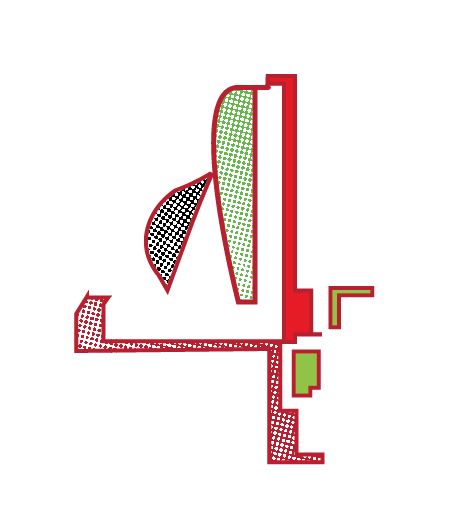
My designs- using Adobe Illustrator
After experimenting with the numbers 2 and 5, I moved on to see what potential there was in a 4. I pushed myself to learn new skills on Illustrator and to practice the skills I have recently learnt.
From my second time on Illustrator, I learnt a few basic principles:
- The white arrow is the Direct Selection Tool. It can be used to round the corners of a rectangle and to stretch the rectangle.
- Add Anchor points just adds anchor points.
- Anchor Point tool just moves anchor points that are already there.
- The Pen Tool draws lines.
- Shift+command+[] to move an object in front or behind