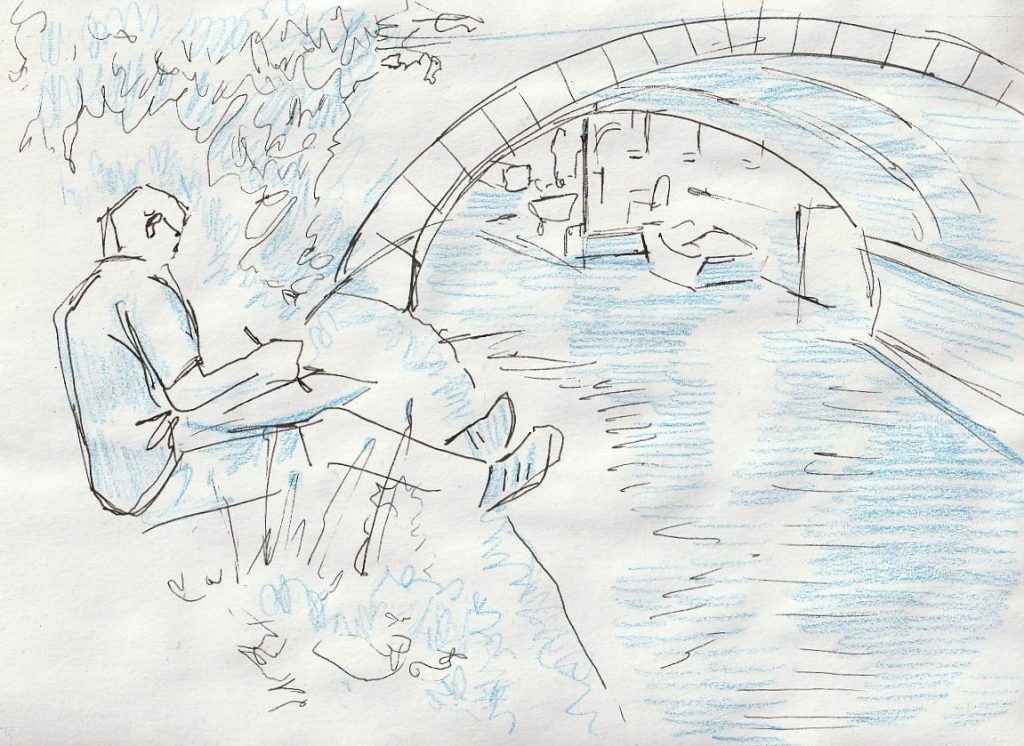
This part of the summer project asks us to use our sketchbooks to look and record our found objects. This is a process I am familiar with. I regularly use my sketchbook when at home or out and about to record the world around me. This month I joined the Oxford Urban Sketchers group and took part in drawing sessions at Osney Lock and Folly Bridge. (The Urban Sketchers are a drawing organisation who gather in cities all over the world).
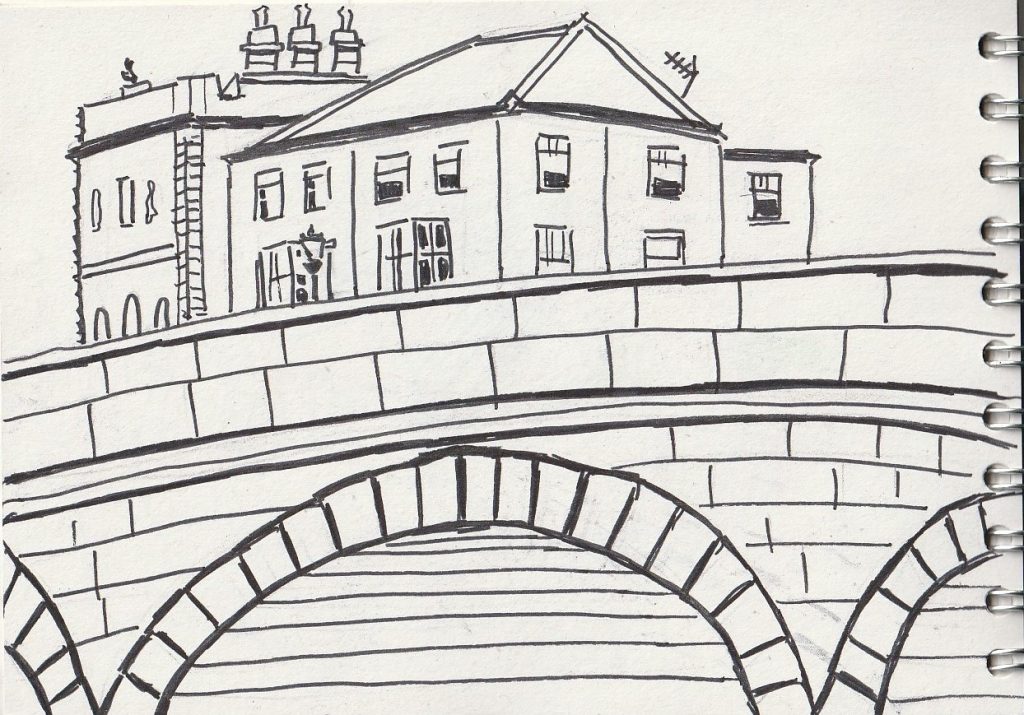
When drawing at Folly Bridge, I used 3 different approaches to what I saw. My process is usually intuitive and I don’t have a plan when I set out to sketch. For example, for the first drawing of the day, I used a black fine tipped marker. This was for 2 reasons.
- The sun was so bright that it made it difficult to see the scene and the drawing. Using pen allowed me to see clearly what I was drawing, as I also needed to wear sunglasses due to the brightness.
- The pattern of the bricks inspired me to go bold. Along with the geometric lines, I knew a pen would help to bring out the patterns.
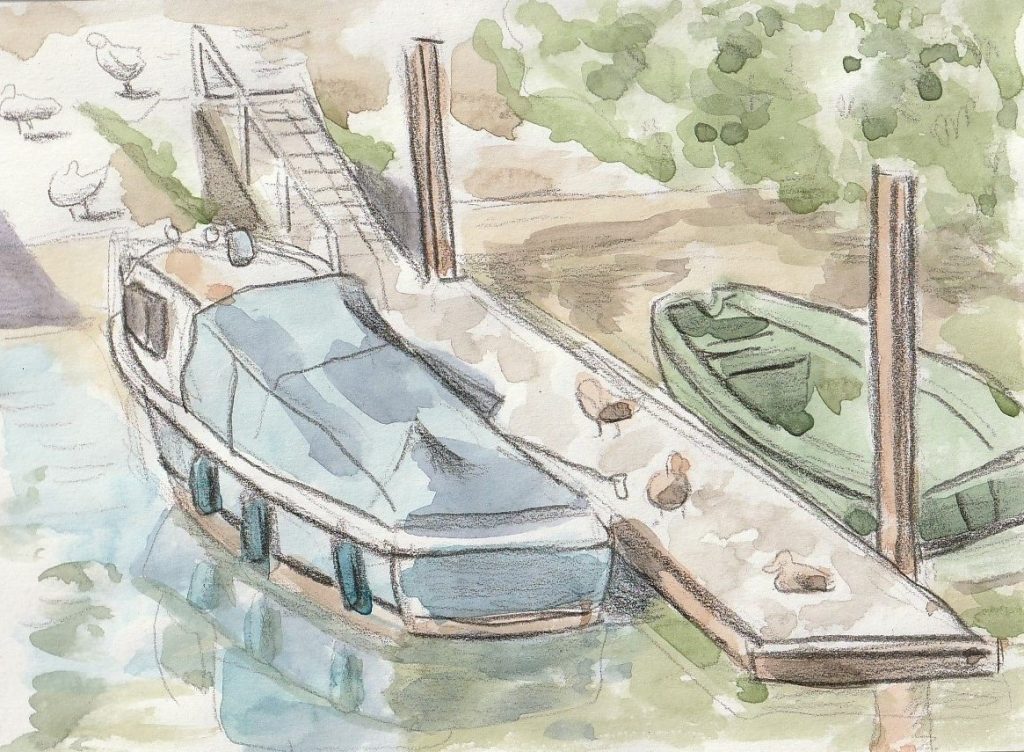
I then moved onto this scene of boats moored on the bank. They looked happy and tranquil. I chose watercolour to pick out the variety of colours: the blue of the boats, the green of the bushes and river and the brown of the wooden decking.
As you can see, I always let the subject inspire what materials and methods I use for the picture. This is usually the mood combined with the texture I want to capture. For a watery scene, I will usually reach for watercolour paints.
Applying drawing to the theme of nature:
When approaching the drawings for the summer project, I looked at artwork mostly by illustrators, to learn from their process of looking and recording.
Secondary Research
Helen Hancocks
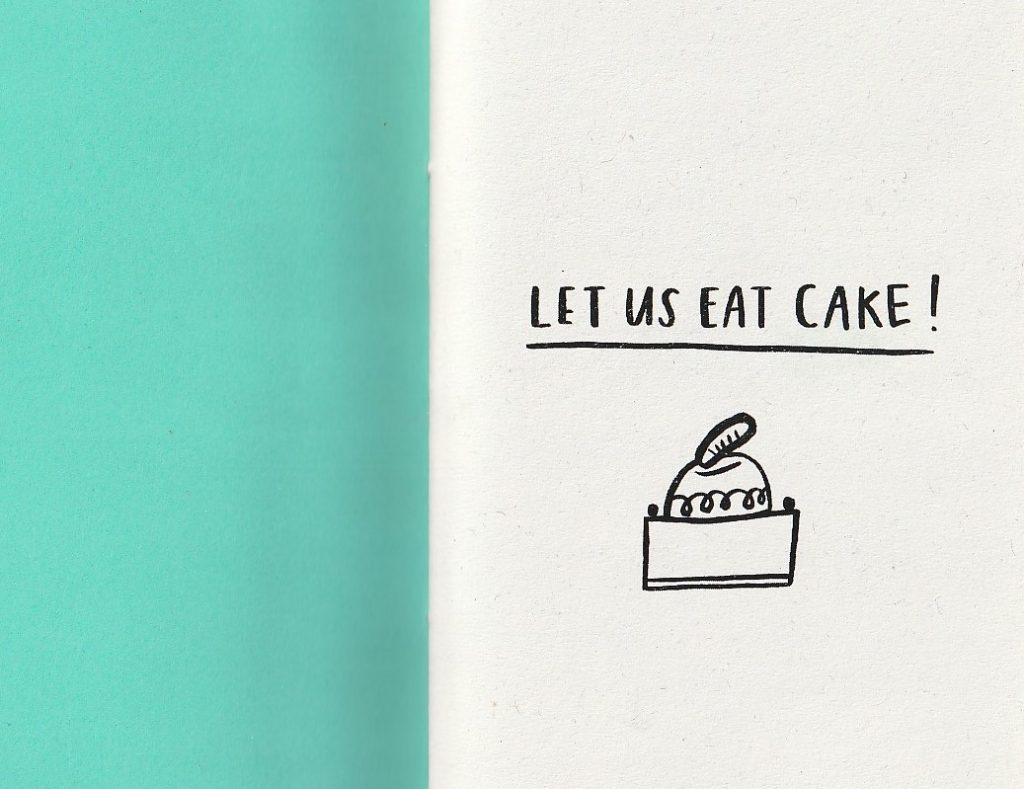
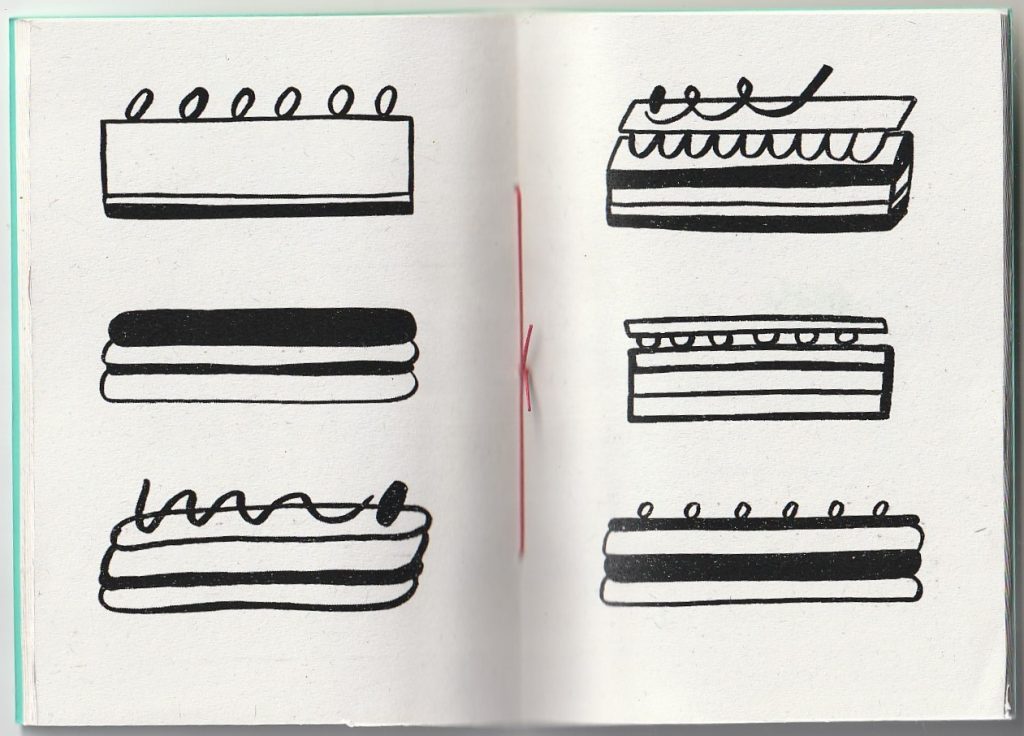
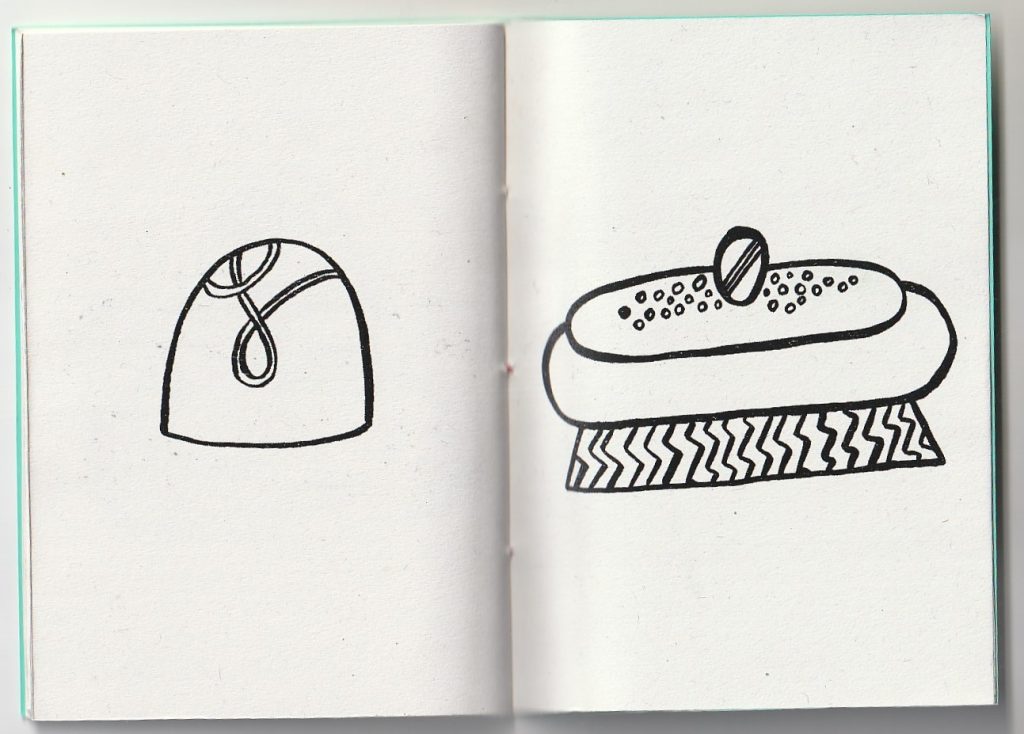
When at the Illustrator fayre at King’s Cross in London this summer, I had to pick up this zine by the illustrstor Helen Hancocks.
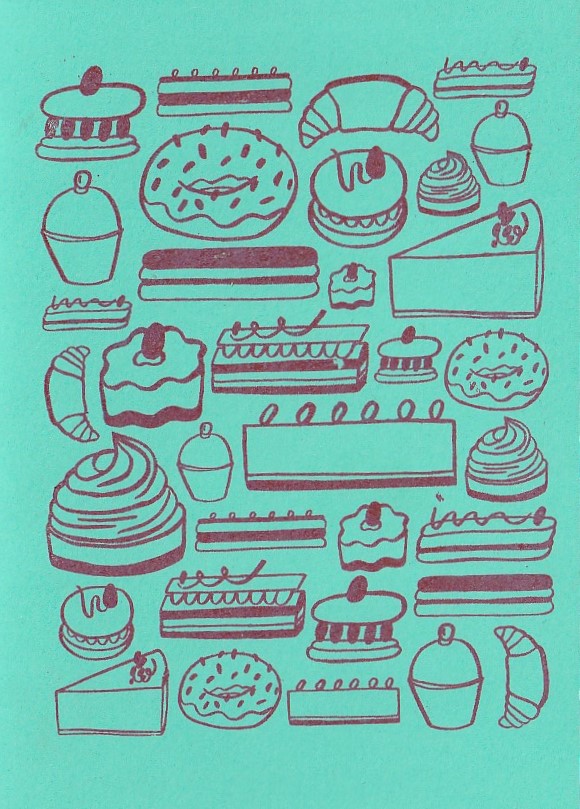
The zine has no narrative or text, simply drawings of cakes and sugary food items! The simplicity of the zine designs makes it bold and rememberable. The lack of colour makes the images easy to view and the booklet cheaper to produce. The only colour is on the front cover (see images).
Her line is bold and confident, which is the appeal. The pen flows across the page and the result is imperfect but full of character. The illustrations are sometimes 2-dimensional (see the eclair drawings below).
Ryn Frank
Looking at this particular set of drawings by Ryn Frank, I get a sense of the artist’s personality. She has been quite loose and playful with her line. For example, the cup at the top, centre, doesn’t have perfect proportions, if this drawing was used as a design drawing for a real cup, that cup when made would not stand on the table. But this inaccuracy doesn’t make the illustration ‘bad’. This is something I learned at UAL. Adding a personal touch to an illustration will make the viewer enjoy it more and make your work also stand out amongst others.
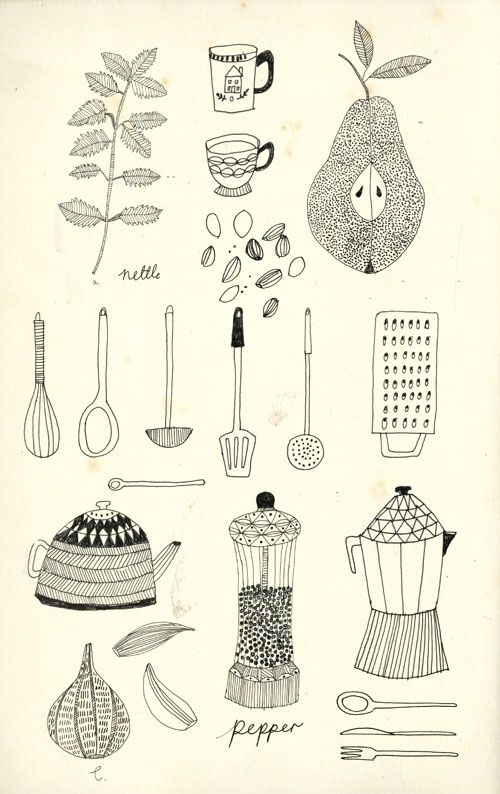
Here she has used the same thickness of line, filling areas in with patterns or block colour to add interest. The patterns she has used are varied from stripes to circles, whichever is appropriate to the object. She also uses negative space to give the eye a place to rest and break up the business of the patterns. Her drawings have a 2D element to them, but this doesn’t hinder us understanding what the drawing is of.
Charlotte Trounce
Illustrator Charlotte Trounce produced a series of over 100 illustrations to promote the national art pass, for the magazine it’s nice that. She used the same black brush pen for all the drawings. It gives her work an expressive line, and in some drawings she used just one line to record the object.
Trounce added some areas of colour, but not too many as she didn’t want to ‘overpower the line work’.
Again, I like the loose quality of her style. The imperfections make the work really likable for me. The boldness of this medium shows confidence and clarity.
Rebecca Green
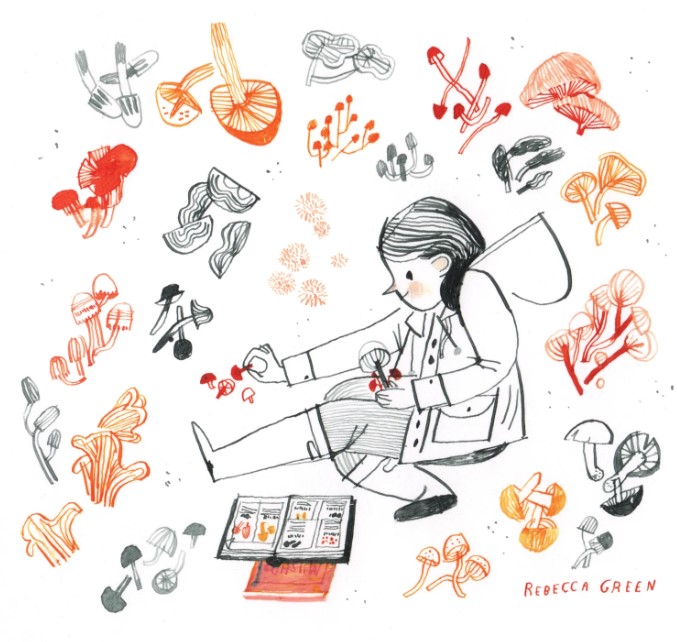
An example of ink illustration
Faye Moorhouse
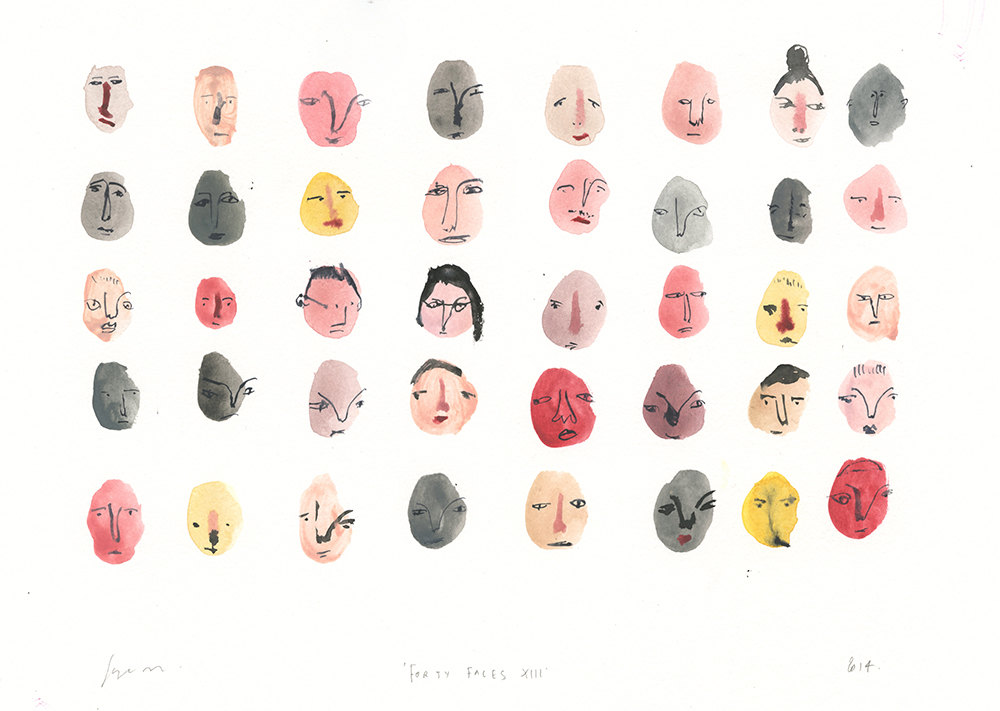
Gouache and ink illustrations. The faces sit in rows of even numbers. This ordered way they are laid out, balances with the fact that Moorhouse paints what she calls ‘wonky’ drawings of her subjects. The colour is laid out first, allowed to dry, then the faces are added on top. Adding the details afterwards, means the line remains clear to read.
Nina Chakrabarti
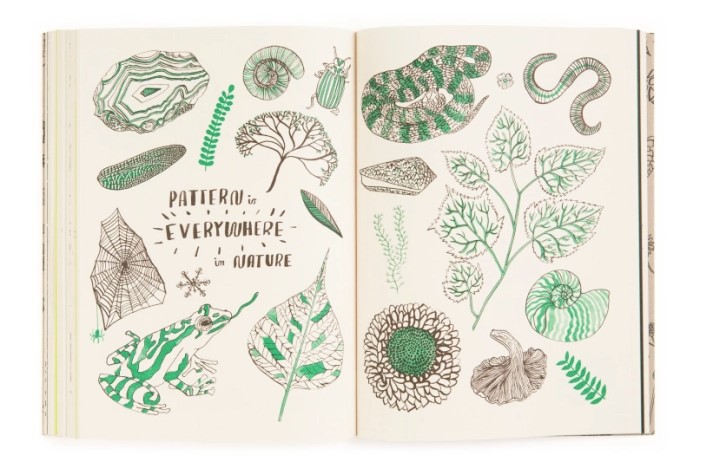
The use of green with the black and white drawings is an effective choice. Limiting the colour keeps us interested as an audience. Green in particular is an appropriate choice for the subject of nature. In this case, it helps us to guess the subject before we have read the line of text ‘Pattern is everywhere in nature’.
In her botanical illustration (below), she has used a thicker line, which I find unusual for the purpose, since botanical illustrations typically use a fine line to depict the tiny details of a plant. The labels are clear and therefore helpful. She has been selective with her application of colour, only adding what is necessary.

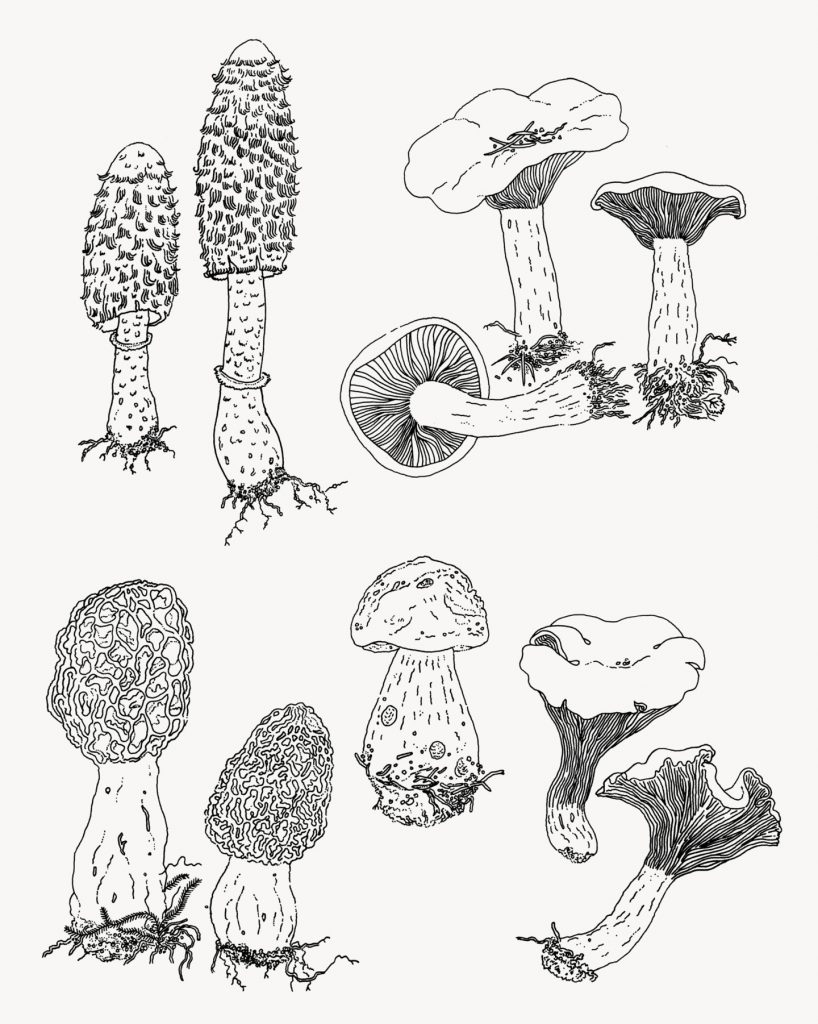
The illustration below for a London grocers is more how I would imagine botanical illustration. The time and the careful way Chakrabarti has drawn every detail of these mushrooms, is apparent. This illustration is more accurate that the previous work I have looked at in this post.
Any colour added would obscure the fine linework in this piece.
Koosje Koene
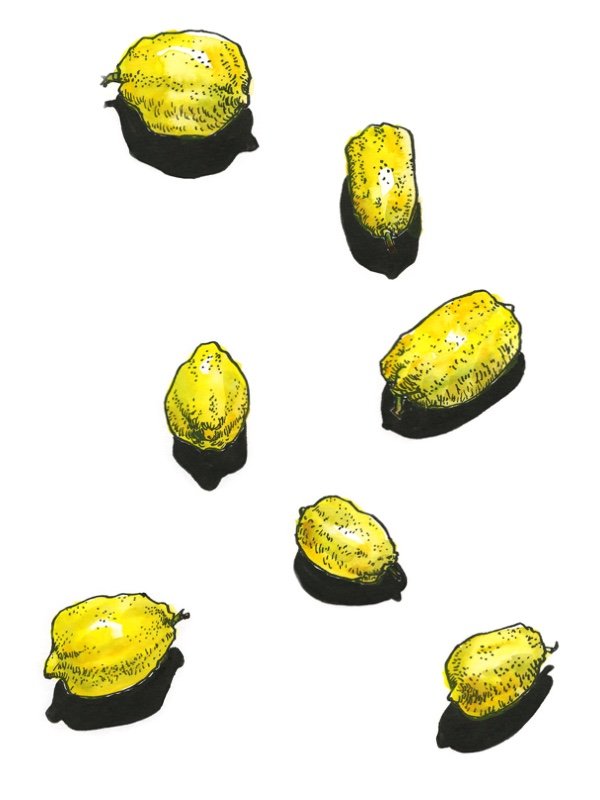
Koene uses mainly watercolour paint with a brush pen. Her sketches are vibrant, like this painting of lemons. The black shadows and bright yellow make the lemons look solid on the page. I like her use of mark-making to express the texture of the skin.
A continuous line drawing is used for this apple core sketch. This helps to sculpt out the shape of the fruit and the dips and curves. A broken line wouldn’t have had the same impact.
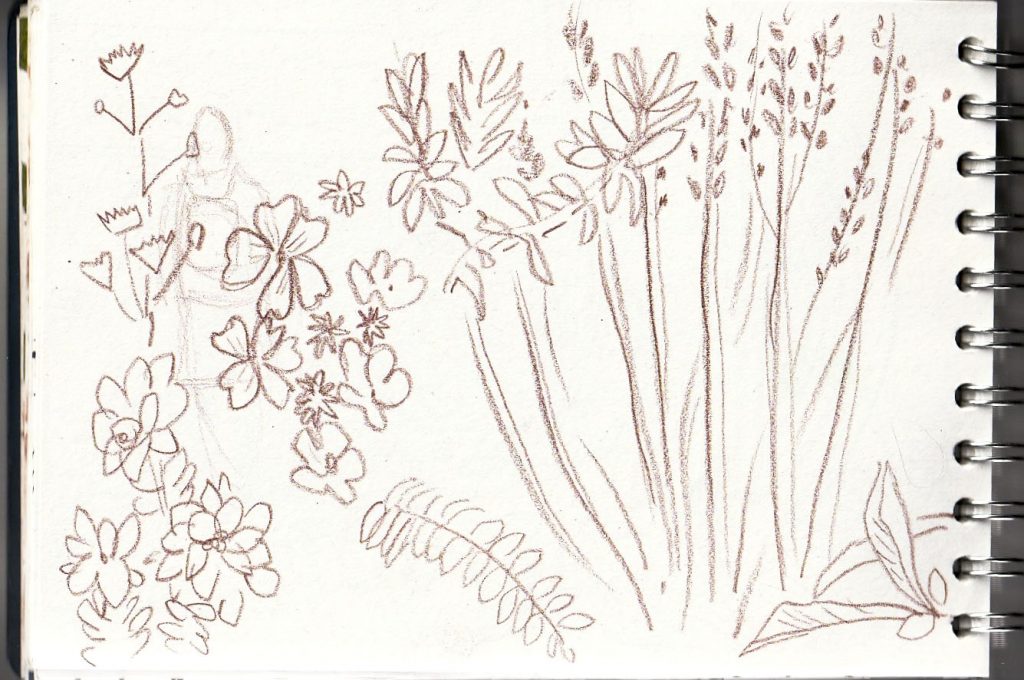
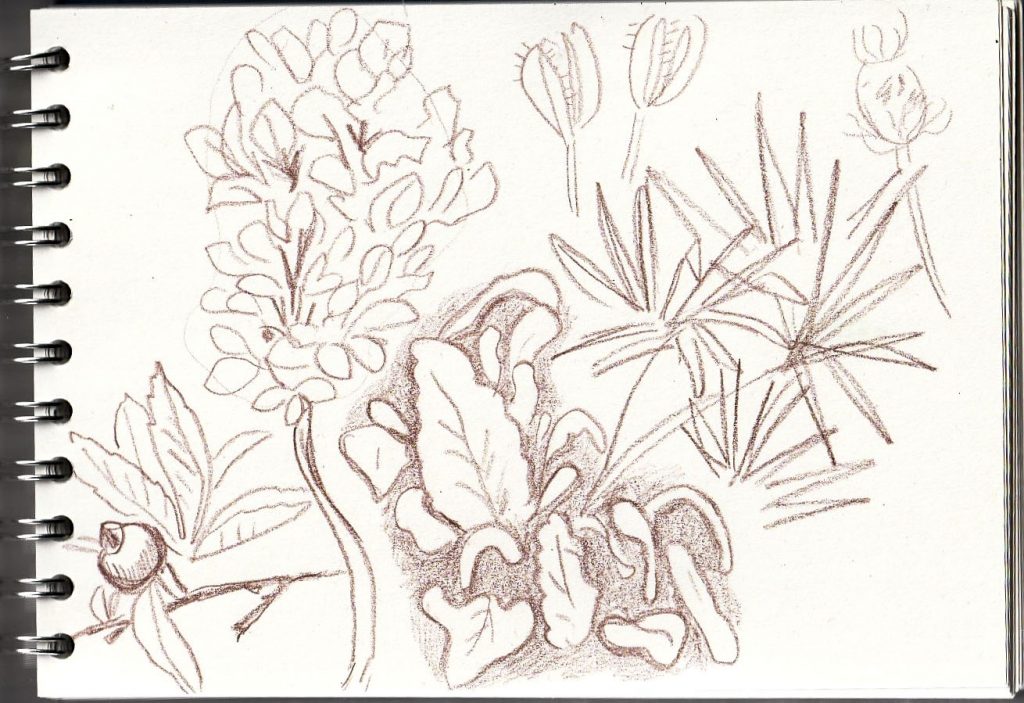
Primary Research
It was now time to turn to my sketchbook.
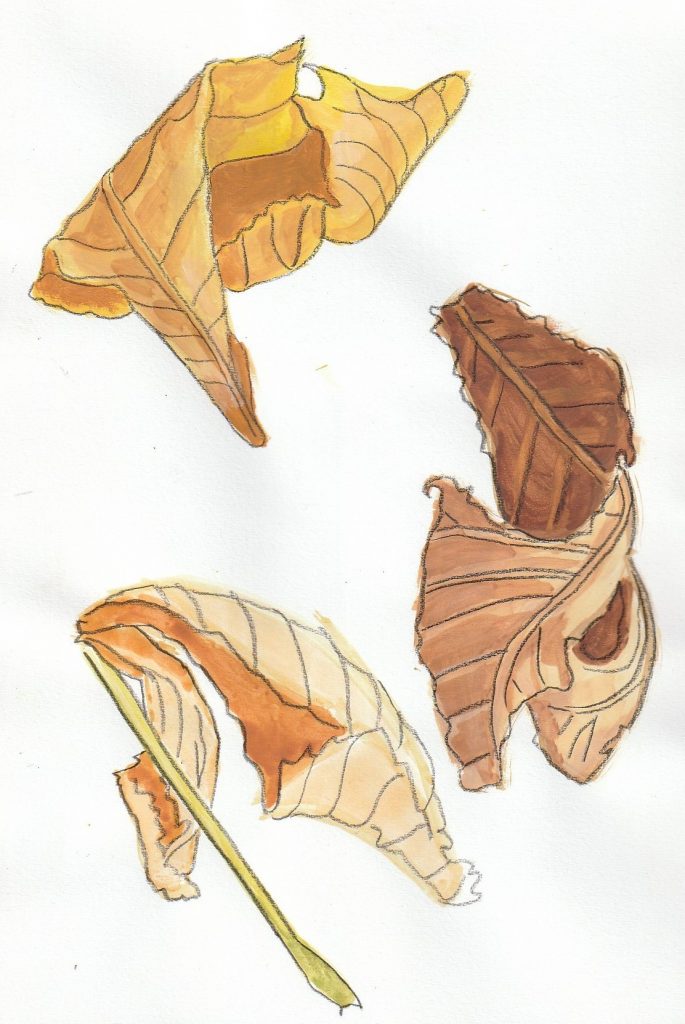
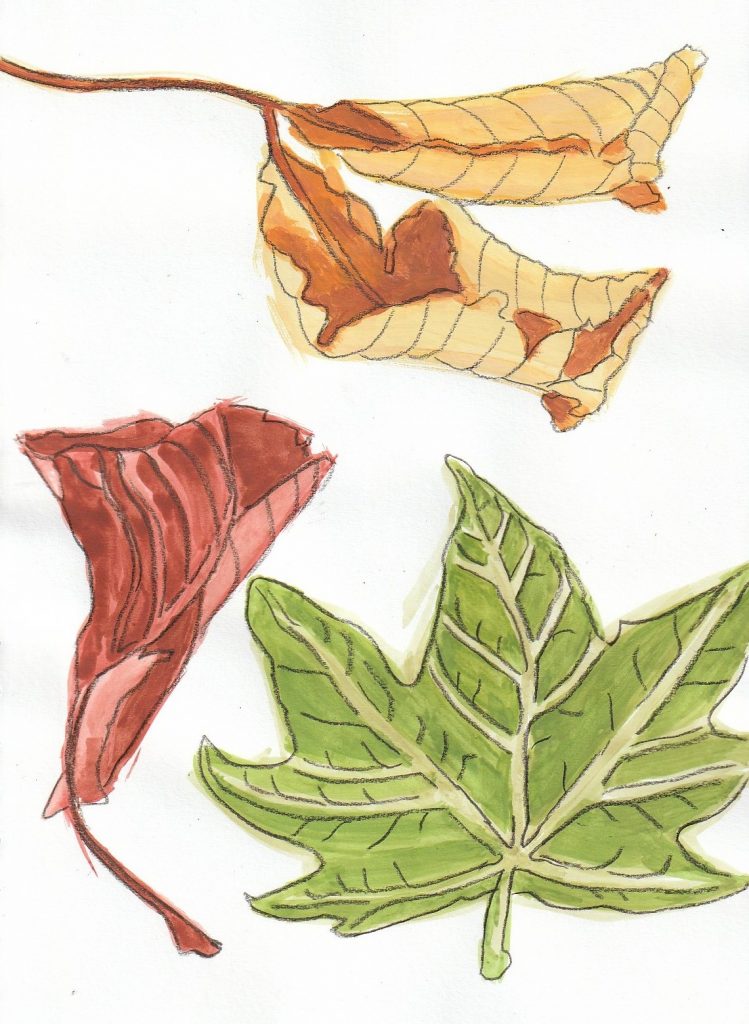
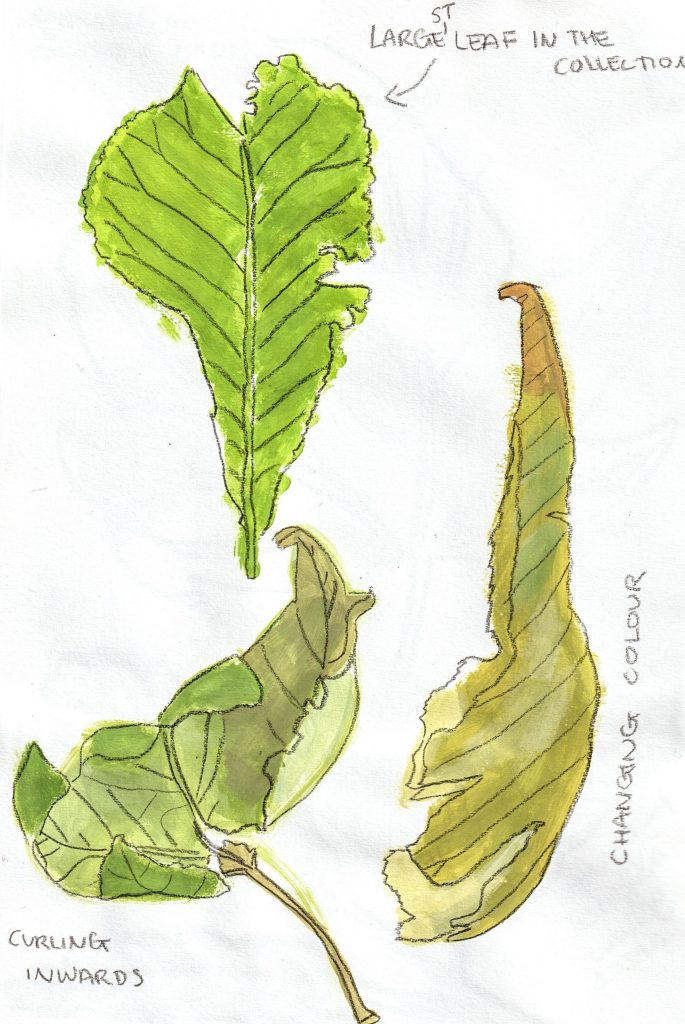
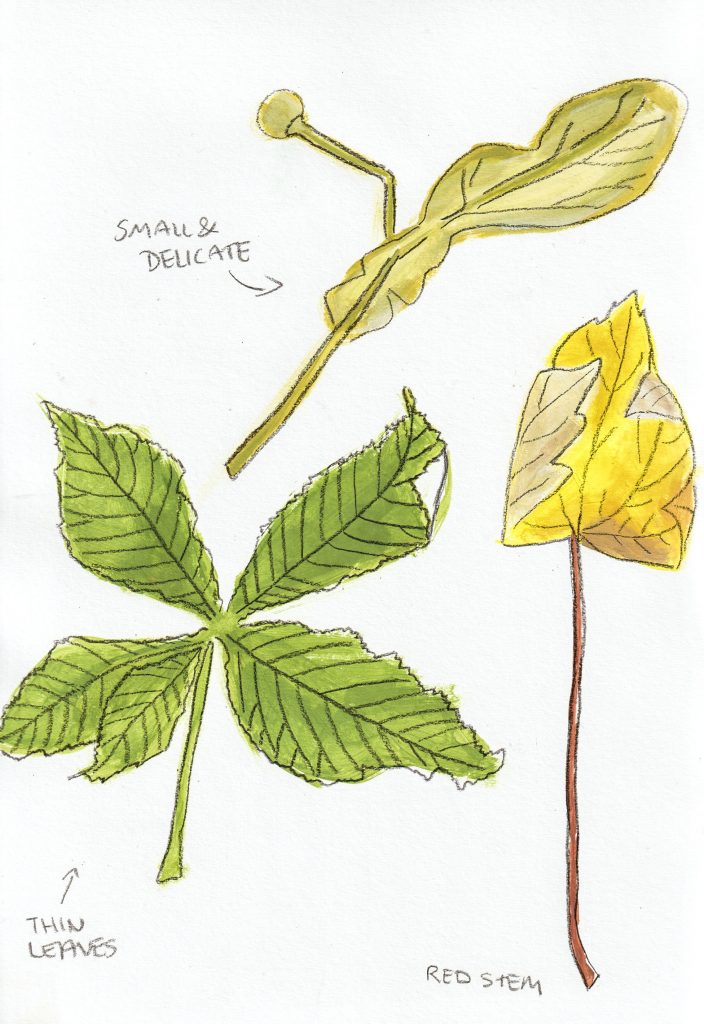
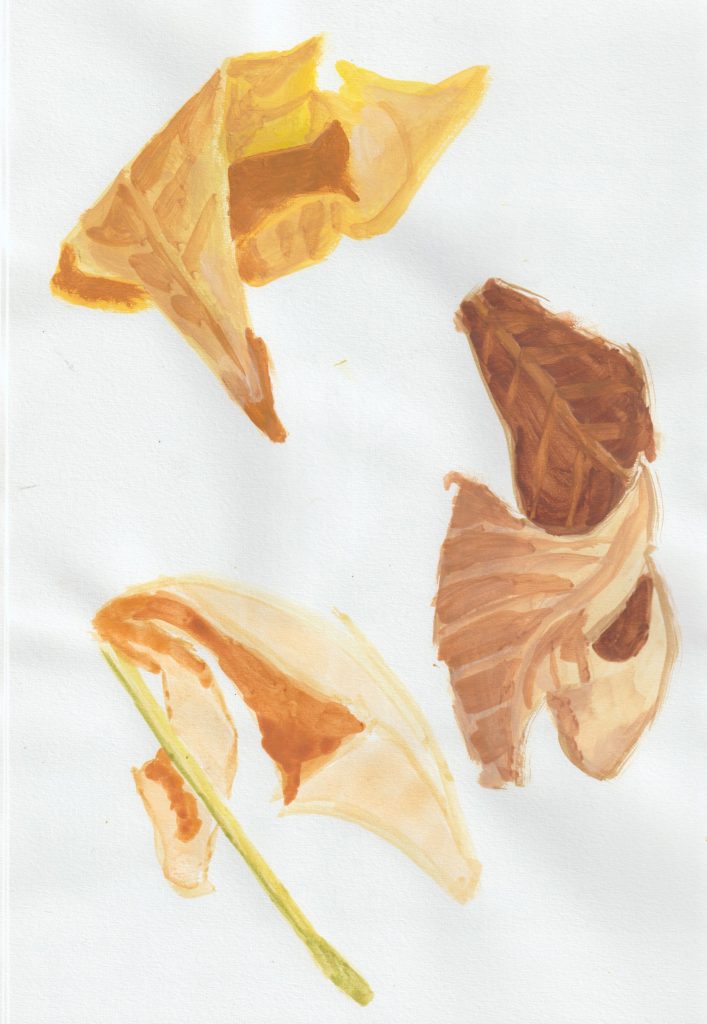
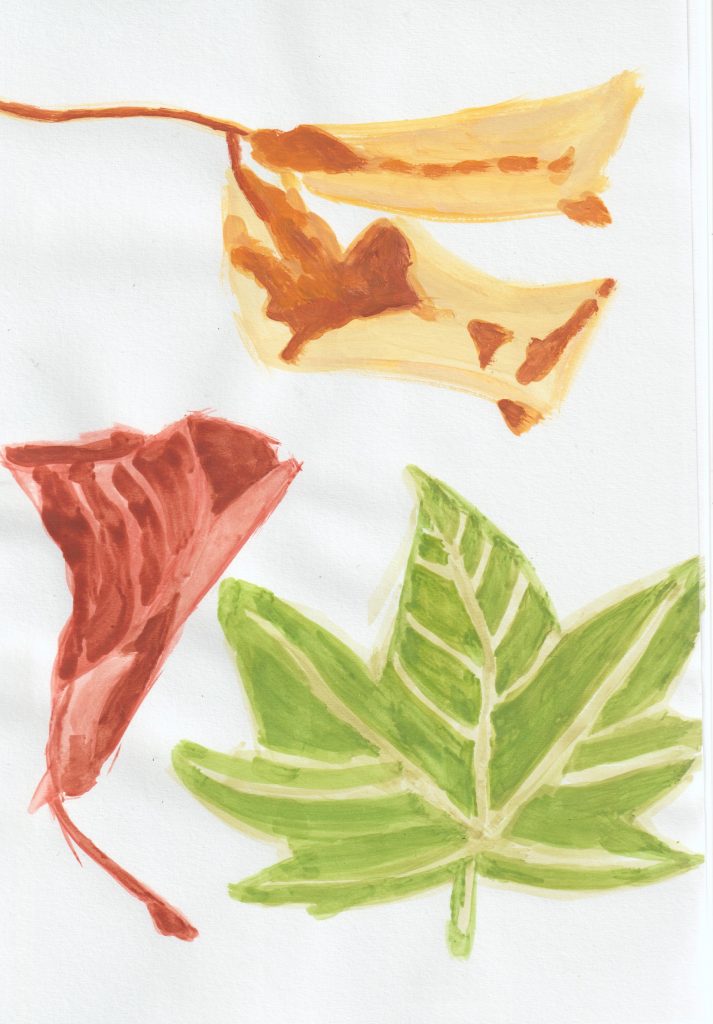
Taking photos of the leaves was a good way of recording the different colours, textures and shapes accuratley, but the process of taking photos didn’t allow me to absorb the subject visually. Photos are useful to keep as reference, but taking the photos takes a number of seconds. Drawing, on the other hand, requires the illustrator to explore the subject for a longer amount of time.
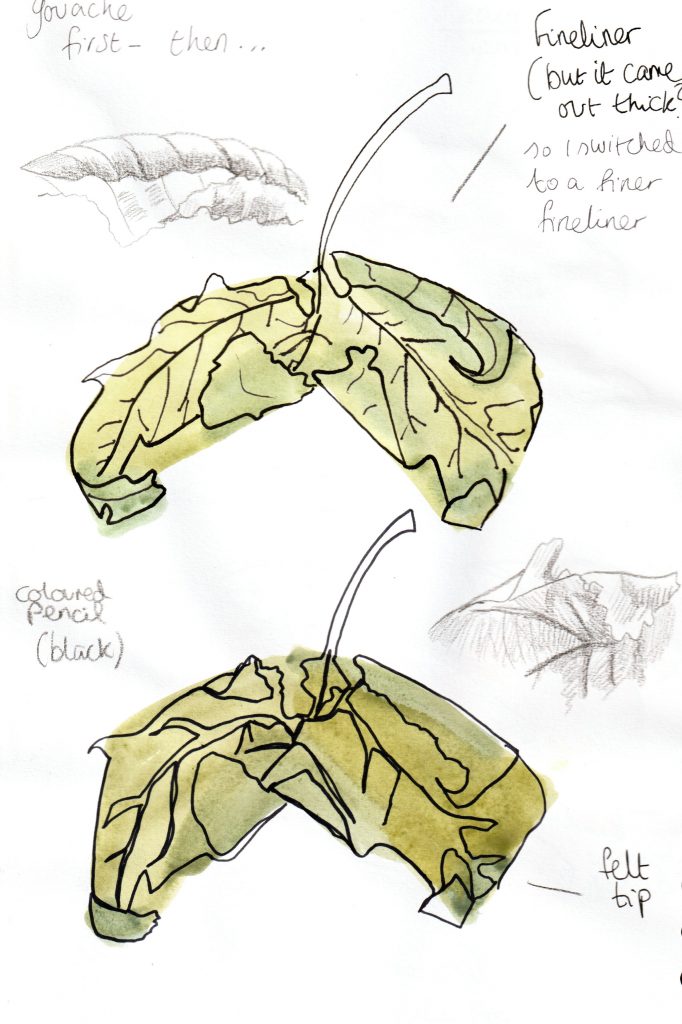
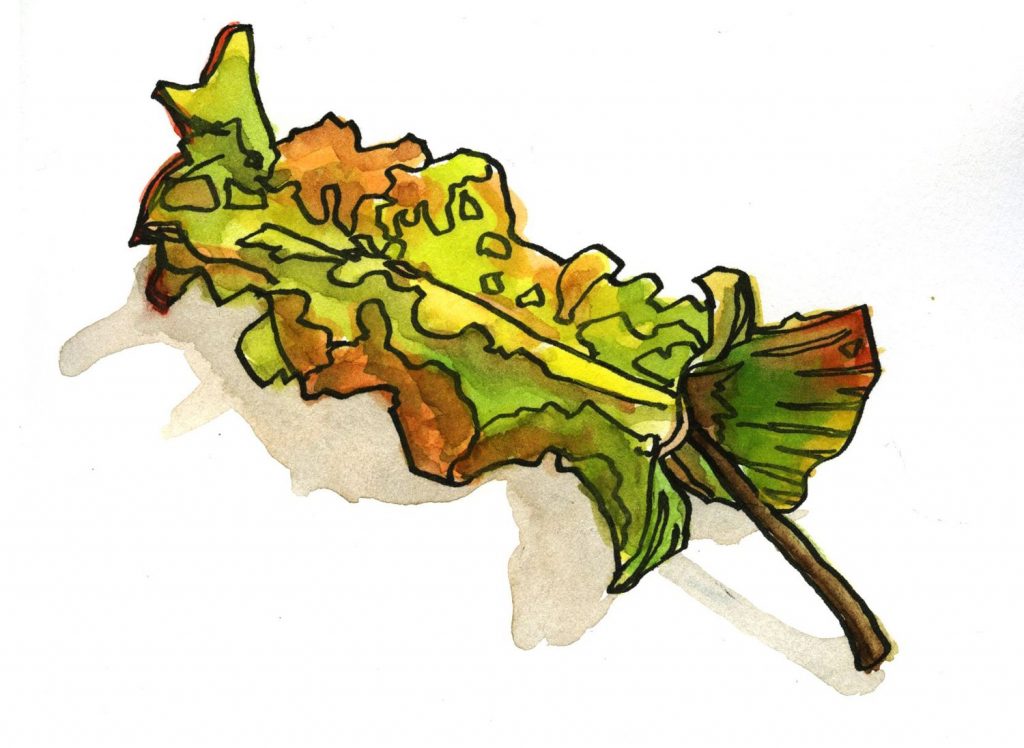
Gouache and coloured pencil (below, top). Brown pencil creates a softer mark against the watercolour layer. This medium allows a variety of texture to be expressed.
Gouache and pen (below, bottom). Painting a blob of colour onto the page, allowing it dry then drawing an outline drawing on top with a black fineliner pen.

(above) I was inspired by Charlotte Trounce’s brush pen markings. I don’t own a brush pen, so I used the next best thing, a pot of black India ink and a regular paintbrush.
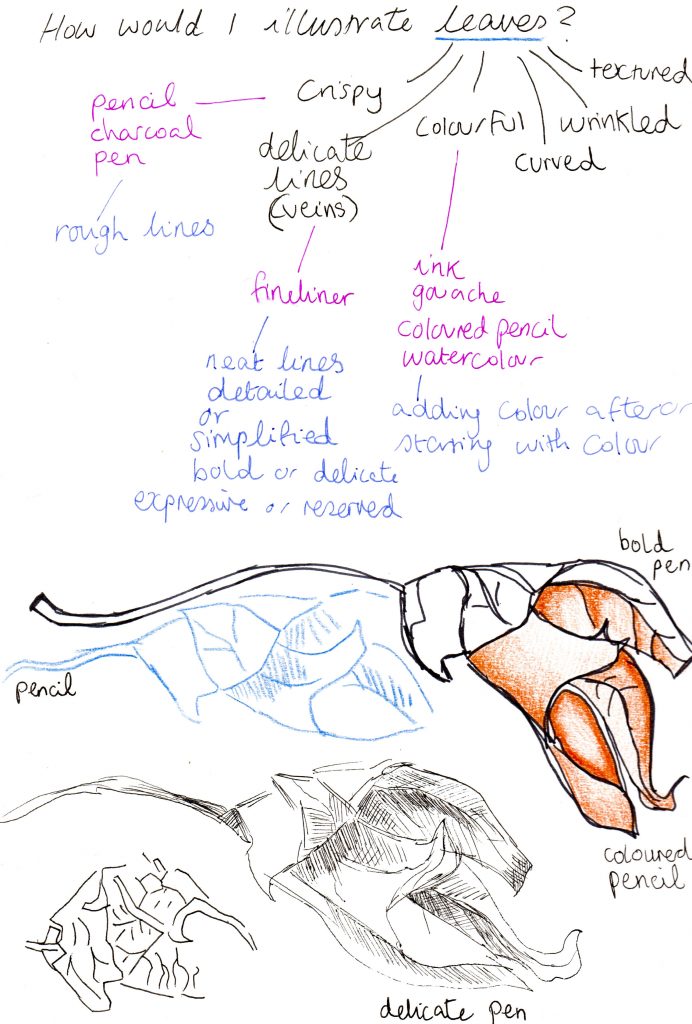
12 leaves
Step 1- painting colour onto the sketchbook page with gouache
Step 2- Adding line to the leaves. I added outlines and details with a black pencil.