This week, I had a go at editing my photos on Adobe Photoshop. Being new to the program, this was a case of experimenting with the tools. My focus was on improving the images as best as I could.
Unfortunately, I did not use the layers tool within Photoshop. This meant that the changes I was making were being made to the photo itself. After saving the document, I was unable to see my previous steps in the history toolbar.
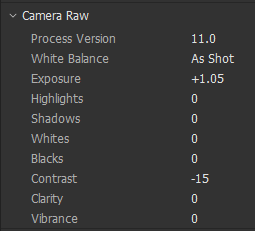
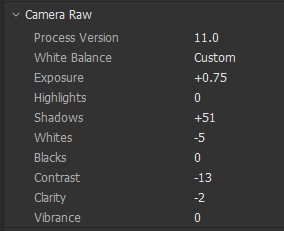
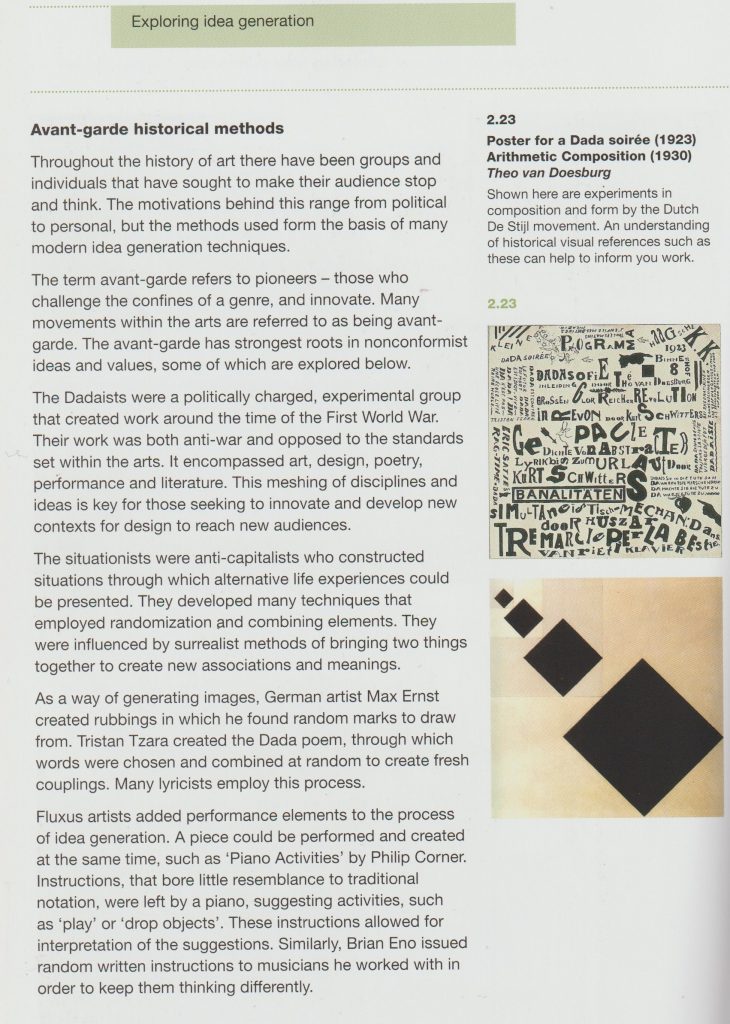
I opened the photos in camera RAW. This allowed me to make changes to the photo before making further adjustments in Photoshop. By then opening the final image in Adobe Bridge, I was able to see the adjustments I made in camera RAW.
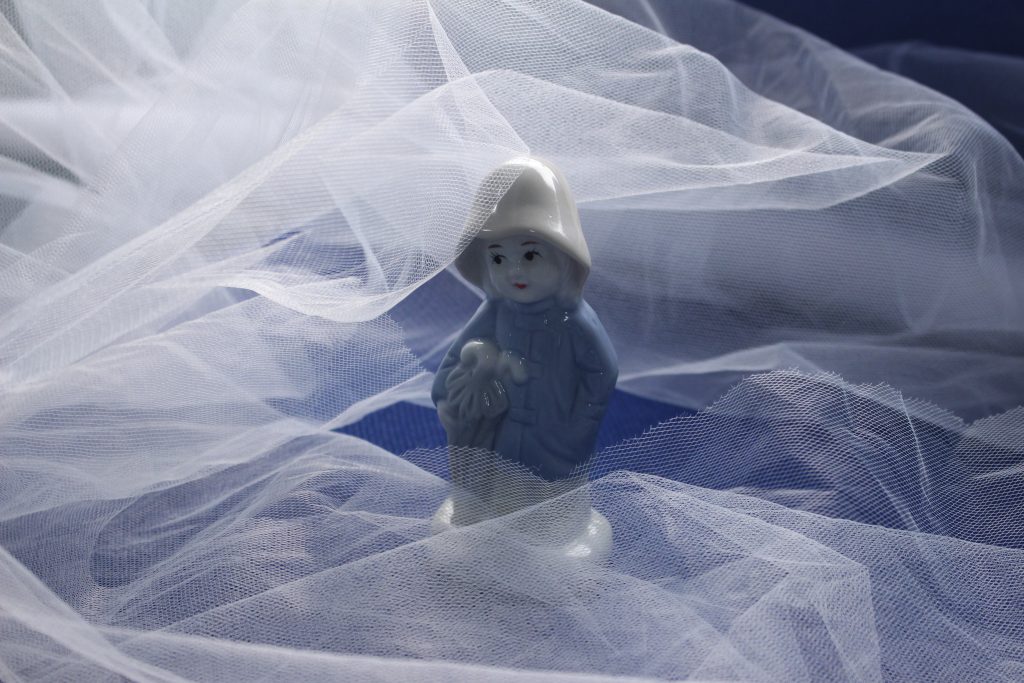
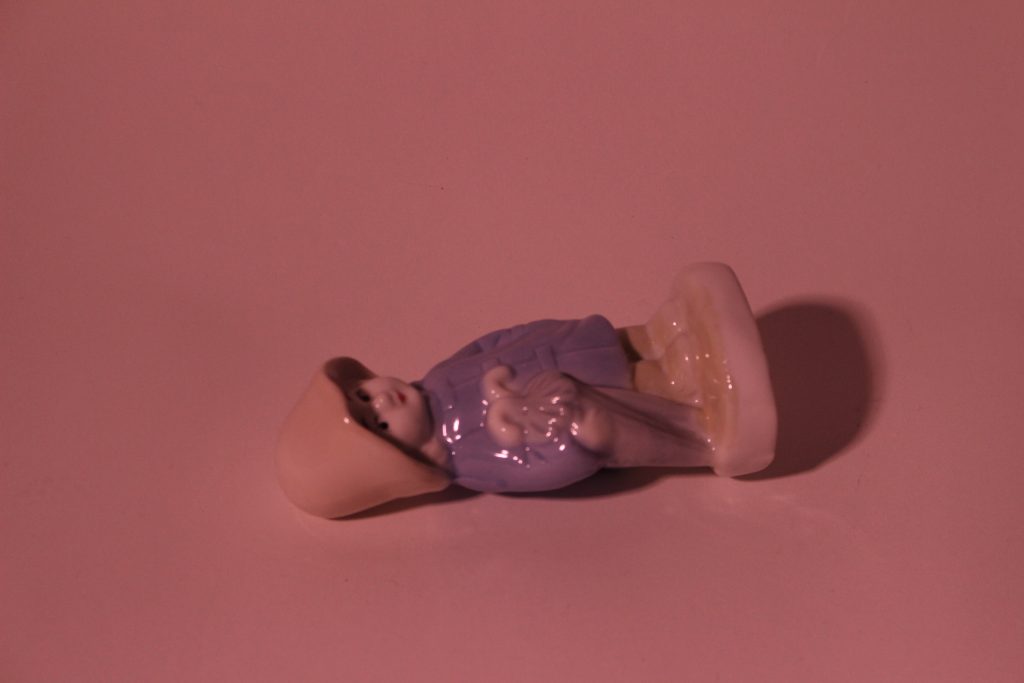
Before
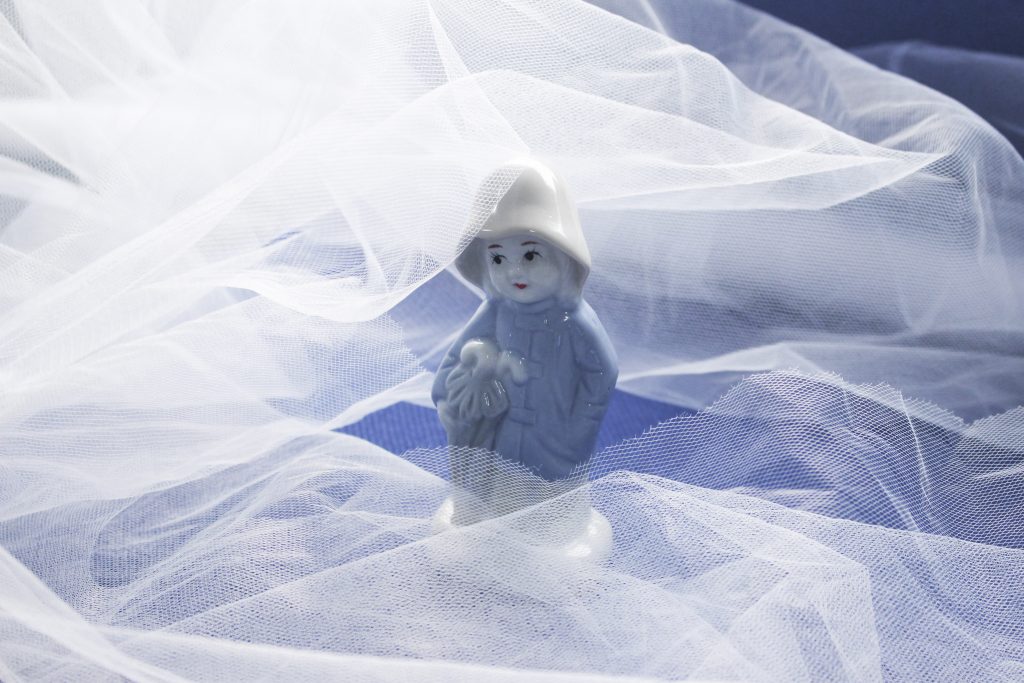
After
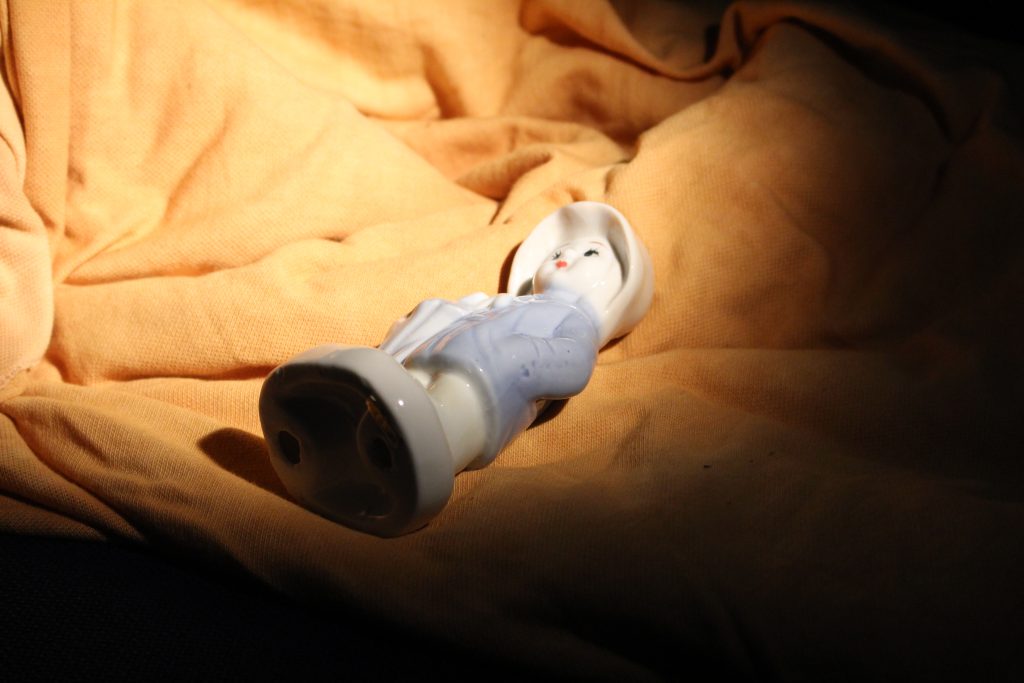
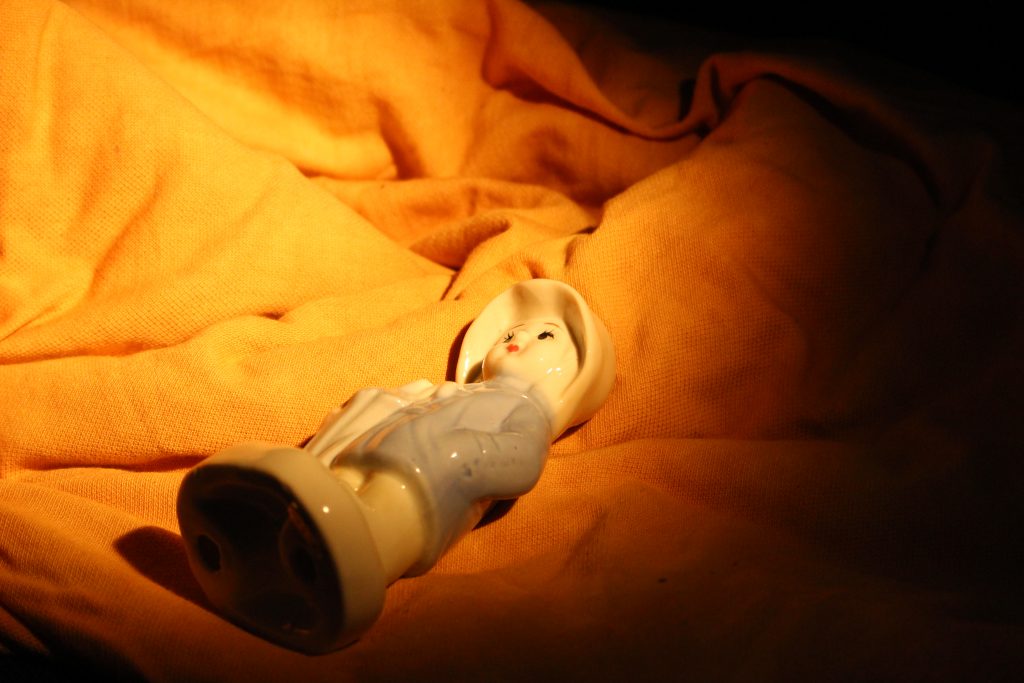
I lowered the contrast to give a softer feel and made the over all image brighter. I wanted to create a dream-like image, like the figure is in the clouds.
Before
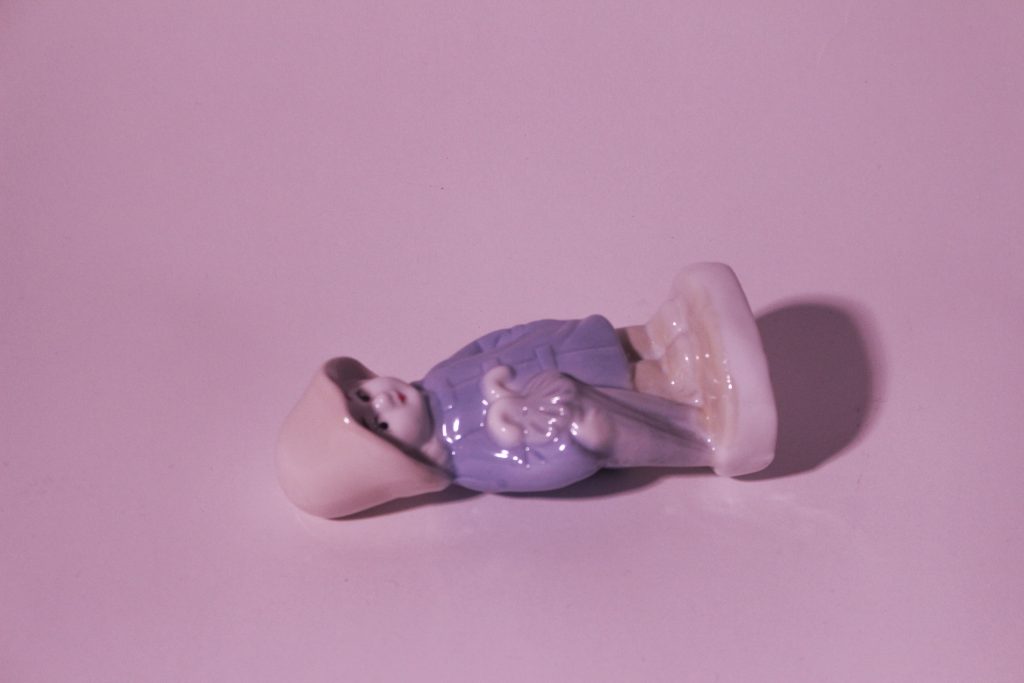
After
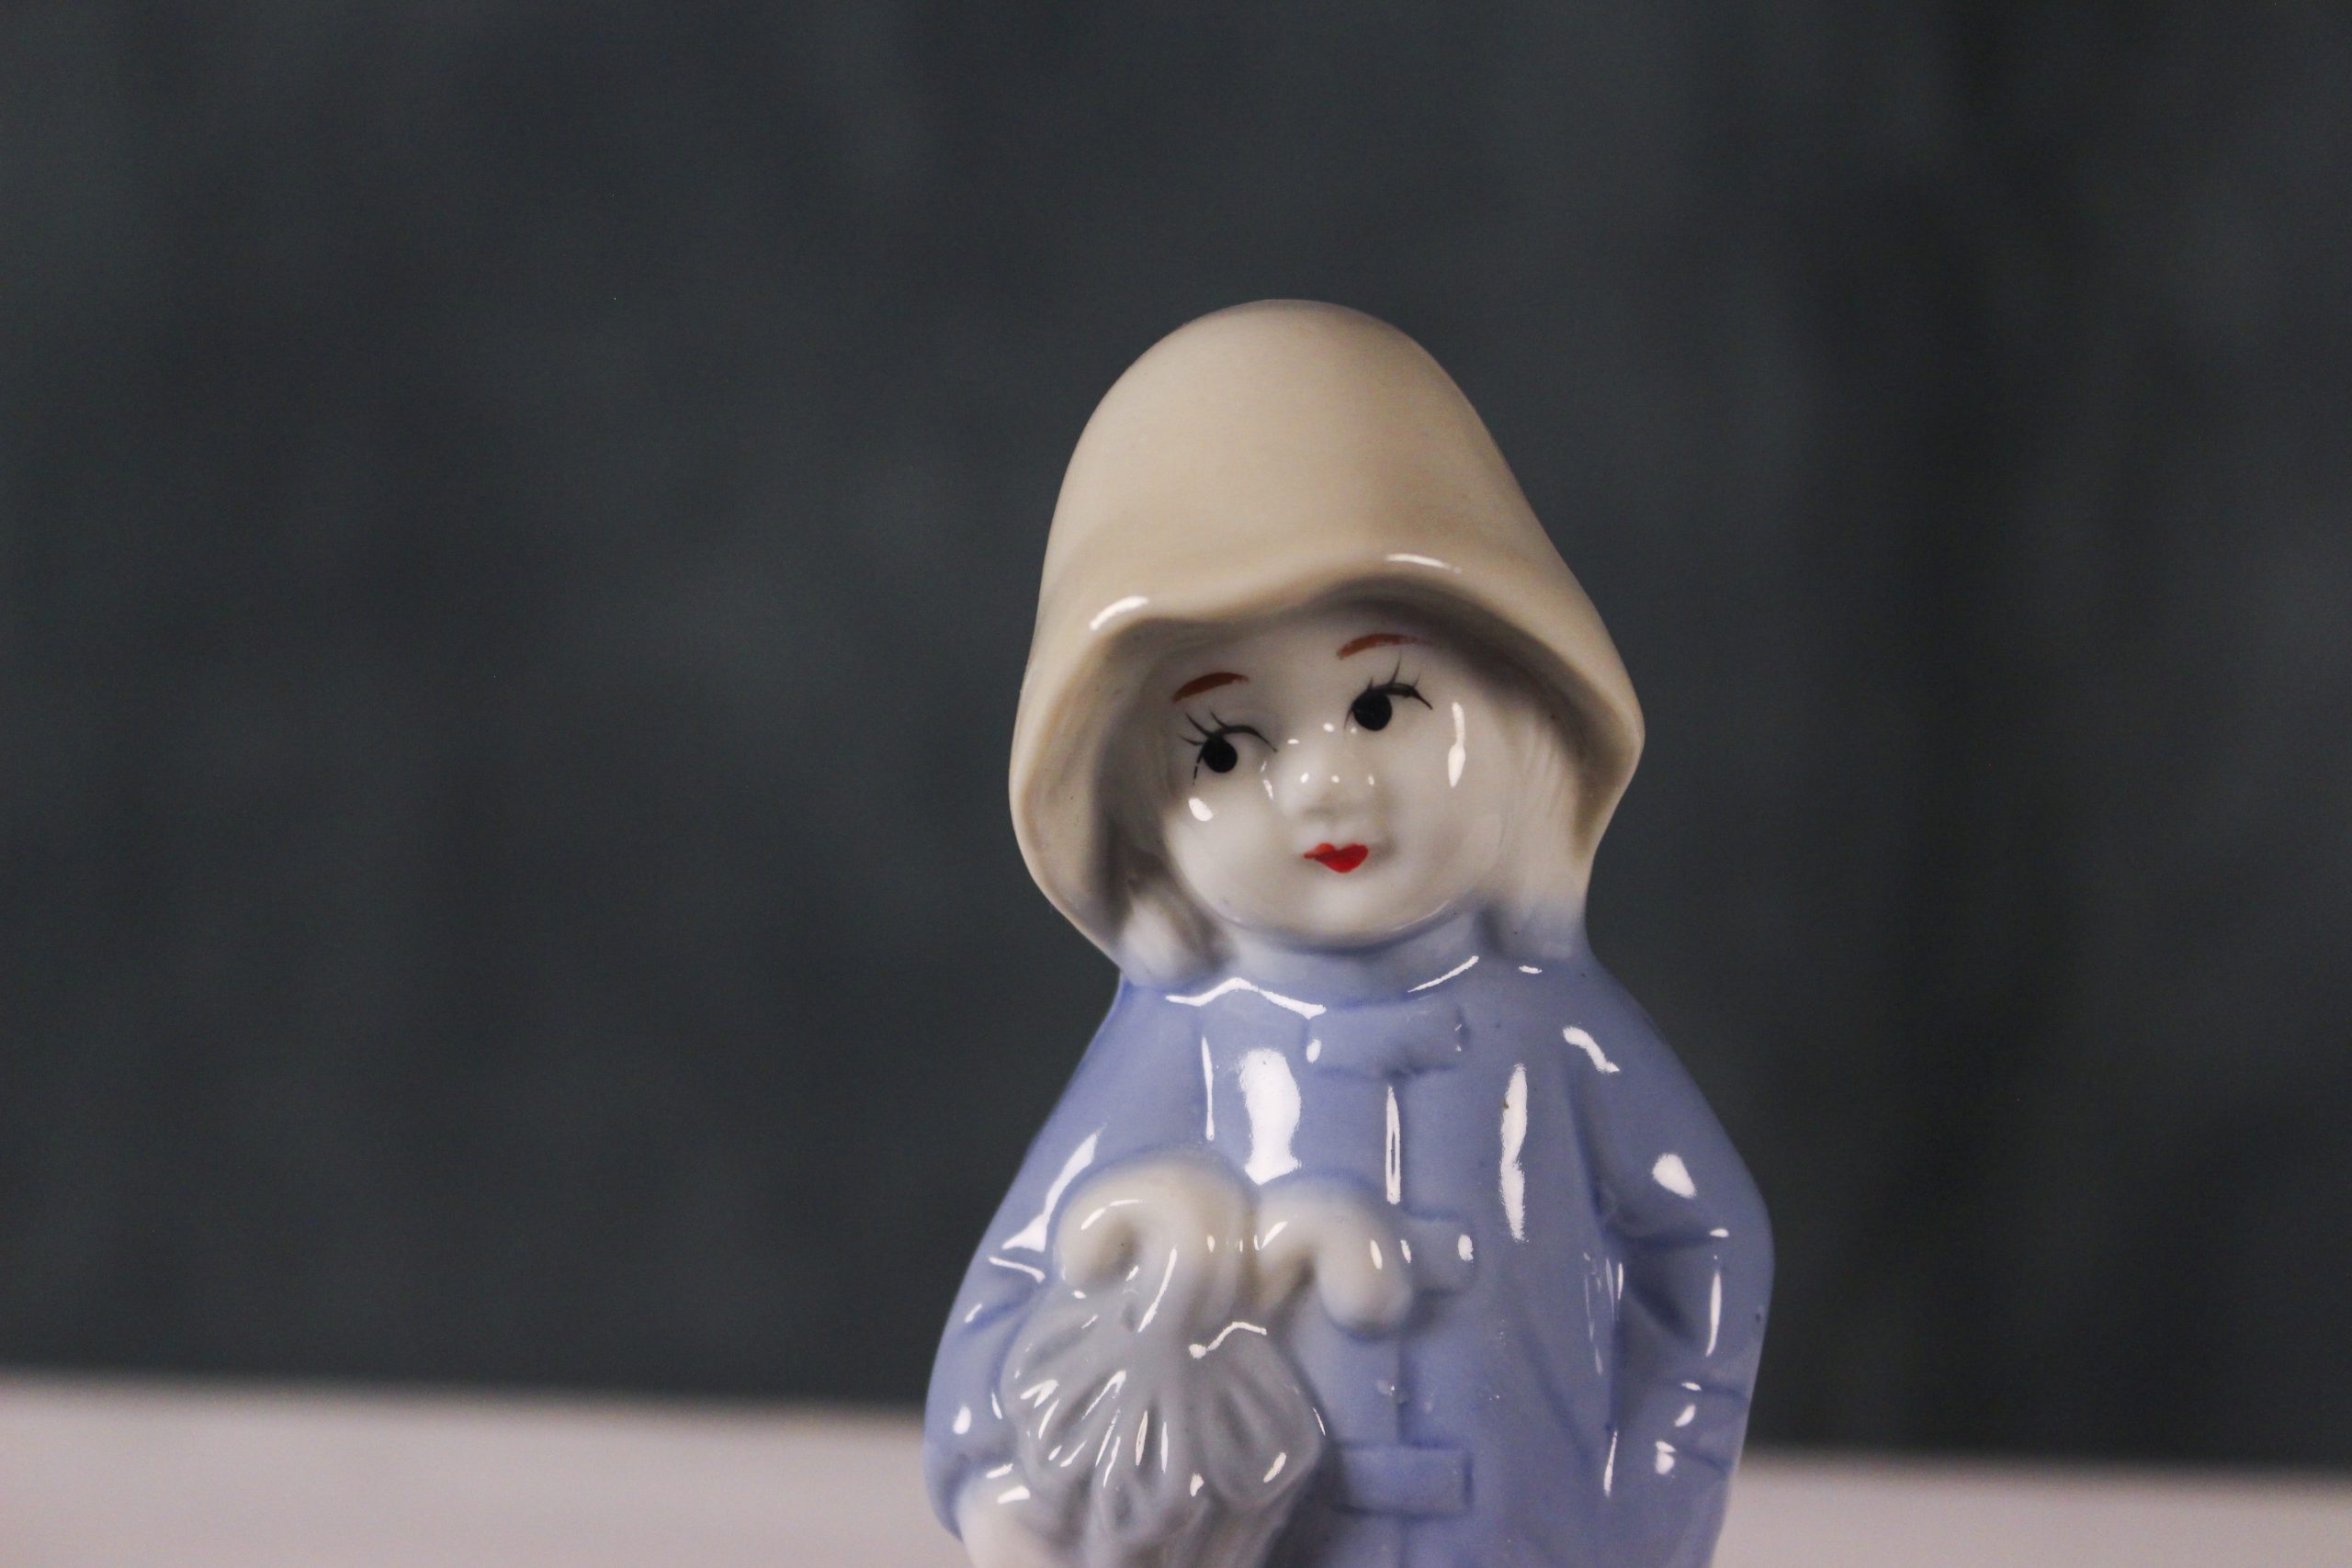
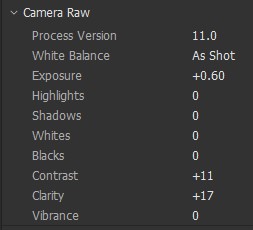
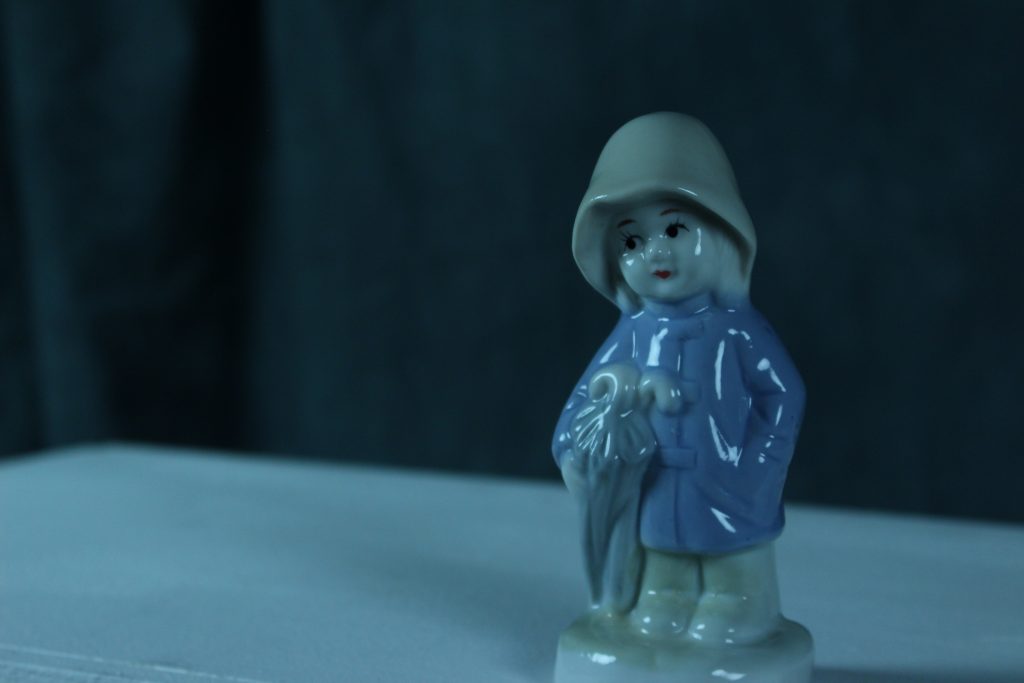
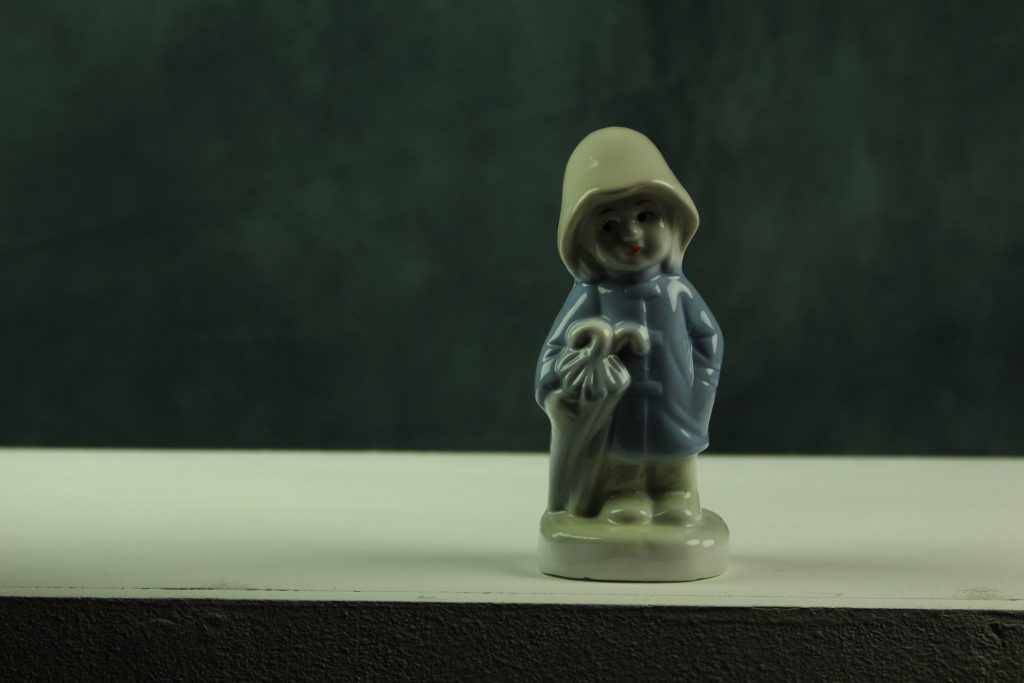
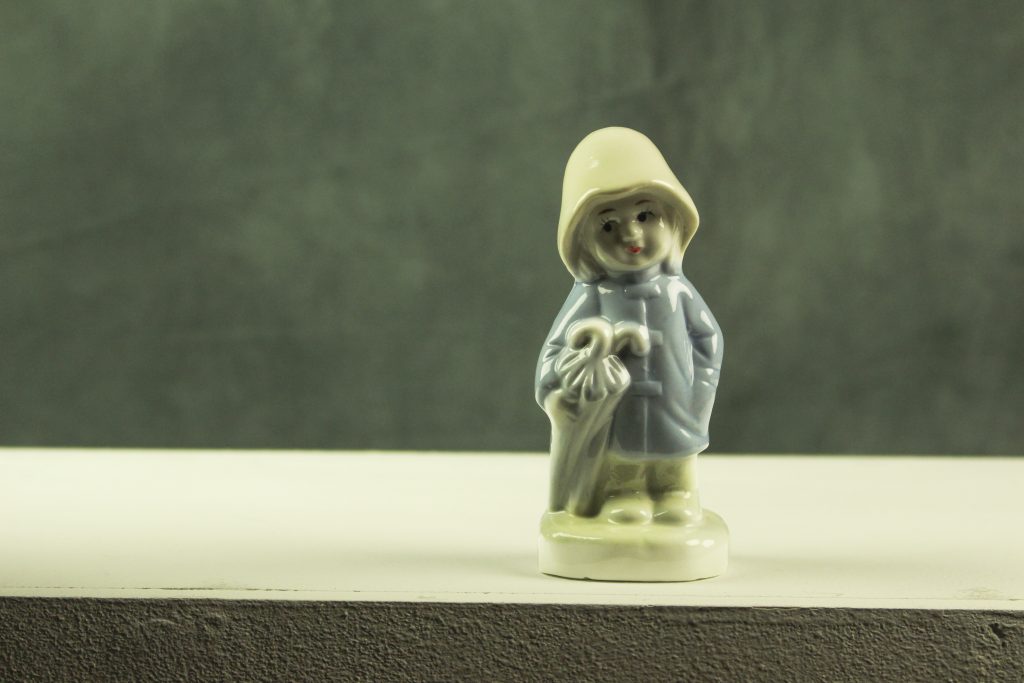
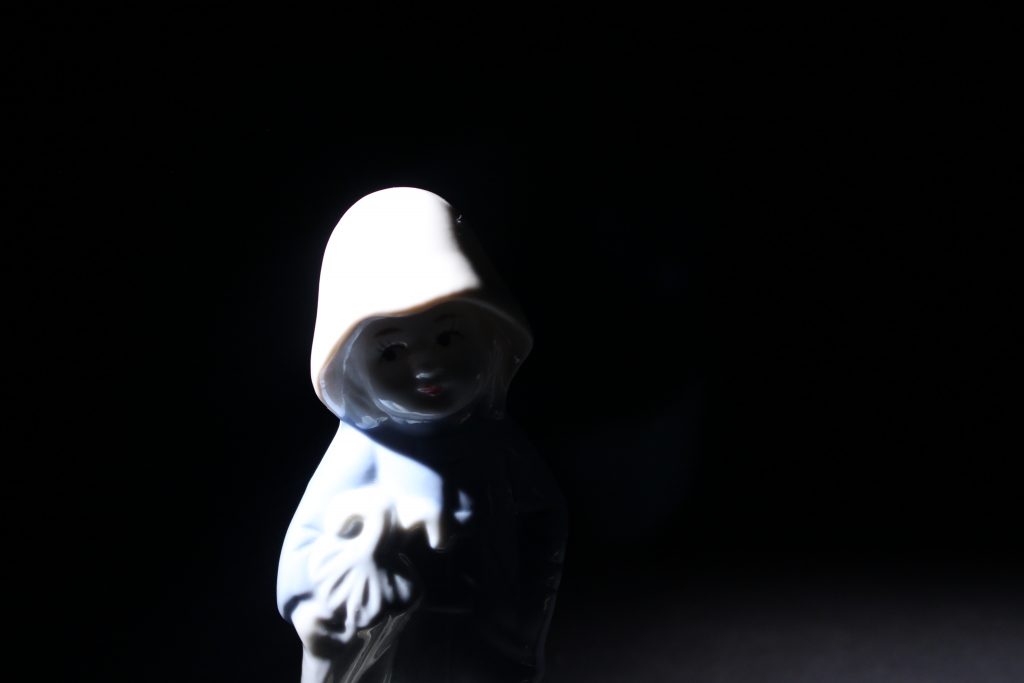
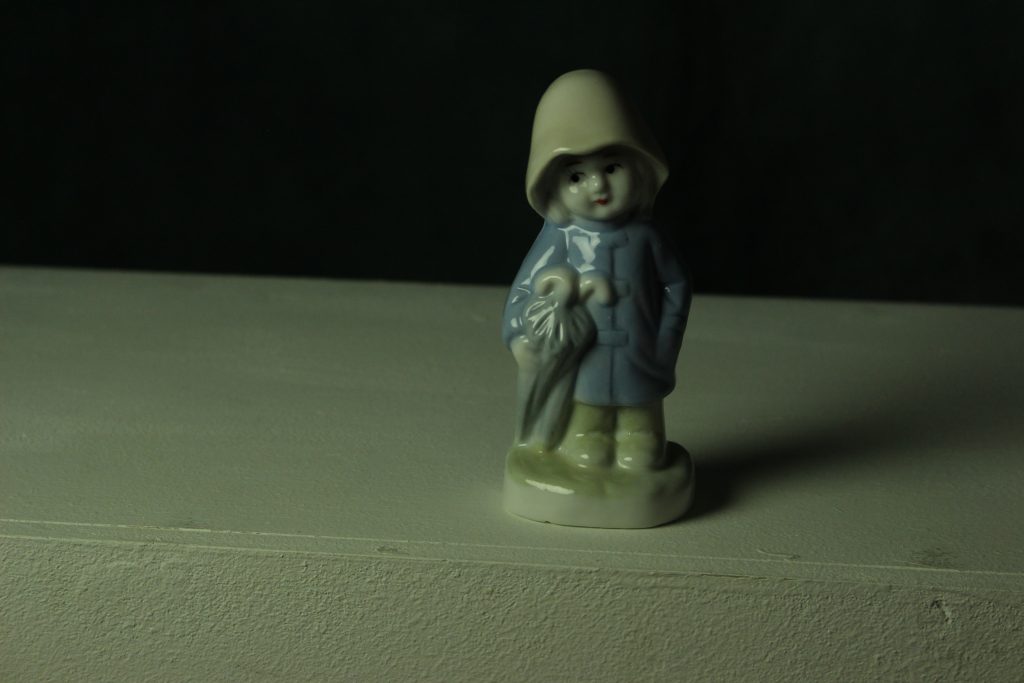
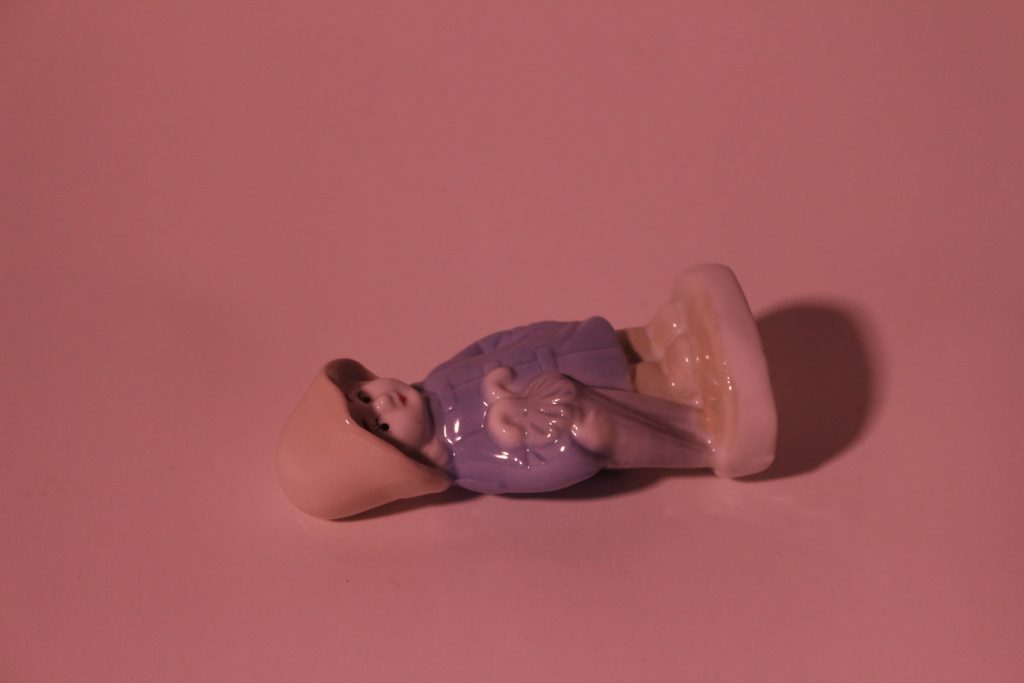
I found the original image too dark. I didn’t like how the background was contrasted against the figurine. After adjusting the image in photoshop, the background had more texture and the colours of the Raincoat Girl popped.
Before
After
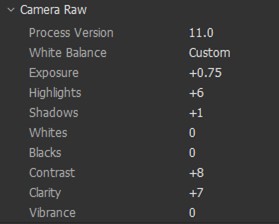
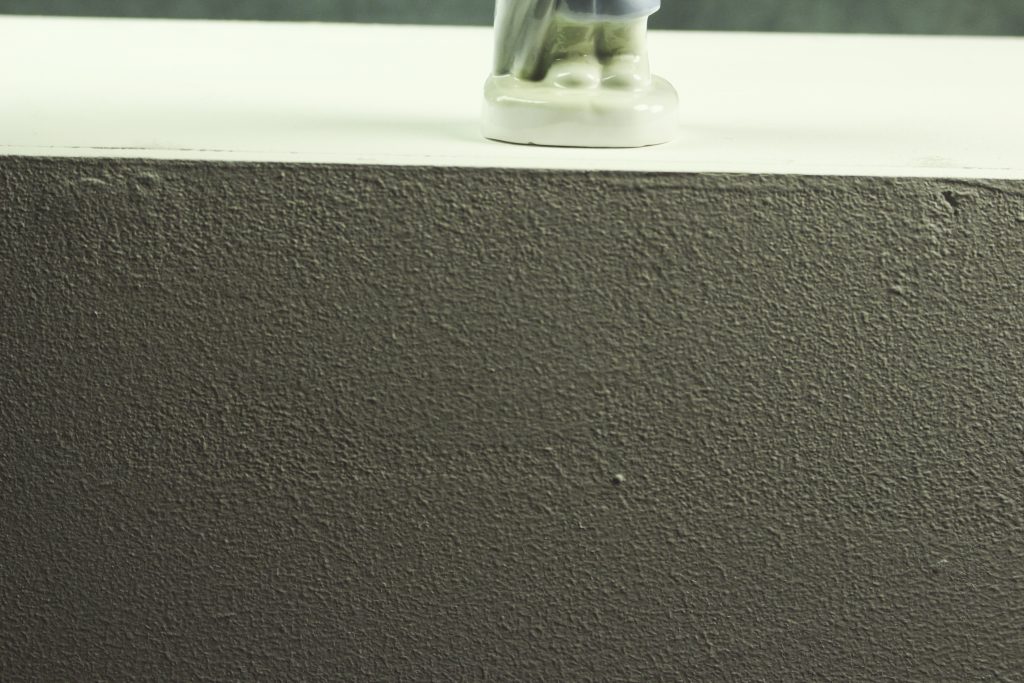
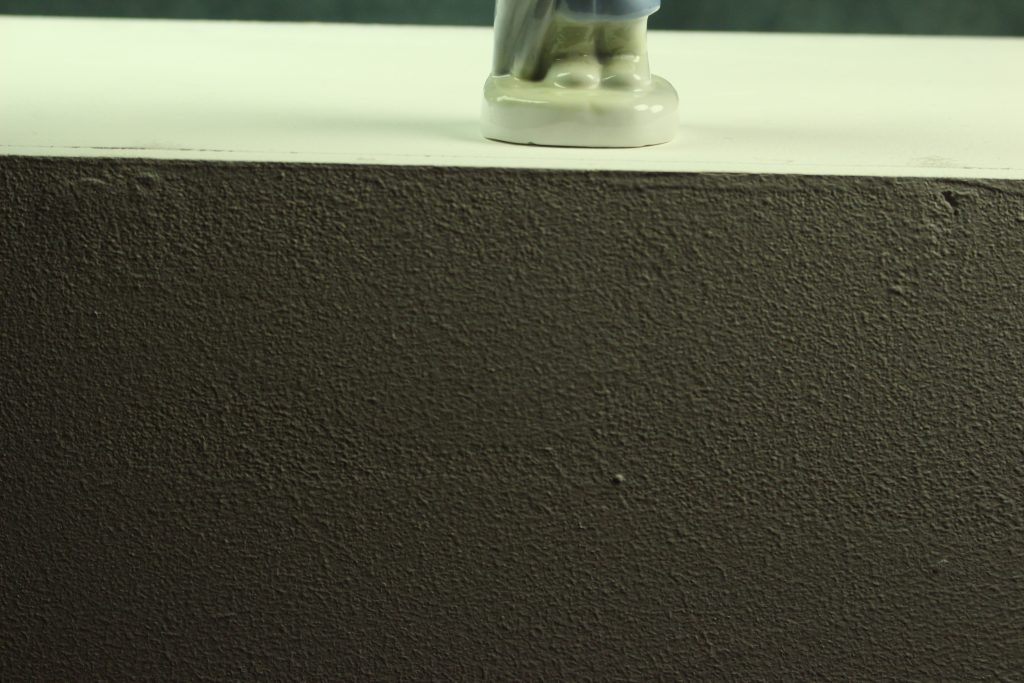
I used the quick selection tool to select the figurine in this photo. I then added contrast so that the boots were more defined. Brightening the wall in the foreground, shows more texture and made the image more interesting.
Before
After
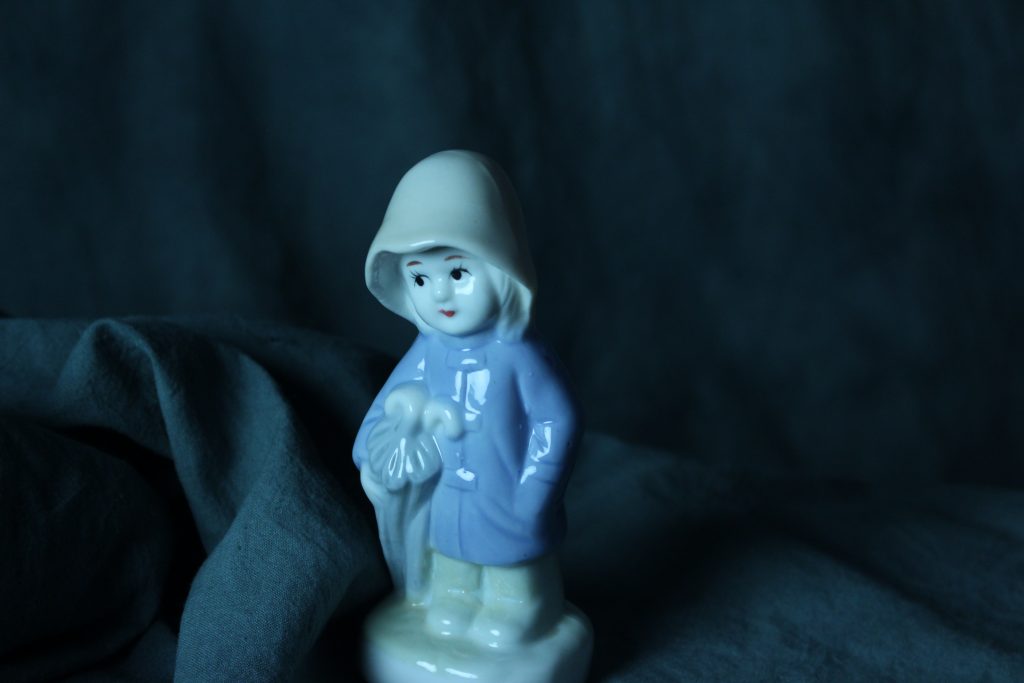
I liked the way I composed this photo and how the figure gazes into the distance. I felt it looked too dark and gloomy. I lifted the brightness in the image. However, I would like to add more saturation to lift the colour in this image.
Before
After
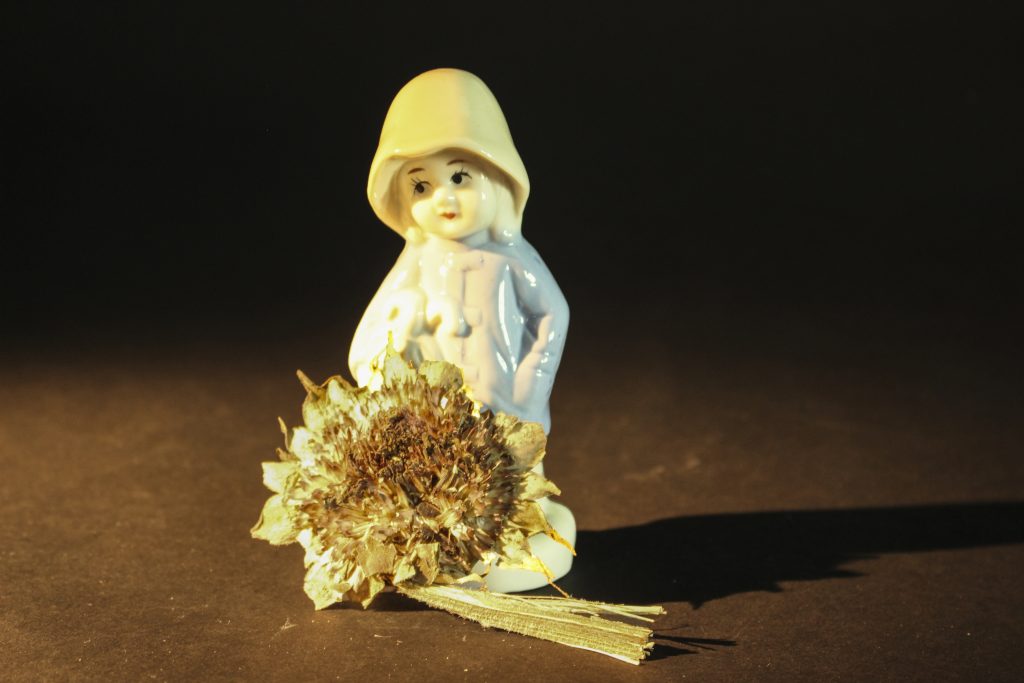
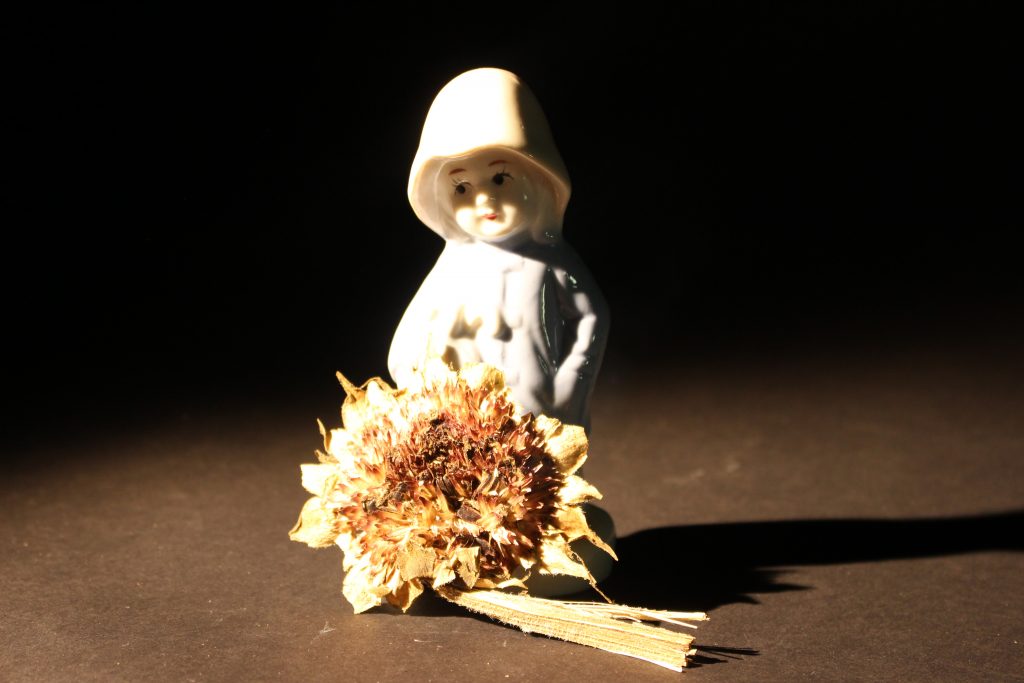
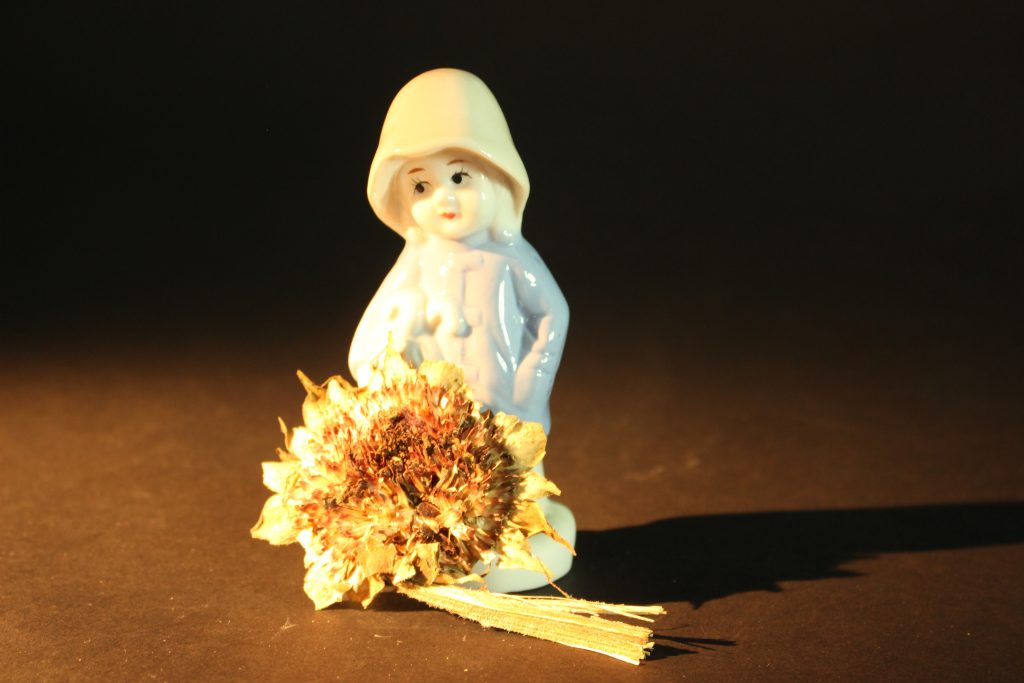
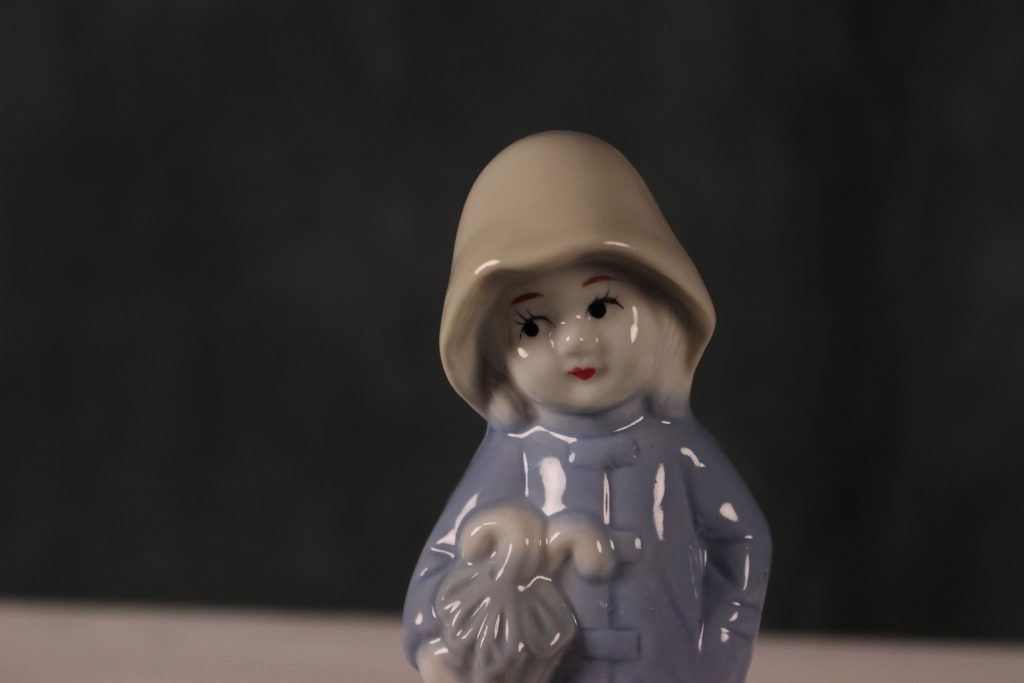
I added more contrast/ shadows to define the figure’s face. I toned down the colours and softened the sharpness of the sunflower.
Before
After
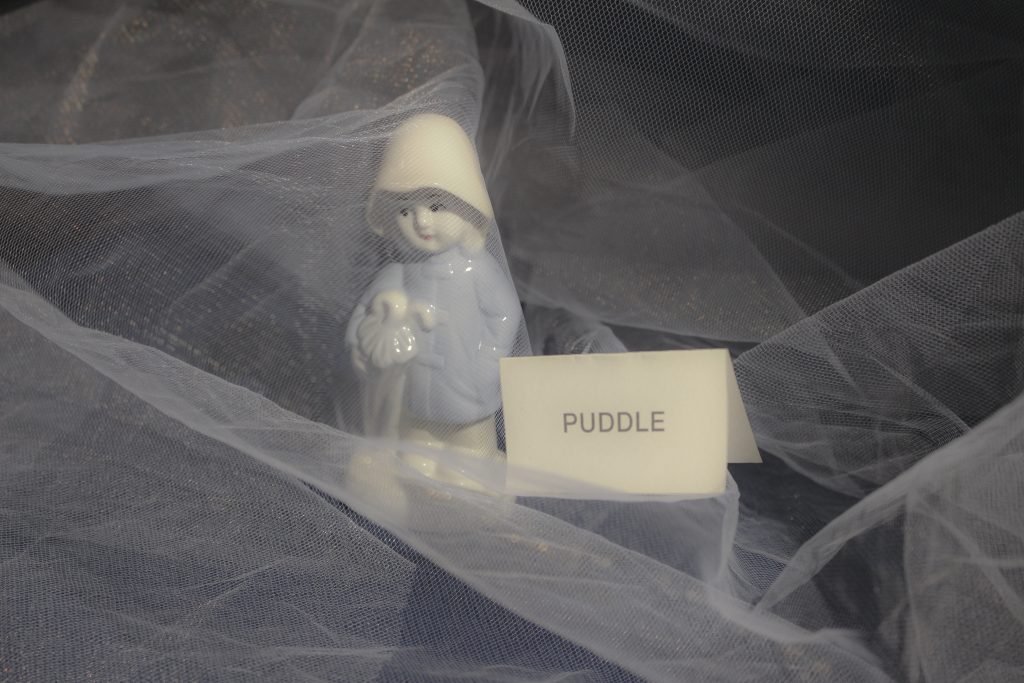
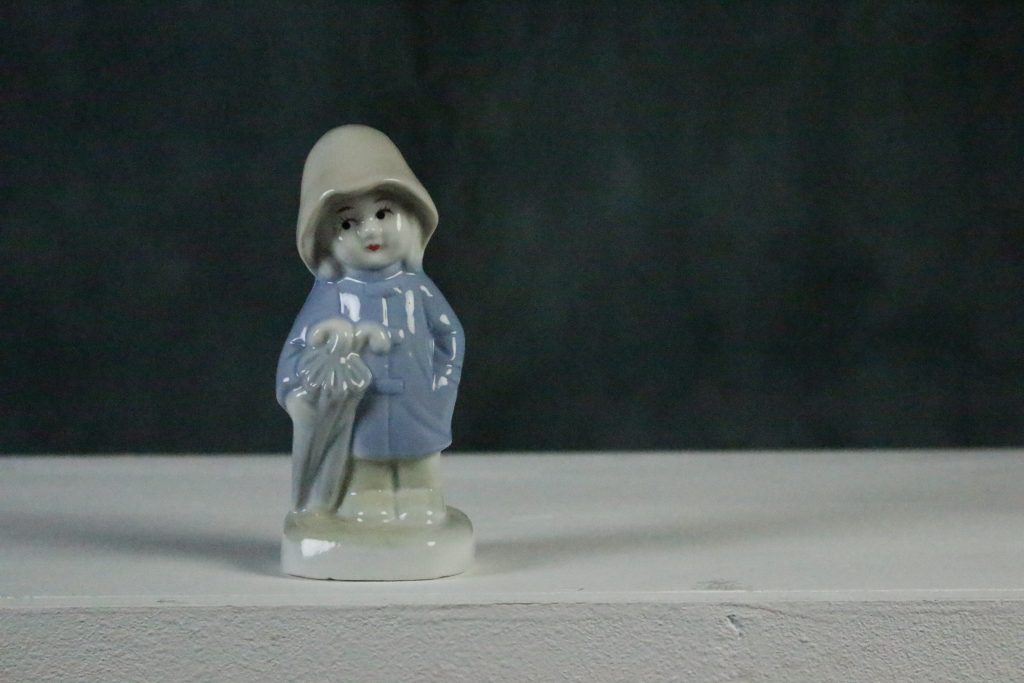
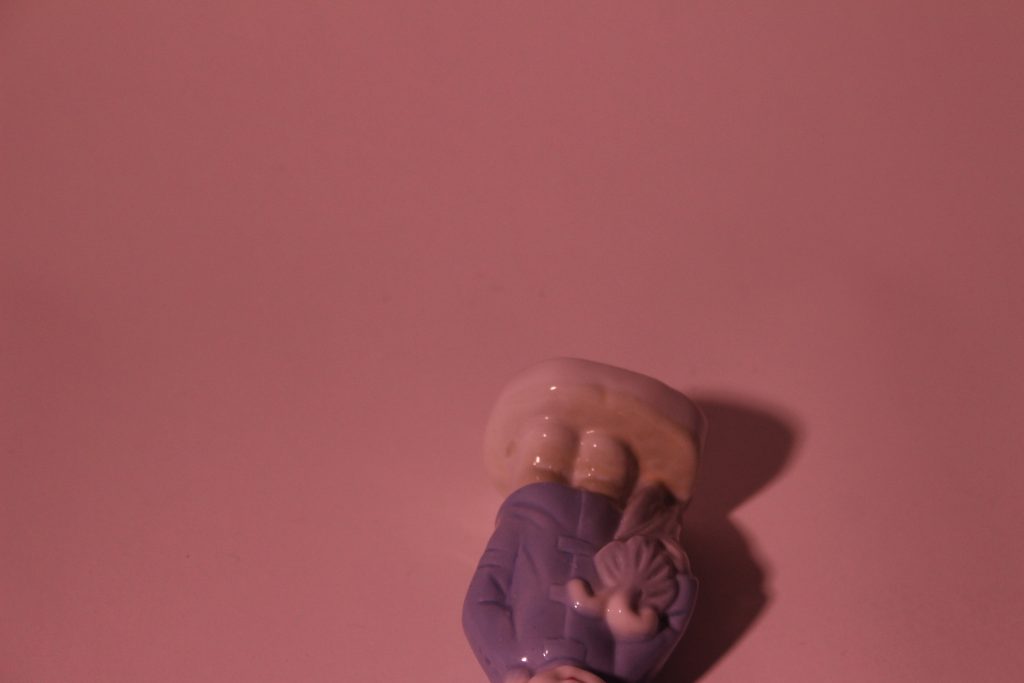
The original photo contained a lot of yellow. This is due to the warm toned lights reflecting off of the material. I could turn the colour temperature down using the camera RAW program.
Before
After
This image is not in focus, so the end result is not perfect, but I wanted to try editing a coloured image like this. I increased the depth of the shadows and improved the overall colour.
Before
After
Increasing the exposure greatly improved this image, as the face became more visible. There is now more balance across the picture.
Workshop #4 Editor as Author- Designing with photographs
In week 4 we have been introduced to photobooks. Photobooks use mainly images and sometimes text to convey a message across the book. We discussed the importance of the editor of a newspaper and the way they shape the publication as much as an author. The way images are chosen, presented, edited and the sequence they appear in all have an effect on the overall narrative or message. The images can carry the stories.
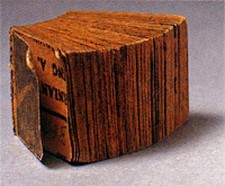
Dieter Roth
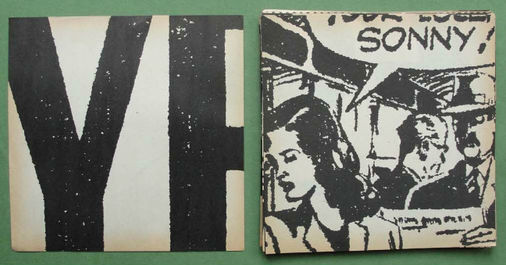
Some artists have created photobooks based on news stories. One example is Dieter Roth, who is known for making miniature books. In 1961 he made The Daily Mirror Book, using snippets from The Daily Mirror newspaper. In this way, the artist is maybe consciously or subconsciously interpreting the news and showing us the parts he is most drawn to.
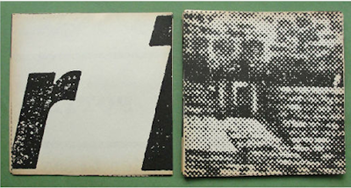
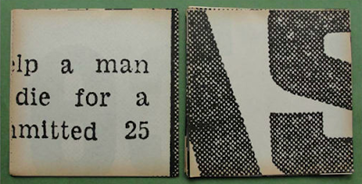
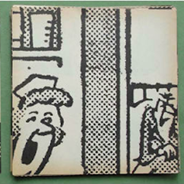
By using one small area of a photo or a piece of text, we are more aware of how the image looks visually. The meaning becomes ambiguous, and this leads the viewer to guess what they are looking at. Is this snippet from a story about something positive or negative for example. By showing half of a sentence, our minds try to fill in the gaps of the area we are not seeing. The artists choice of images shows us something about his personality. For example, some of the images are quirky and humorous when taken out of context.
Daily Mirror Book
In a way, he is reconstructing the book by forming a new book made from the old book. He is giving the newspaper a new life and making it more meaningful to people. A newspaper is an object that is thrown away after use (a transient object) By constructing The Daily Mirror Book, he is creating an object that has value. If someone handed me a newspaper, I may or may not read it but it would soon go into the bin. If someone handed me a tiny book they had spent time and effort into creating, I would likely keep it.(it has become a durable object)
From Idea Generation by Neil Leonard and Gavin Ambrose
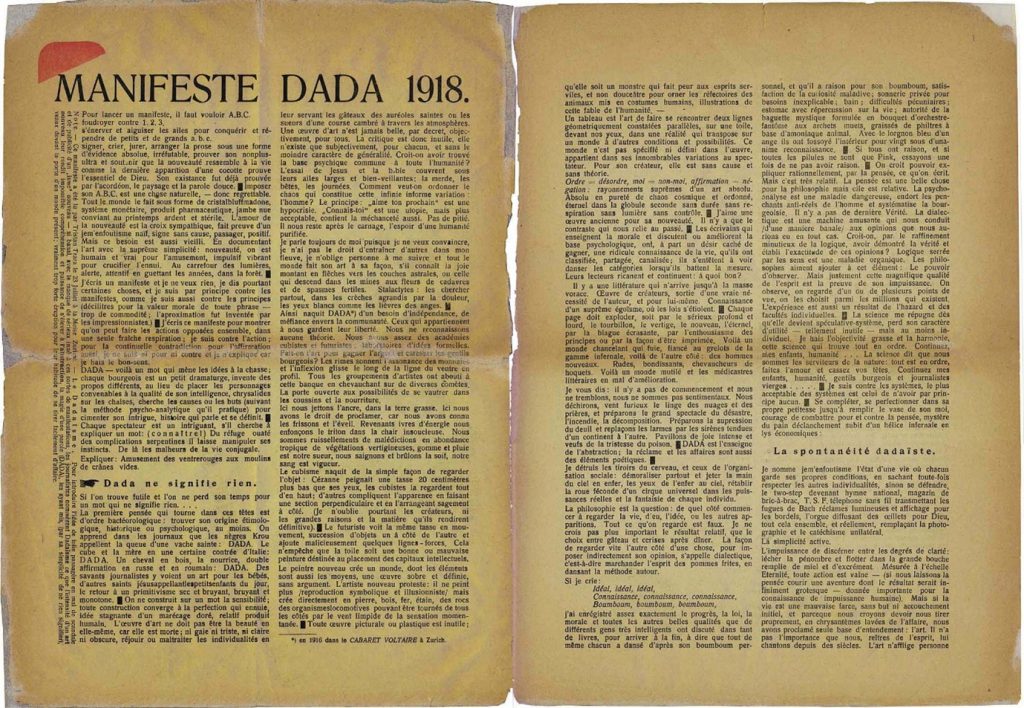
To make a Dadaist Poem is a set of instructions written by Tristan Tzara in 1920. Dadaists and other artists and writers, such as William Burroughs of the Beat Generation in the 1960s, would use similar techniques when coming up with inspiration for their work. To make a Dadaist Poem encourages spontaneity in the creative process.
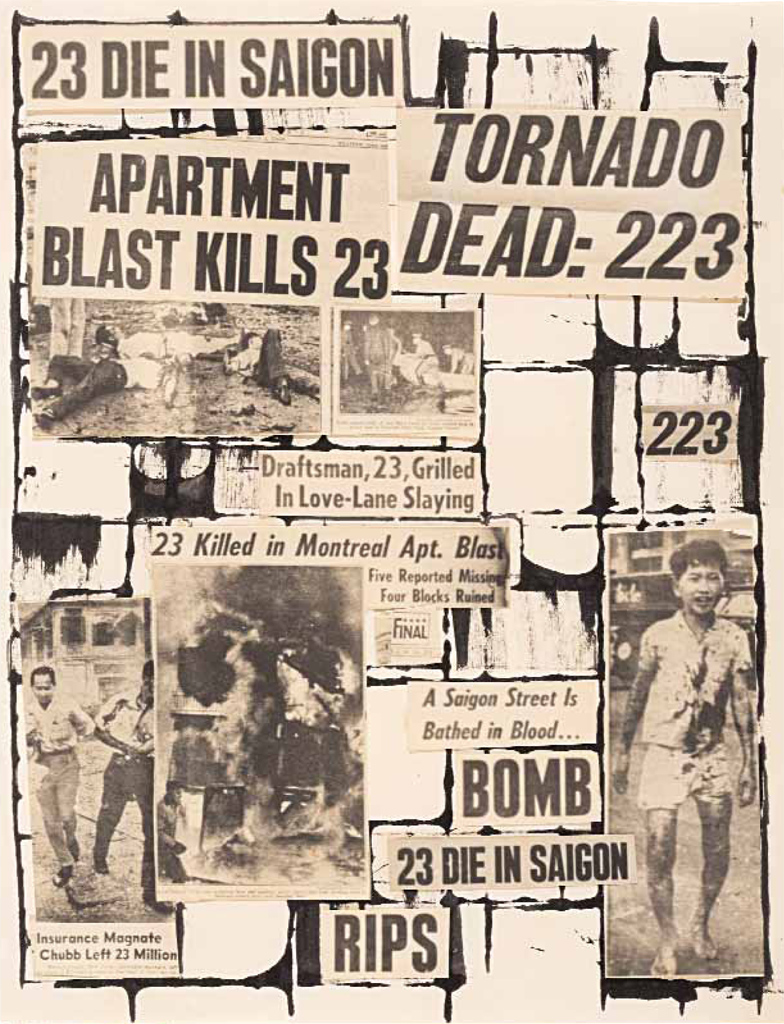
By juxtaposing ideas, the artist is making something new. The unpredictability of these methods means the artist is open to inspiration and the outcome is interesting and unusual.
‘2-page layout of Tristan Tzara’s Dada Manifesto, printed in Dada 3 (December 1918)‘
The poet Tristan Tzara was a strong advocate of the international Dada movement, but his Dada Manifesto of 1918 appears to be complete nonsense. It is, in fact, just that — but in a really interesting way that perfectly serves the goals of the Dada movement
Tzara, gave the following instructions on how “To make a Dadaist Poem” (1920):
Take a newspaper. Take some scissors. Choose from this paper an article the length you want to make your poem. Cut out the article. Next carefully cut out each of the words that make up this article and put them all in a bag. Shake gently. Next take out each cutting one after the other. Copy conscientiously in the order in which they left the bag. The poem will resemble you. And there you are—an infinitely original author of charming sensibility, even though unappreciated by the vulgar herd.
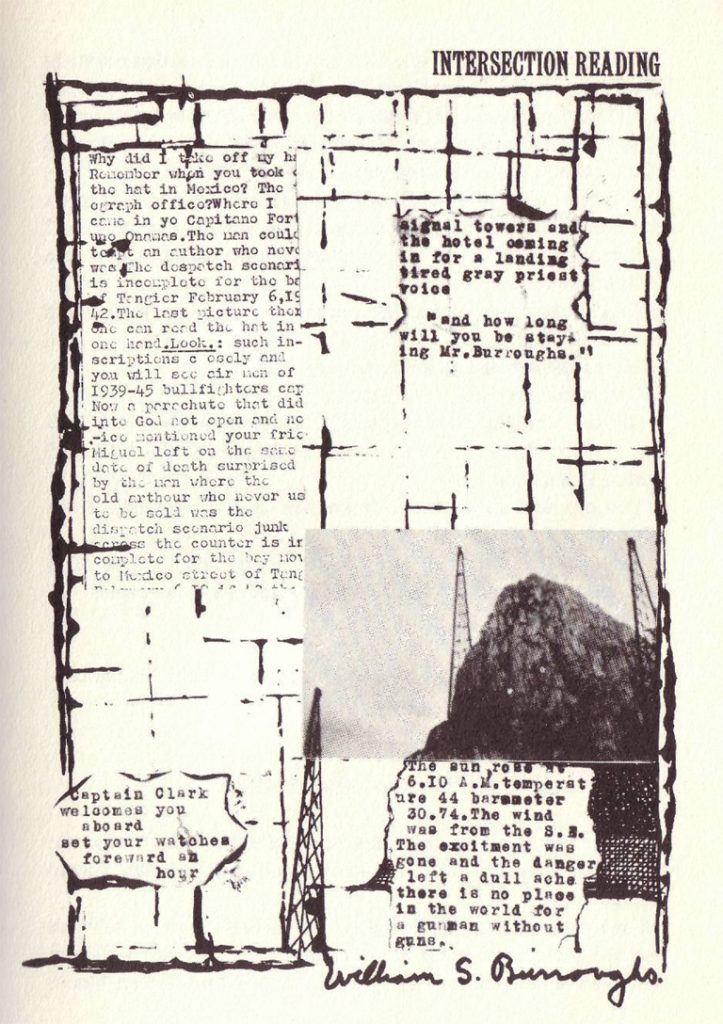
William Burroughs would use cut up techniques for writing ideas. Several of his books were written this way. He used a similar method where he would take a page of text, draw lines on it. He would cut up and invert the sections. This would produce interesting narratives. He was also a visual artist as well as poet and novelist. He put together scrapbooks and painted.
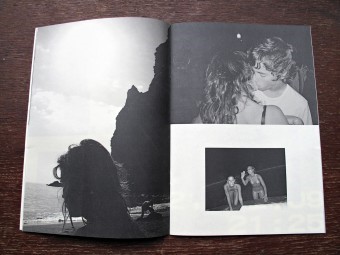
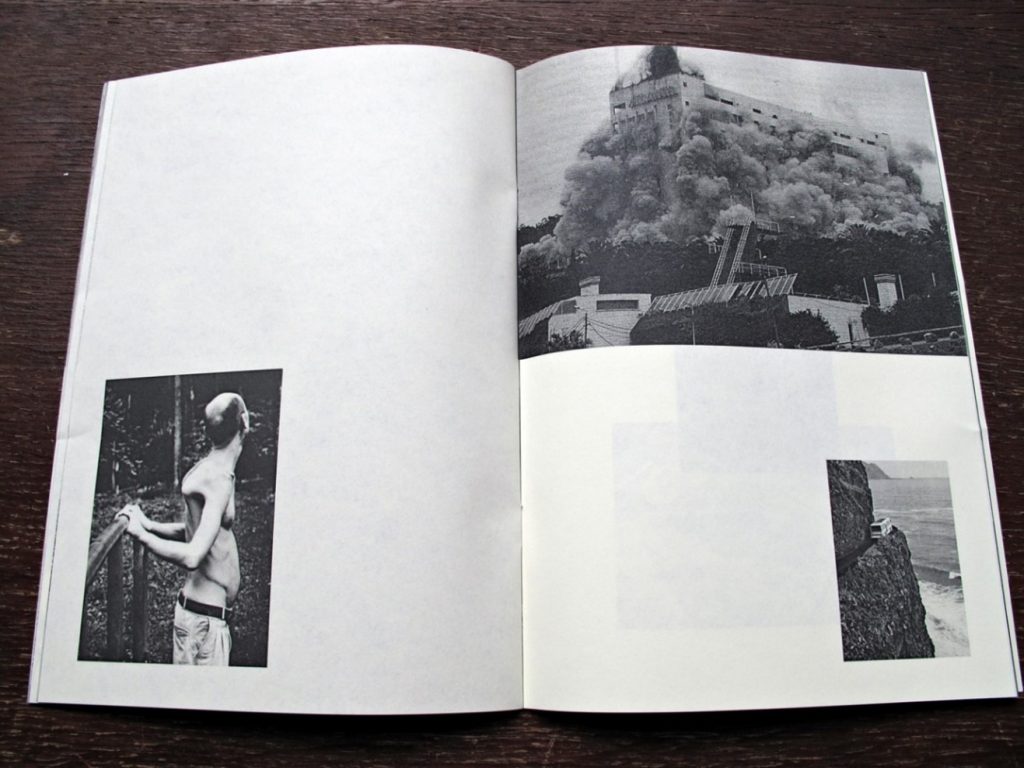
Inspired by Madeira, his birthplace, Ramos created the Black scabbard research centre. This photo book is made up of pictures from friends and pictures from the newspaper, all within Madeira. In this way, he is painting a picture of the region, made up of the many stories within it. I like that even though some pictures may not look like they have any connection to the picture on the next page, they are linked by their association with the place. Every picture seems out of context. Words are not needing because of the strength of the images.
In this photo book, he is juxtaposing 2 separate images – from 2 far apart moments. By placing the images together, the viewer makes up a narrative that could be possible between the 2 or 4 images.
Part 2 of the photography workshop blog is , of course, the photos!
These were all taken on the Canon 600D digital camera. I have not edited any of these. My next step will be to edit them in PhotoShop and see how I can improve them and in some cases, maybe create a different effect to give them a new meaning.
I was pleasantly surprised with the difference in quality between my phone camera and the DSLR camera. These photos need to be edited to get the best out of them, but already I can see a depth that just is not possible with a phone camera.
We use cookies on our website to give you the most relevant experience by remembering your preferences and repeat visits. By clicking “Accept All”, you consent to the use of ALL the cookies. However, you may visit "Cookie Settings" to provide a controlled consent.
This website uses cookies to improve your experience while you navigate through the website. Out of these, the cookies that are categorized as necessary are stored on your browser as they are essential for the working of basic functionalities of the website. We also use third-party cookies that help us analyze and understand how you use this website. These cookies will be stored in your browser only with your consent. You also have the option to opt-out of these cookies. But opting out of some of these cookies may affect your browsing experience.
Necessary cookies are absolutely essential for the website to function properly. These cookies ensure basic functionalities and security features of the website, anonymously.
Cookie
Duration
Description
cookielawinfo-checkbox-analytics
11 months
This cookie is set by GDPR Cookie Consent plugin. The cookie is used to store the user consent for the cookies in the category "Analytics".
cookielawinfo-checkbox-functional
11 months
The cookie is set by GDPR cookie consent to record the user consent for the cookies in the category "Functional".
cookielawinfo-checkbox-necessary
11 months
This cookie is set by GDPR Cookie Consent plugin. The cookies is used to store the user consent for the cookies in the category "Necessary".
cookielawinfo-checkbox-others
11 months
This cookie is set by GDPR Cookie Consent plugin. The cookie is used to store the user consent for the cookies in the category "Other.
cookielawinfo-checkbox-performance
11 months
This cookie is set by GDPR Cookie Consent plugin. The cookie is used to store the user consent for the cookies in the category "Performance".
viewed_cookie_policy
11 months
The cookie is set by the GDPR Cookie Consent plugin and is used to store whether or not user has consented to the use of cookies. It does not store any personal data.
Functional cookies help to perform certain functionalities like sharing the content of the website on social media platforms, collect feedbacks, and other third-party features.
Performance cookies are used to understand and analyze the key performance indexes of the website which helps in delivering a better user experience for the visitors.
Analytical cookies are used to understand how visitors interact with the website. These cookies help provide information on metrics the number of visitors, bounce rate, traffic source, etc.
Advertisement cookies are used to provide visitors with relevant ads and marketing campaigns. These cookies track visitors across websites and collect information to provide customized ads.